User Guide
Contents
- Overview
- Equipment
- Example Images
- Process
- BeyondRGB Demo
- Spectral Picker
- Calibration Charts
- Issues Running BeyondRGB
- Using your own custom Calibration Target
Overview
Spectral imaging is a powerful technique that enables higher color accuracy than conventional RGB capture,
as well as material identification capabilities. However, it is still relatively unused for everyday museum
photography due to perceived complexity and high cost. BeyondRGB is a standalone spectral image processing
tool that is user-friendly, yet capable of handling complex image data. It integrates existing image
calibration routines and repackages them into a standalone application, enabling a simpler user experience
over current methods. A user is able to import a number of RAW images and receive a true spectral image in
the form of a TIFF file. You will only need to make a few basic selections before the images are processed.
Finally, you will be able to view and interact with the output images and also inspect reports detailing
the accuracy of the color and spectral calibrations developed during processing.
Use of this application requires 6 or 8 raw images that meet the following specifications:
-
2 art images (optional) (Images of the same piece of artwork under two different lighting conditions)
-
2 color target images (Images of the same color target under the same two different lighting conditions)
-
2 flatfield images: (Images of a white sheet under the same two different lighting conditions)
-
2 darkfield images: (Images taken with the same camera with the lens cap on - note these can be copies of the same image)
The two images of the art can also include the targets, and in that case only the 6 images are required.
Equipment
The following is a list of equipment necessary to take these images:
-
Camera with RGB sensor (point and shoot, DSLR, etc). The camera must be capable of taking a picture with the lens cap on in order to provide dark current images.
-
Flatfield board
-
Registration targets
-
Color target(s) (either one that is preloaded on the software or have one with reflectance measurements)
BeyondRGB includes reflectance measurements for APT, Next Generation Target, ColorChecker SG, and ColorChecker Classic targets preloaded.
Required Image Examples
| Lighting Condition A | Lighting Condition B |
|---|---|
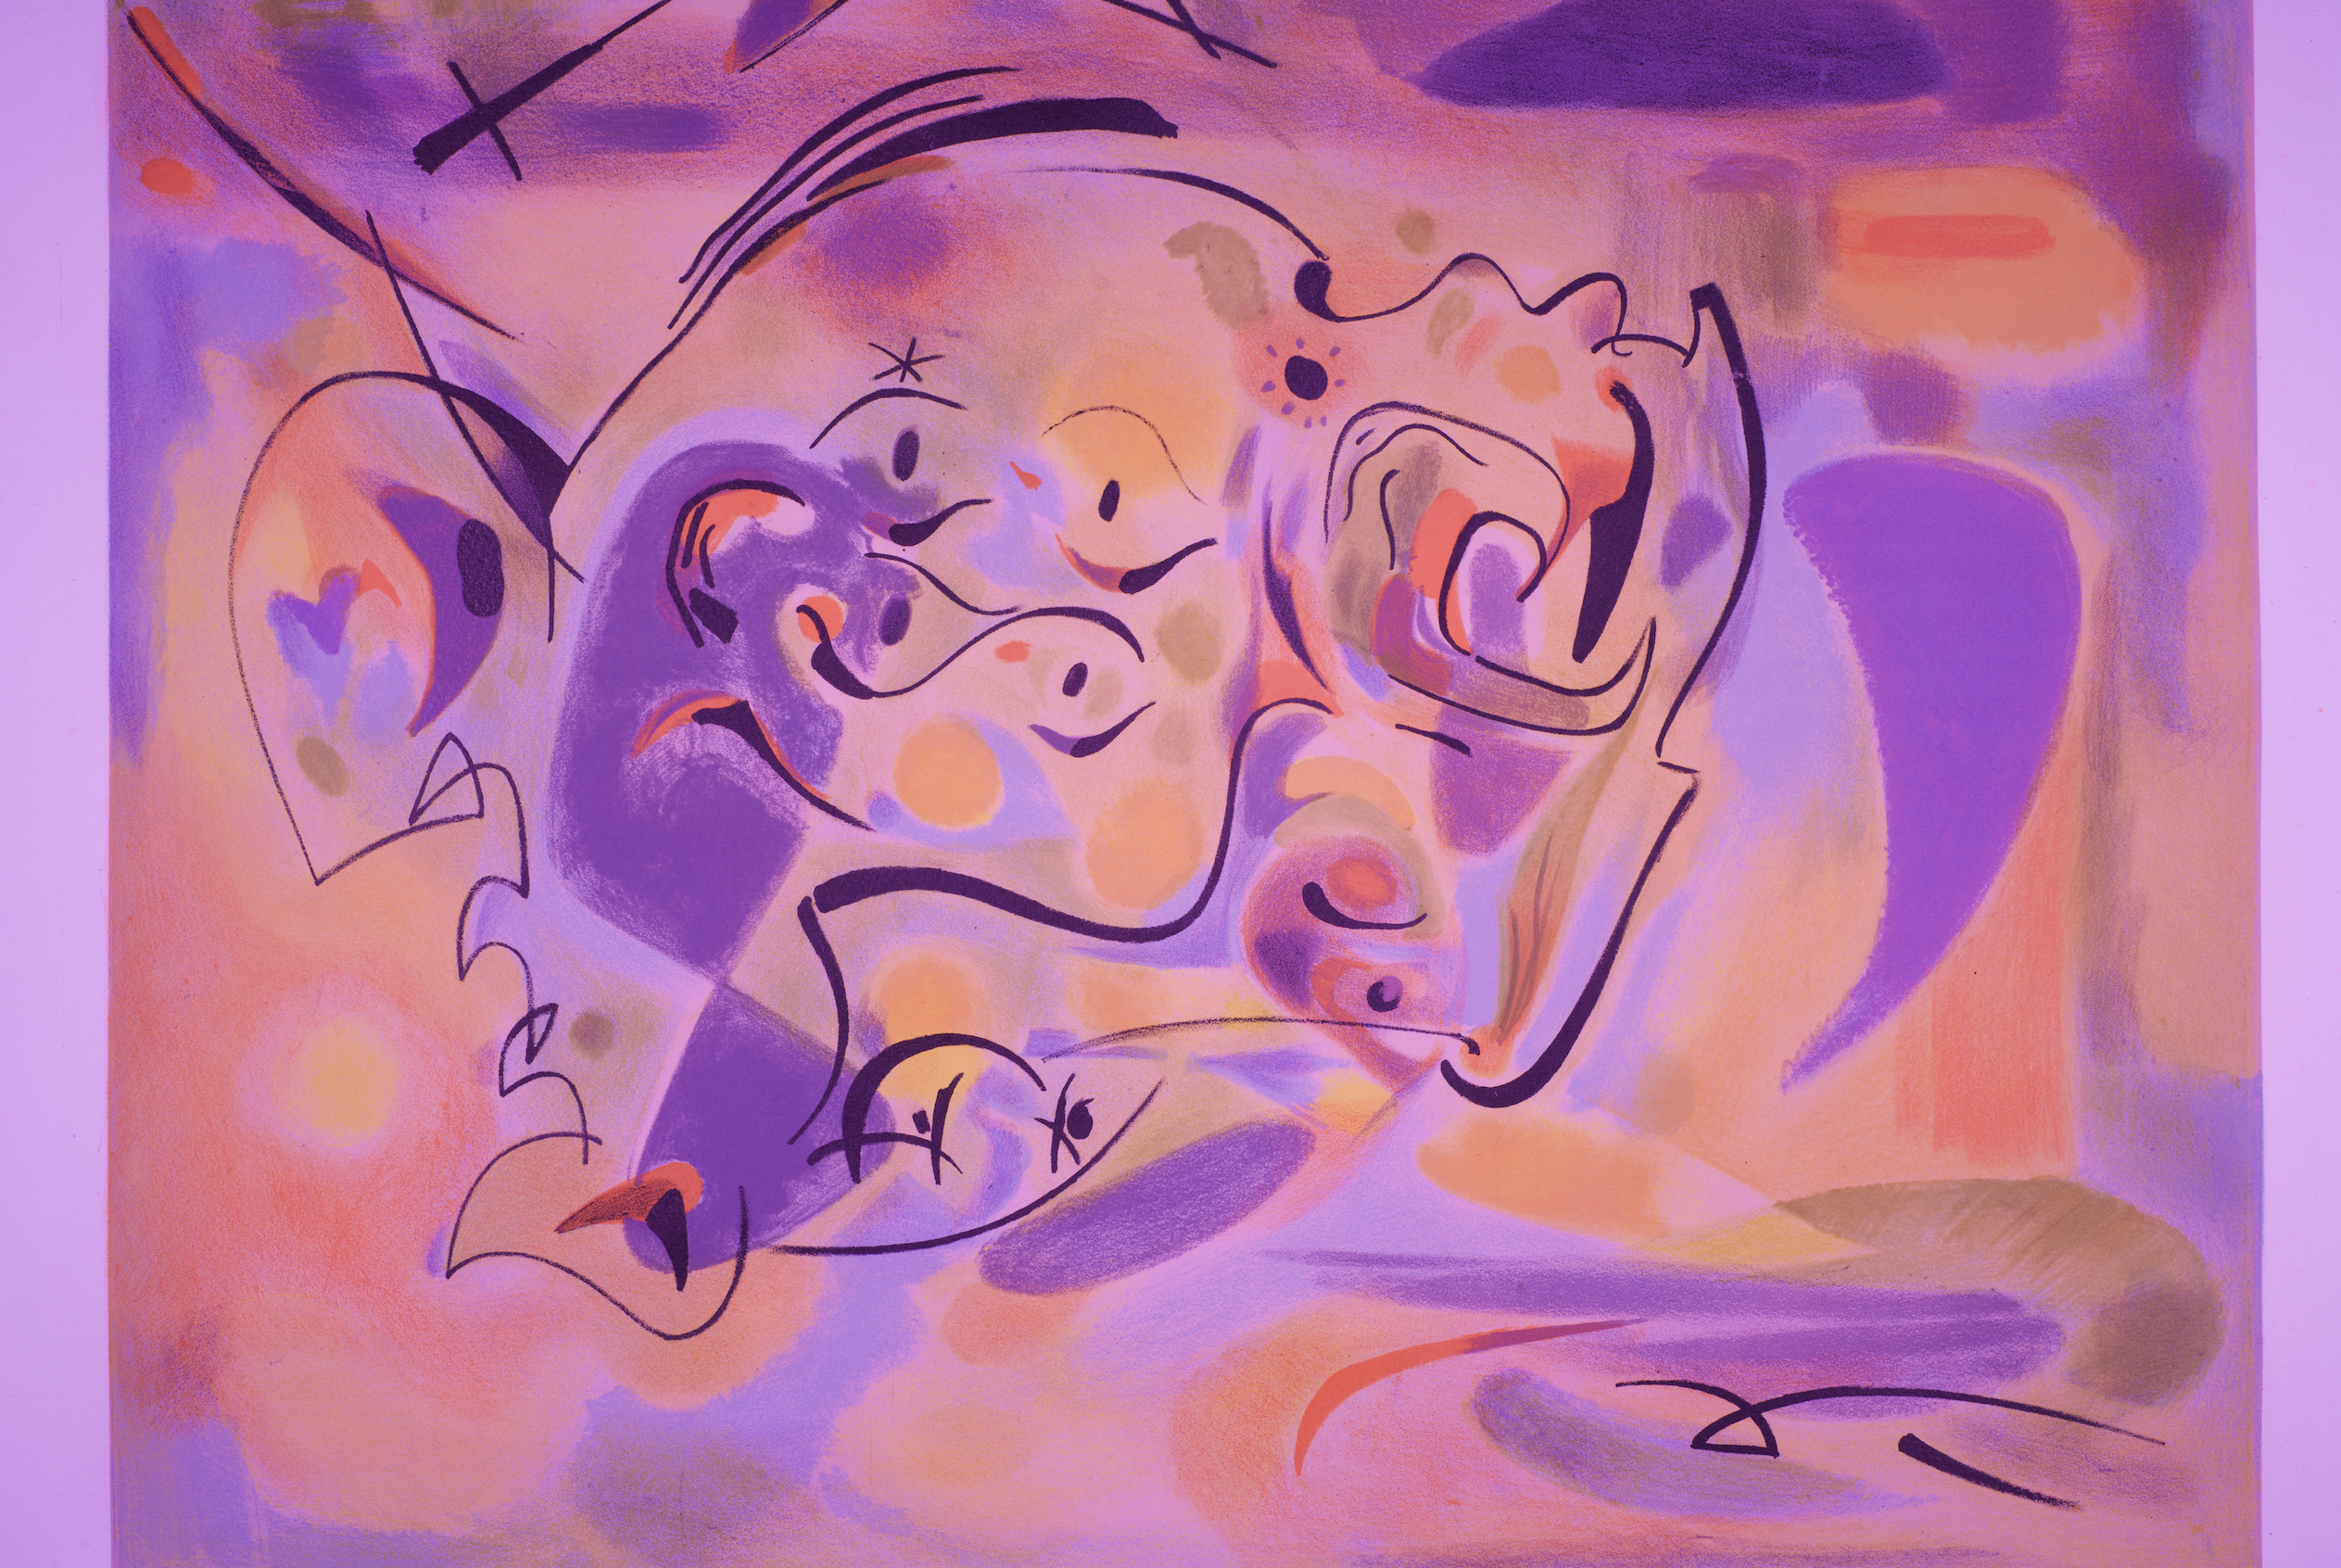
Art A
download

|
Art B
download
|
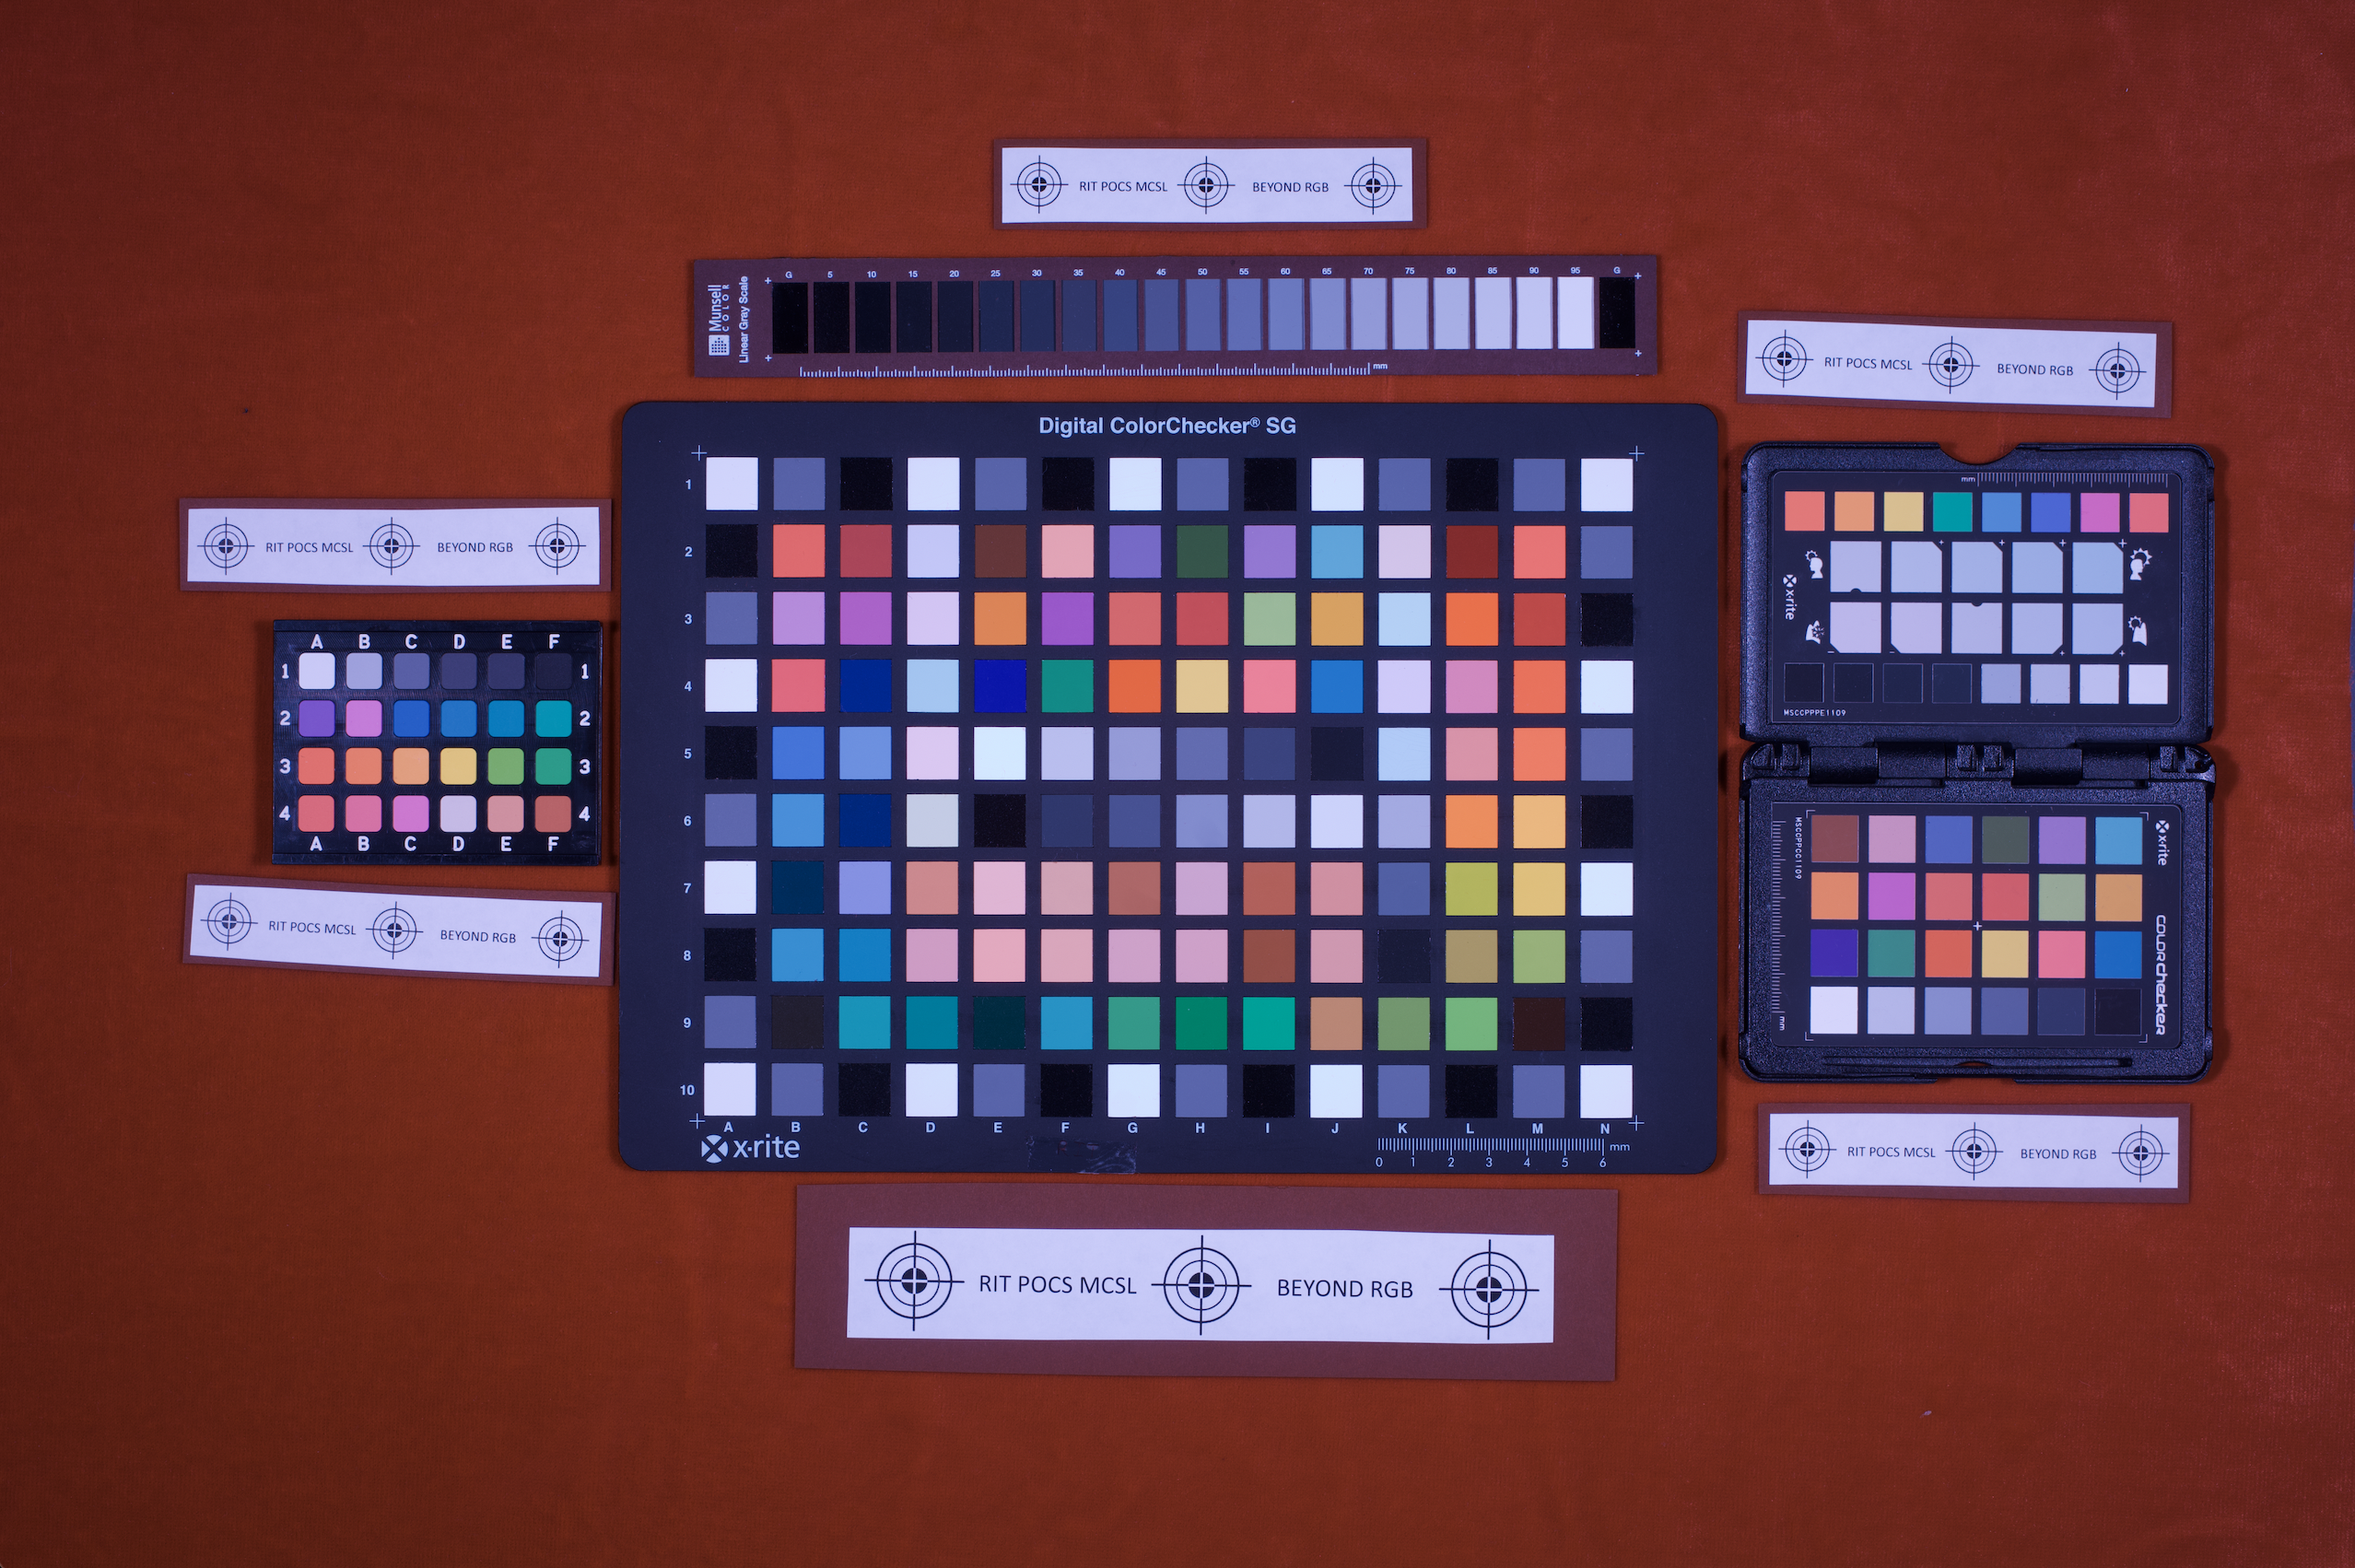
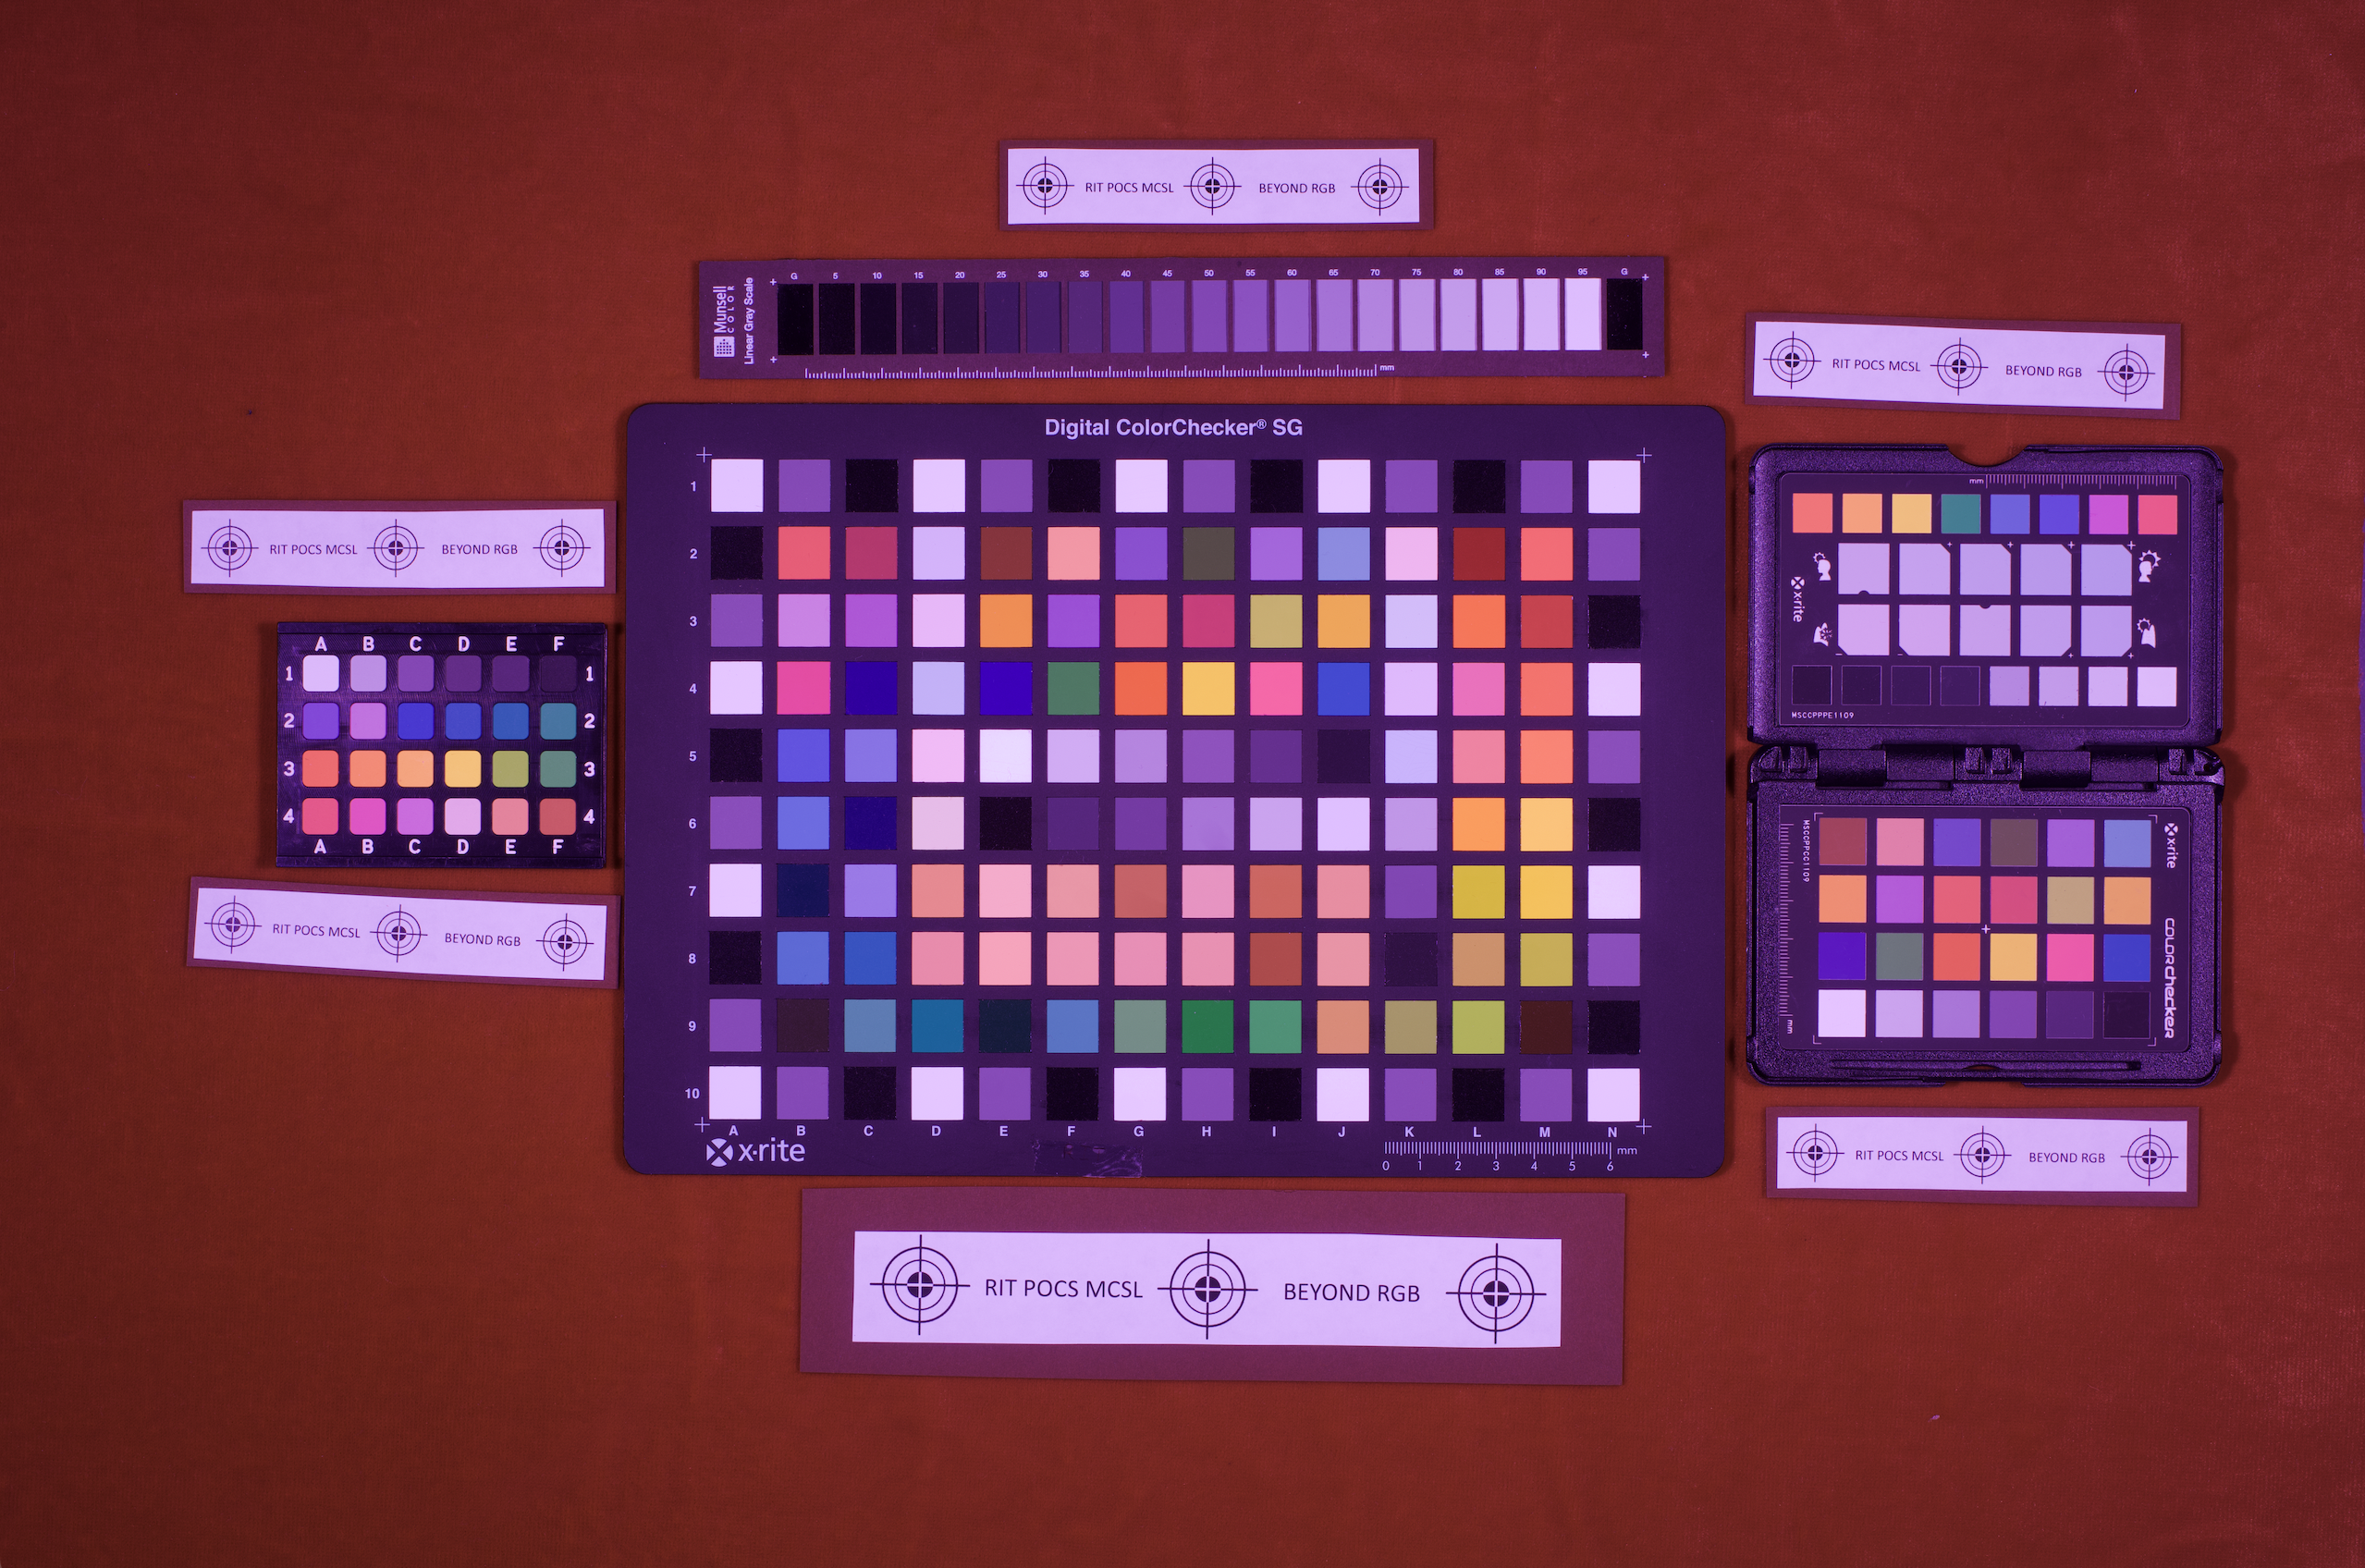
Target A
download
|
Target B
download
|
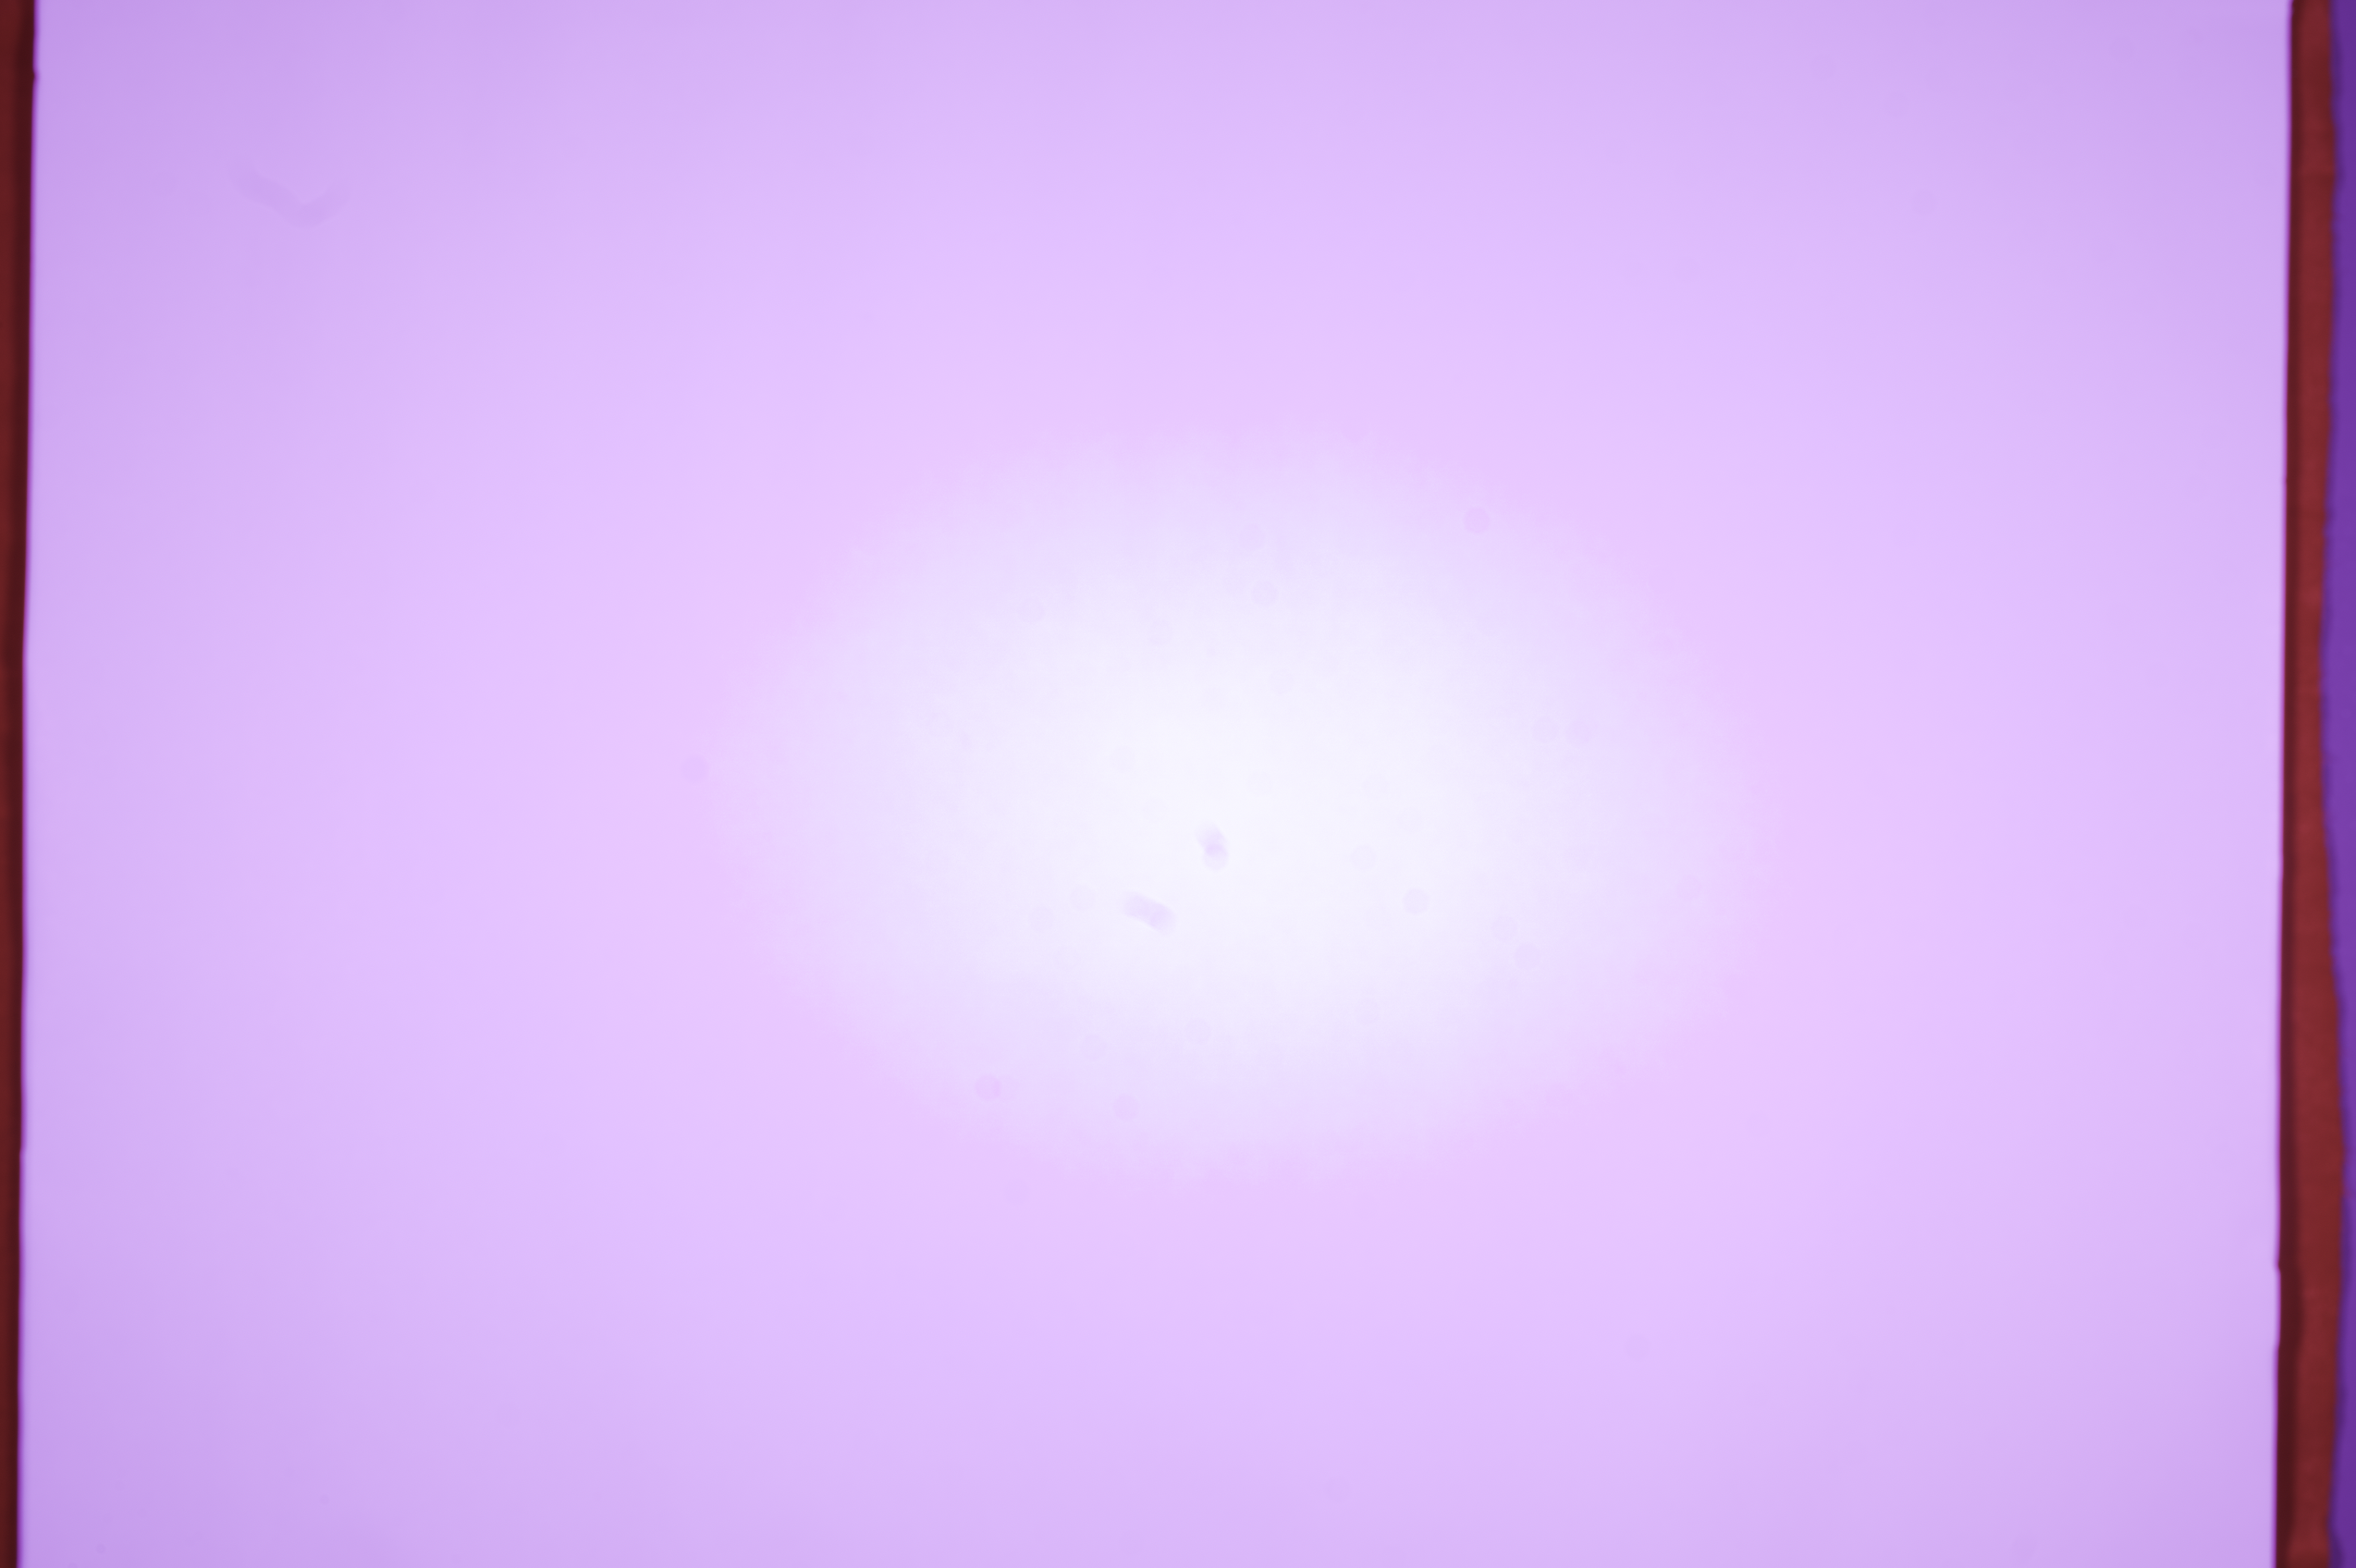
Flatfield A
download

|
Flatfield B
download
|
Darkfield A
download

|
Darkfield B
download
|
Process
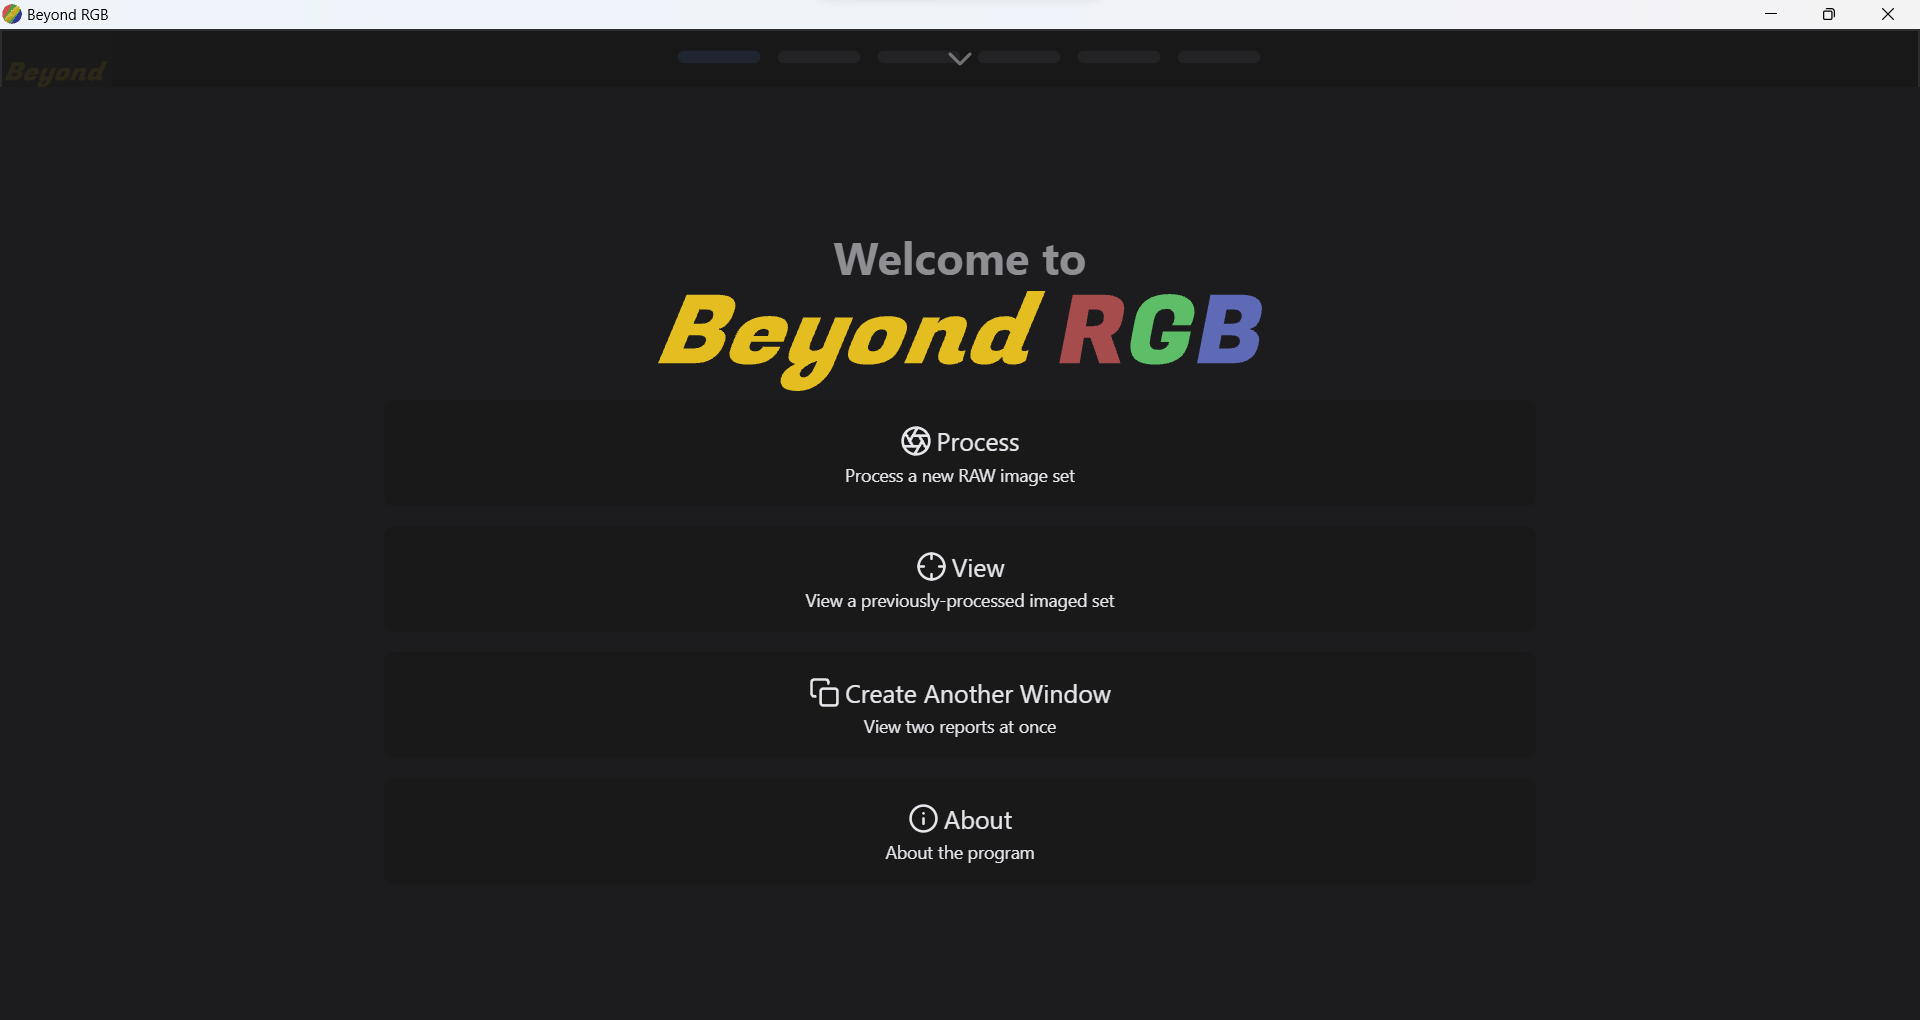
This is the homepage, the first thing you will see upon starting the application. You immediately have the options to begin processing a new image set or to view an already-processed set (and its corresponding calibration data).
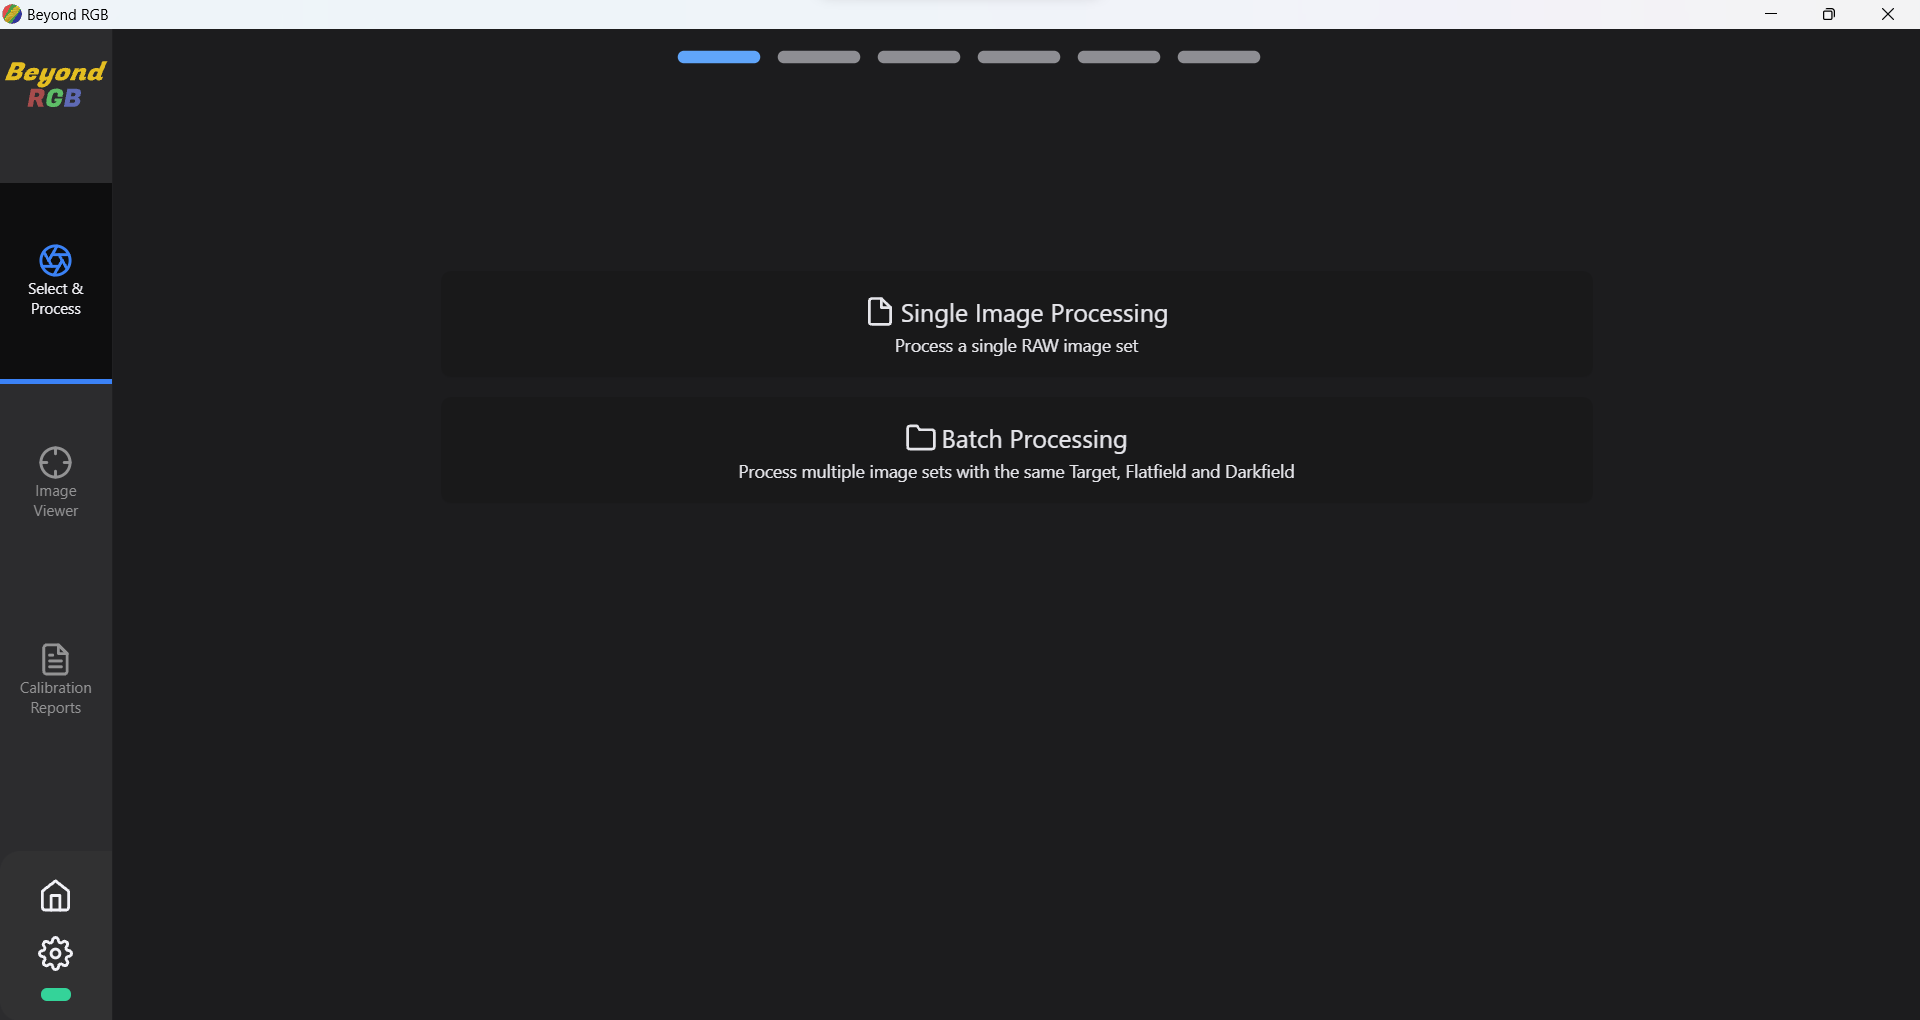
Let's begin with processing an image. The first thing you will see is the option to select whether you will do single image processing or batch processing.
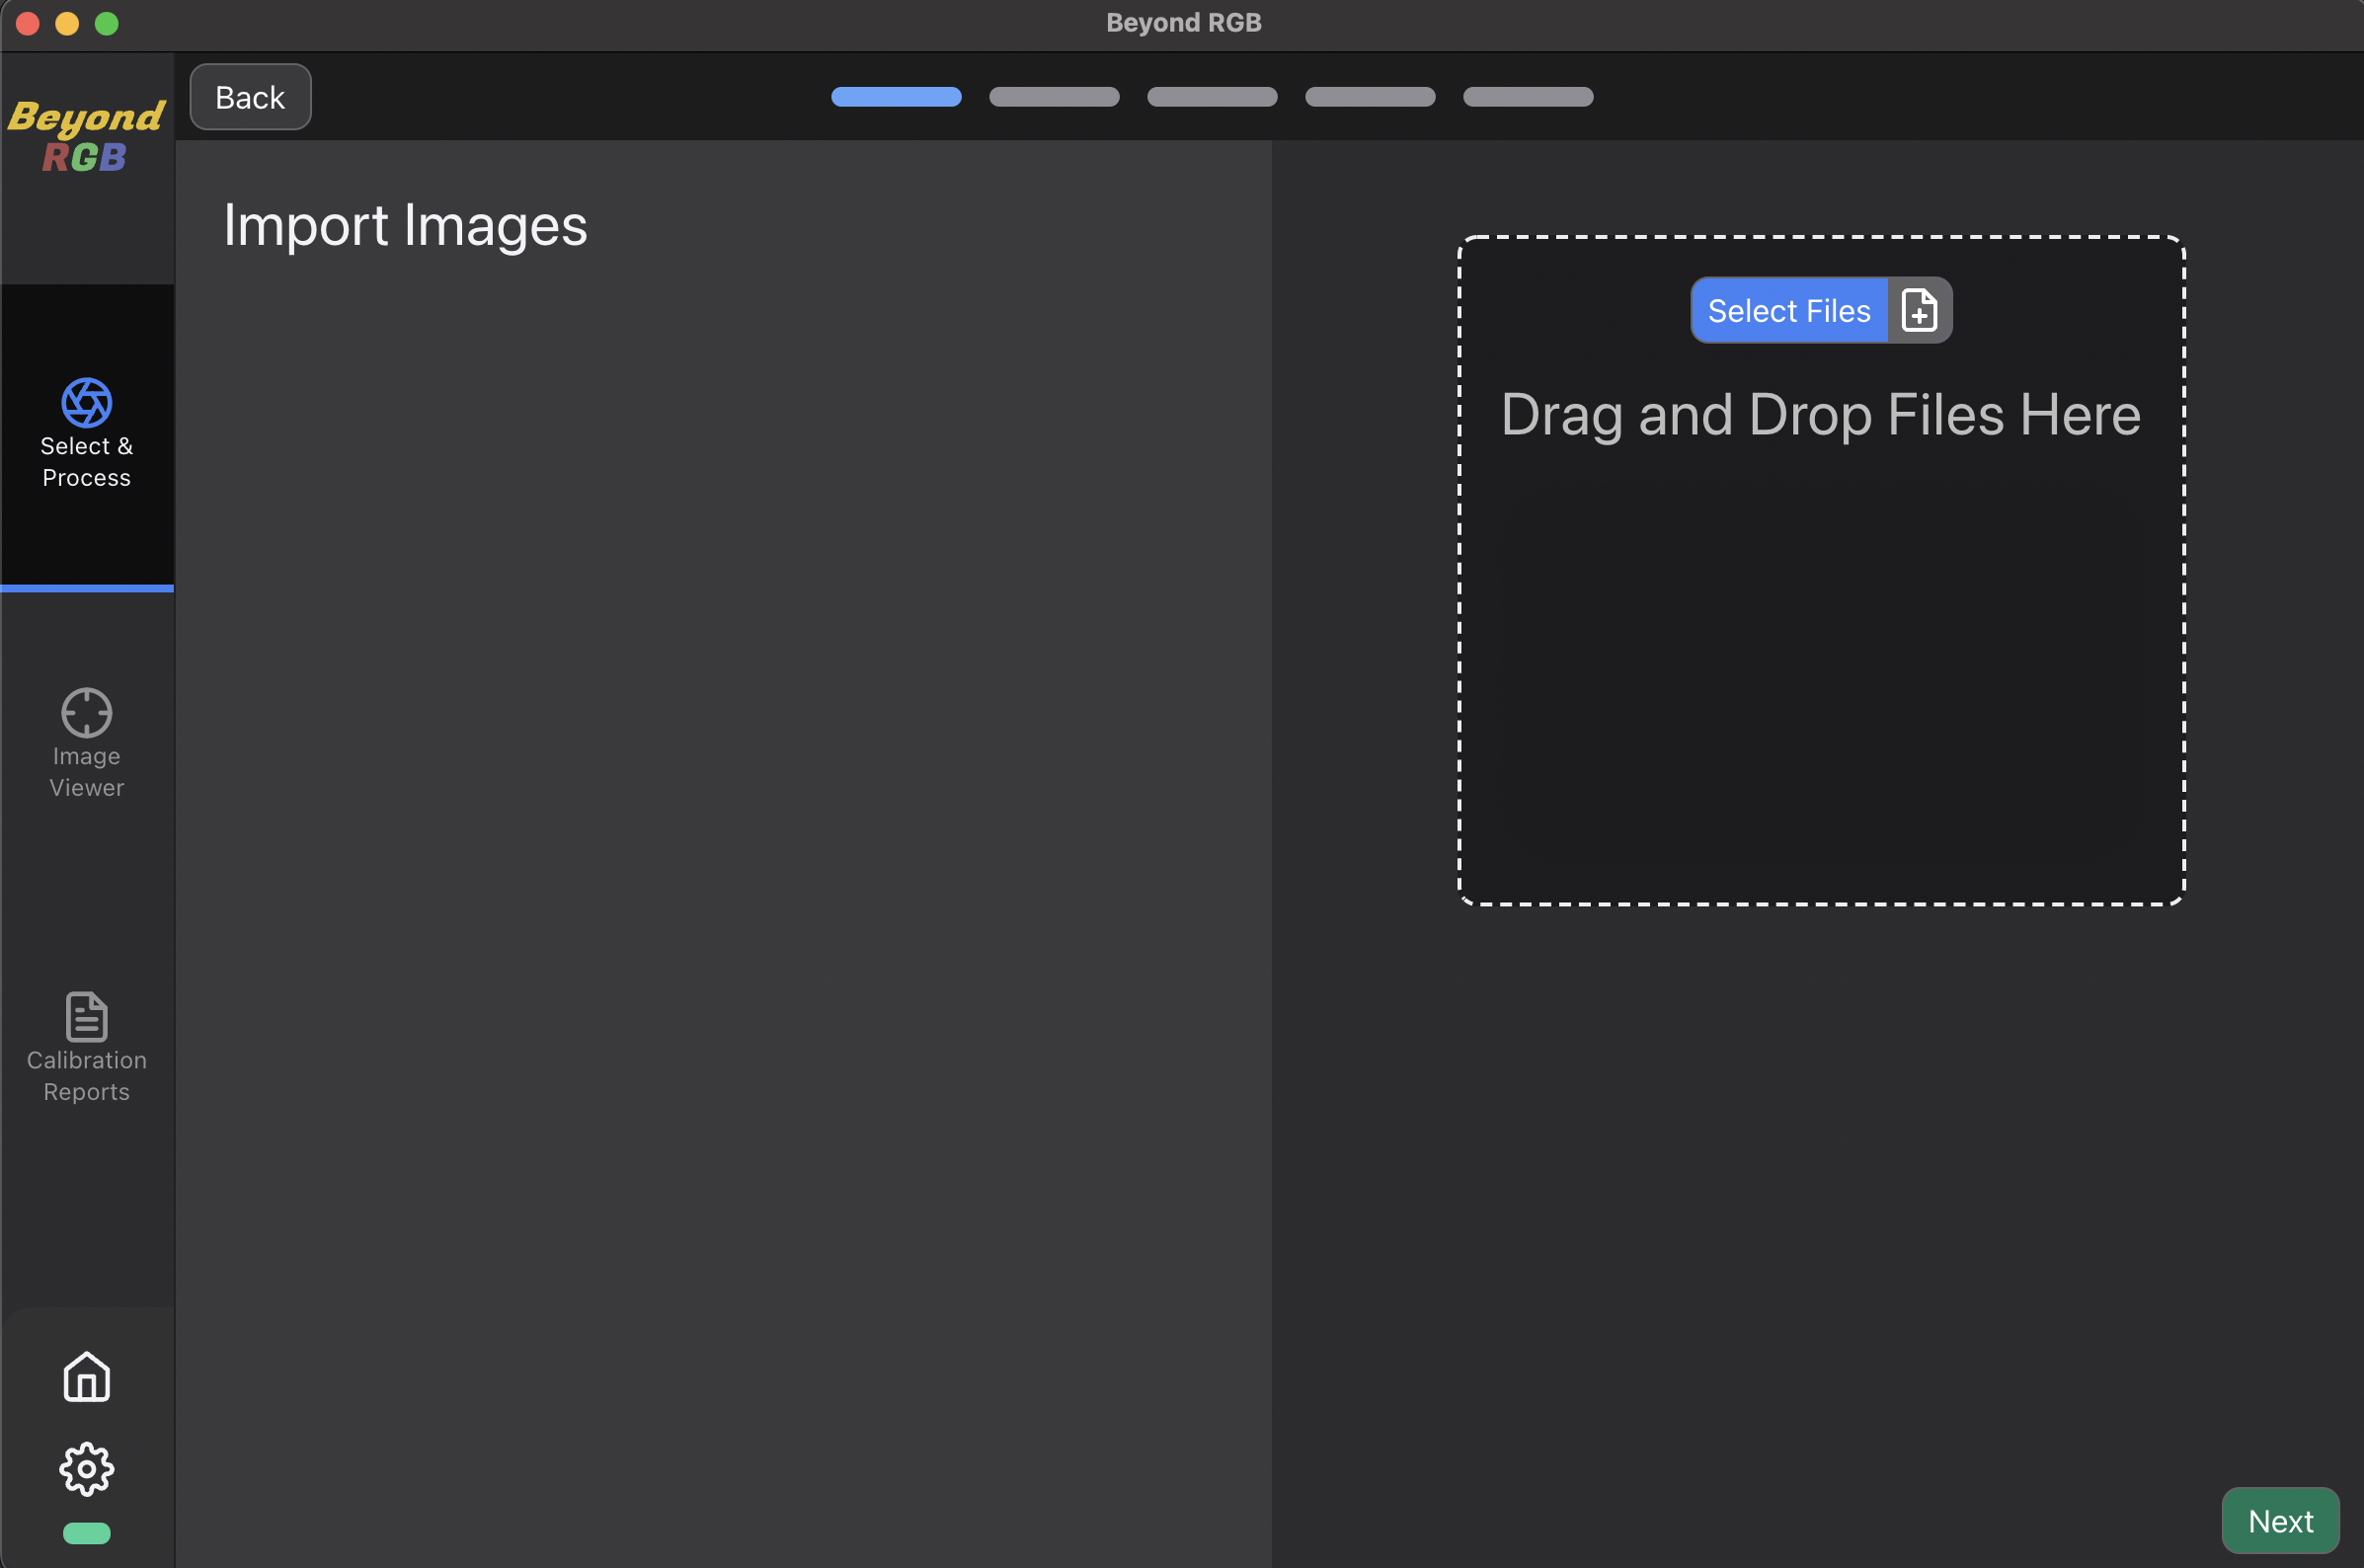
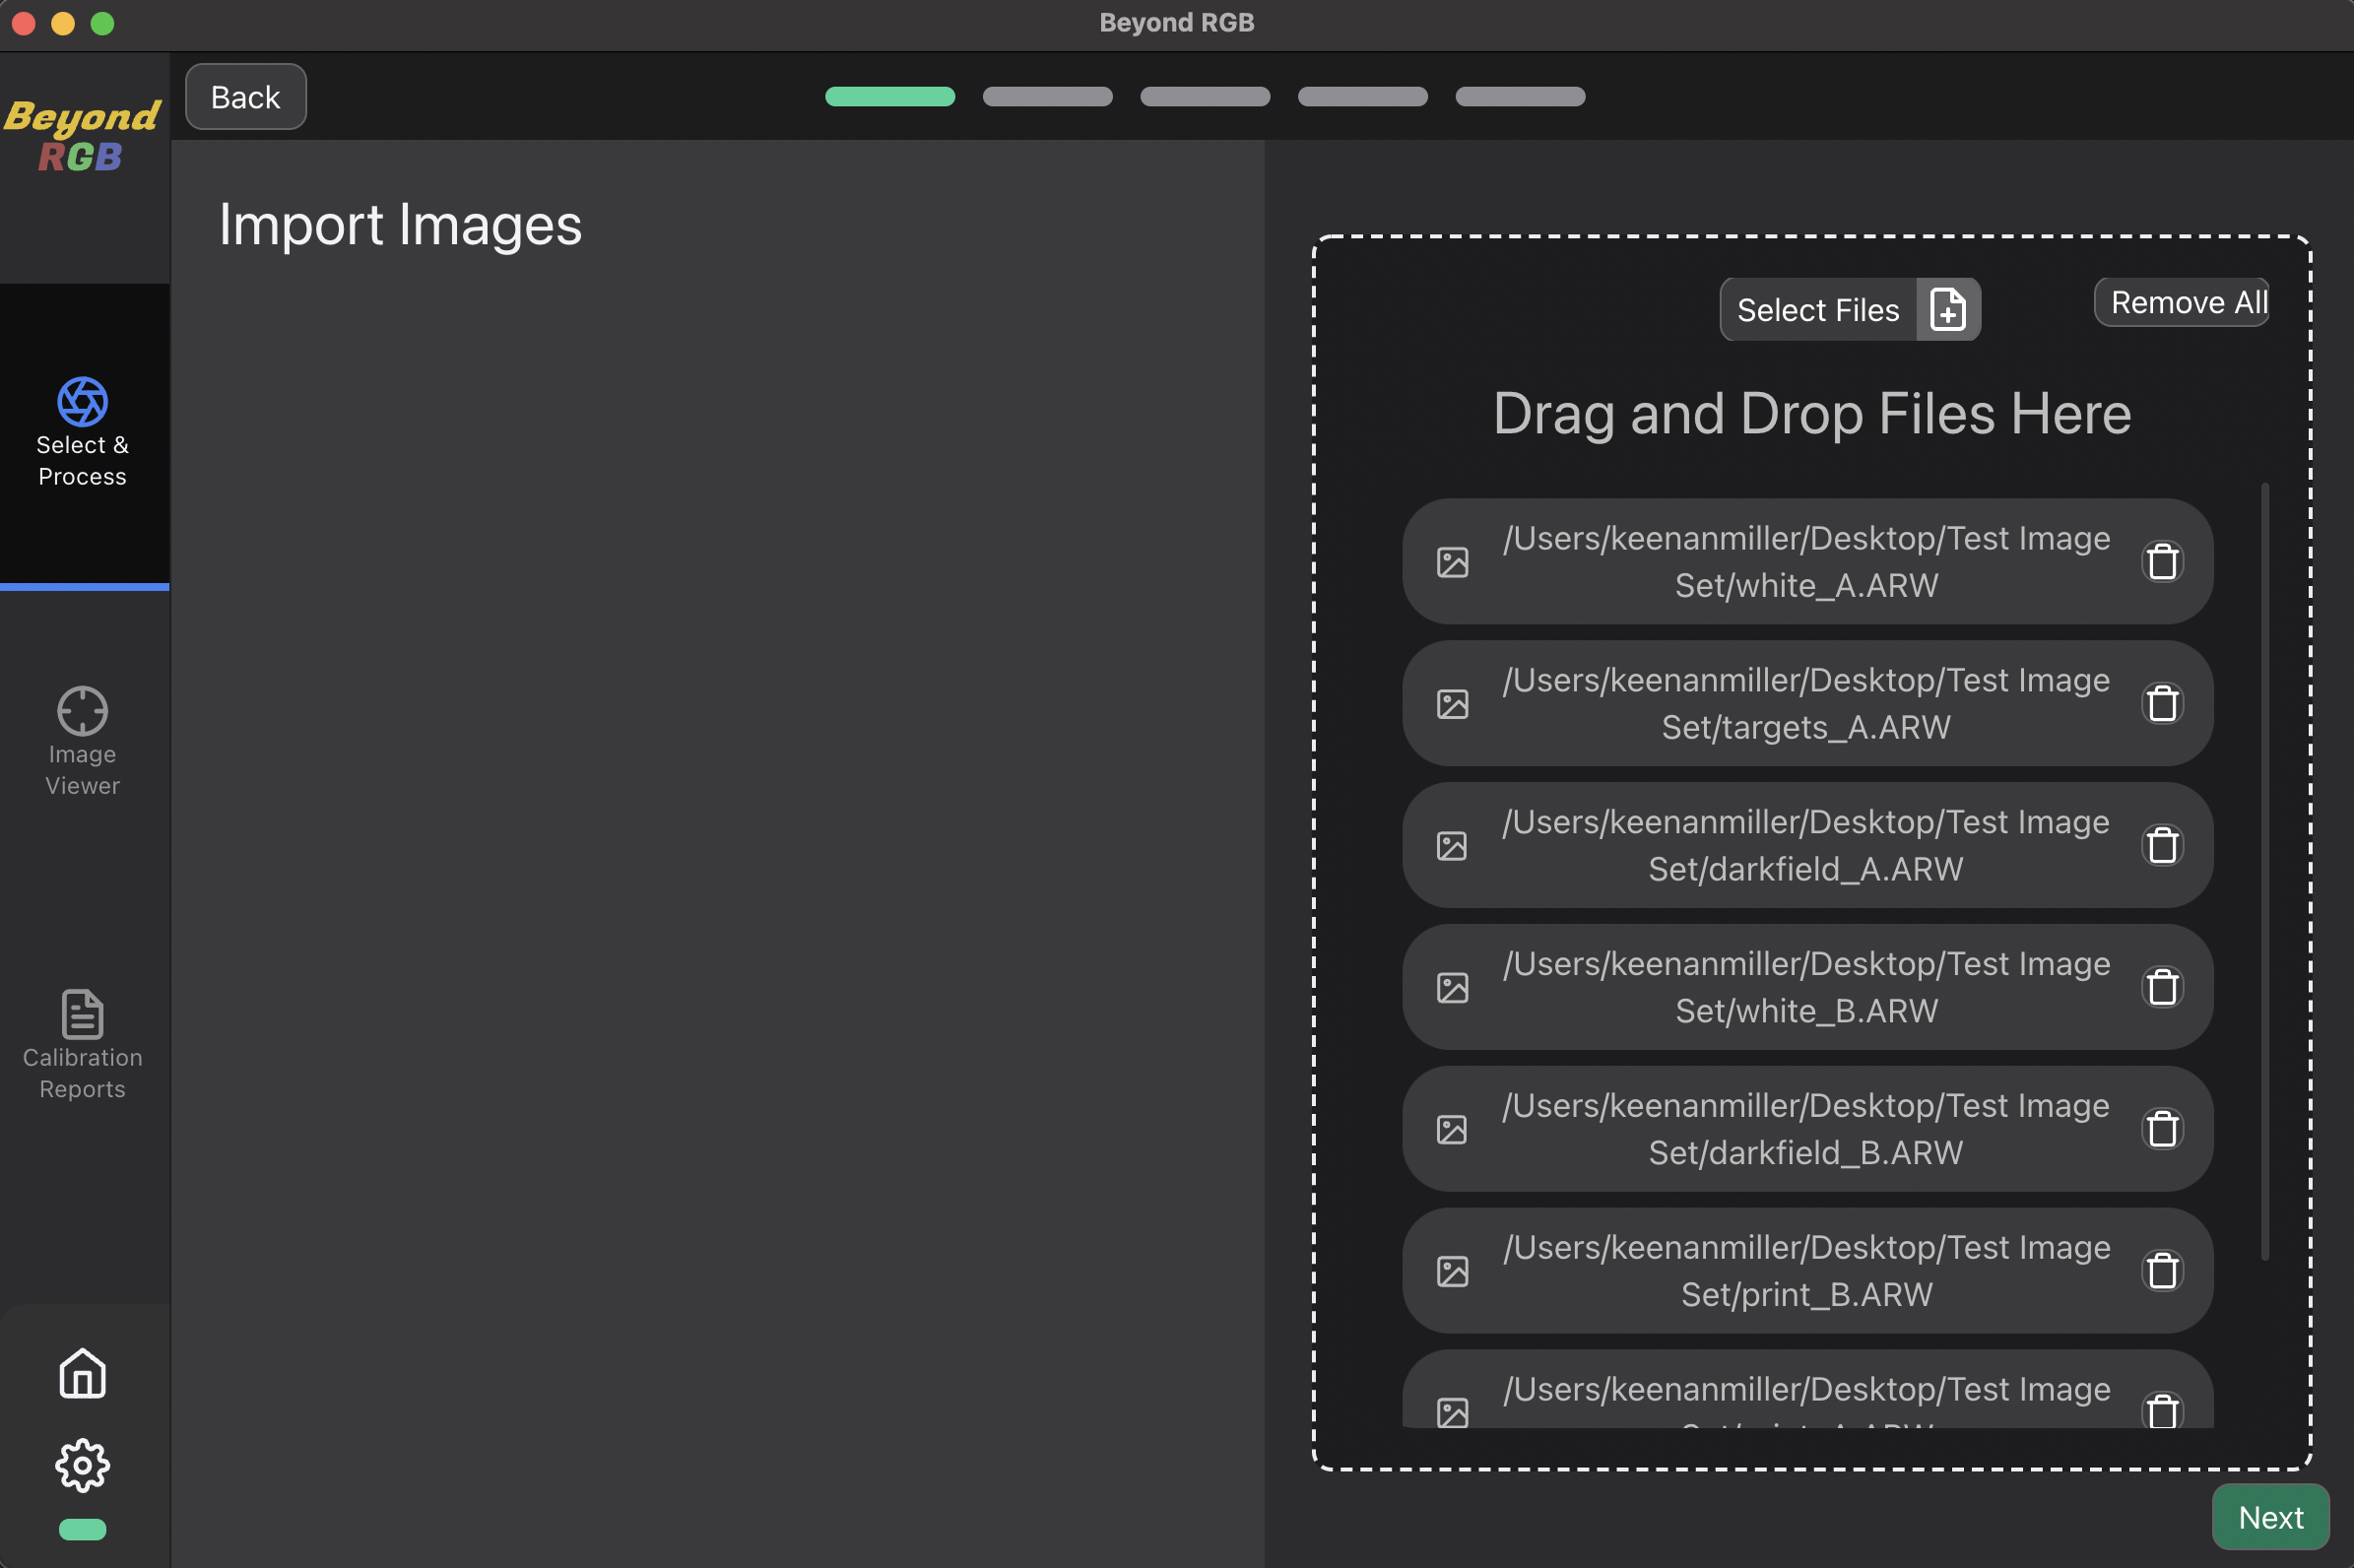
Let's begin with processing an image. Regardless of how many images you choose to process, the next screen enables you to upload your image set. Let's use our example images from above. Then click "next".
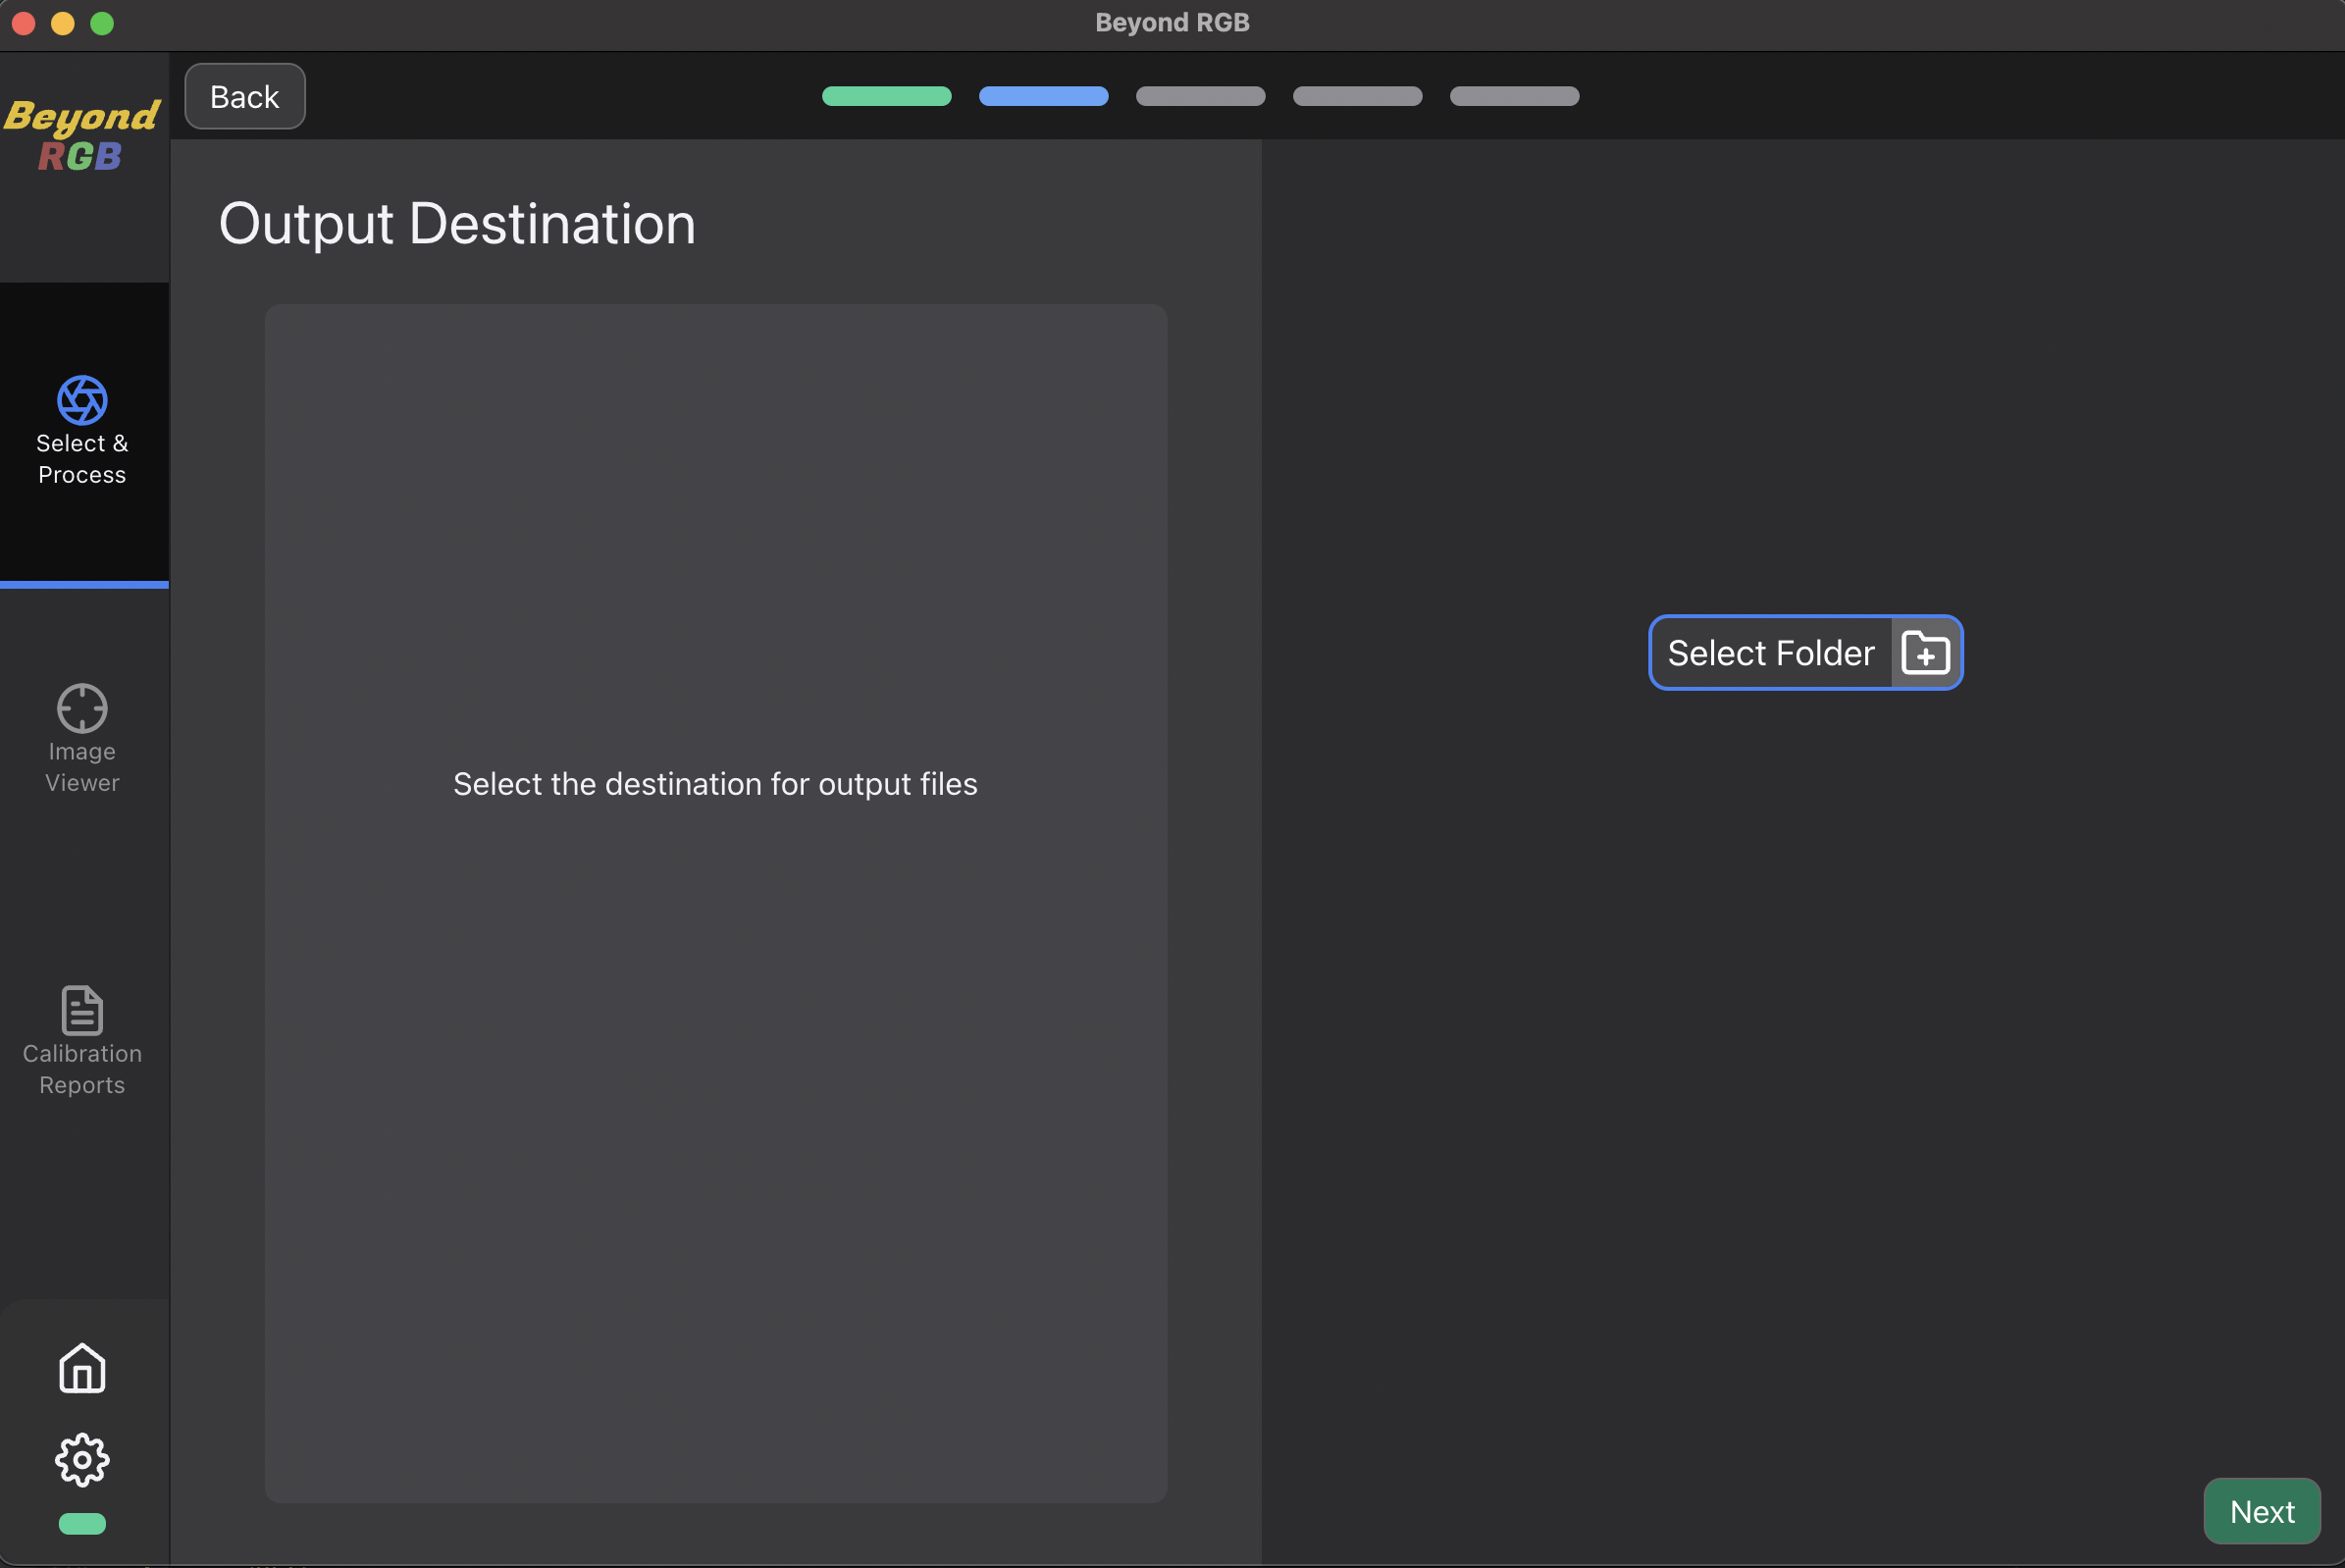
This is the page where you can specify where you would like the output files saved to. Simply choose a file location and click "next". If you would like to name the output folder you can do so on this screen, otherwise a name will be assigned based on the date.
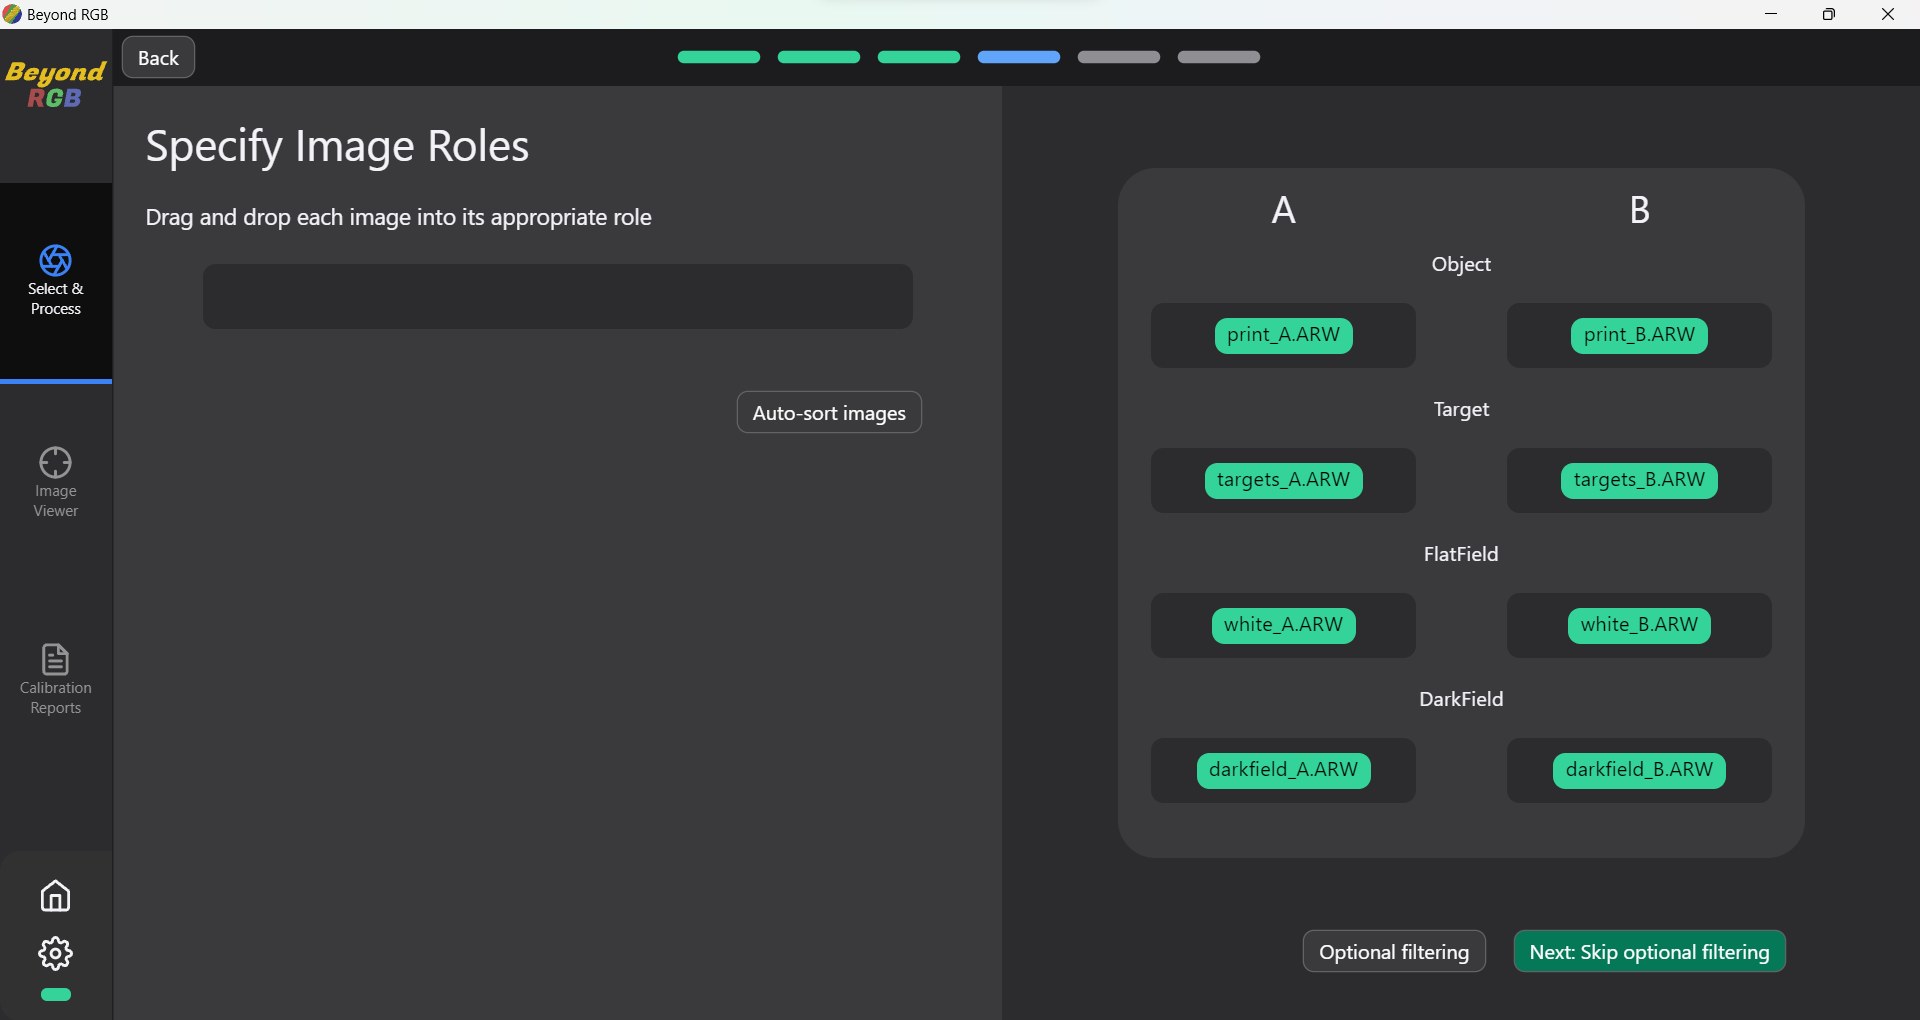
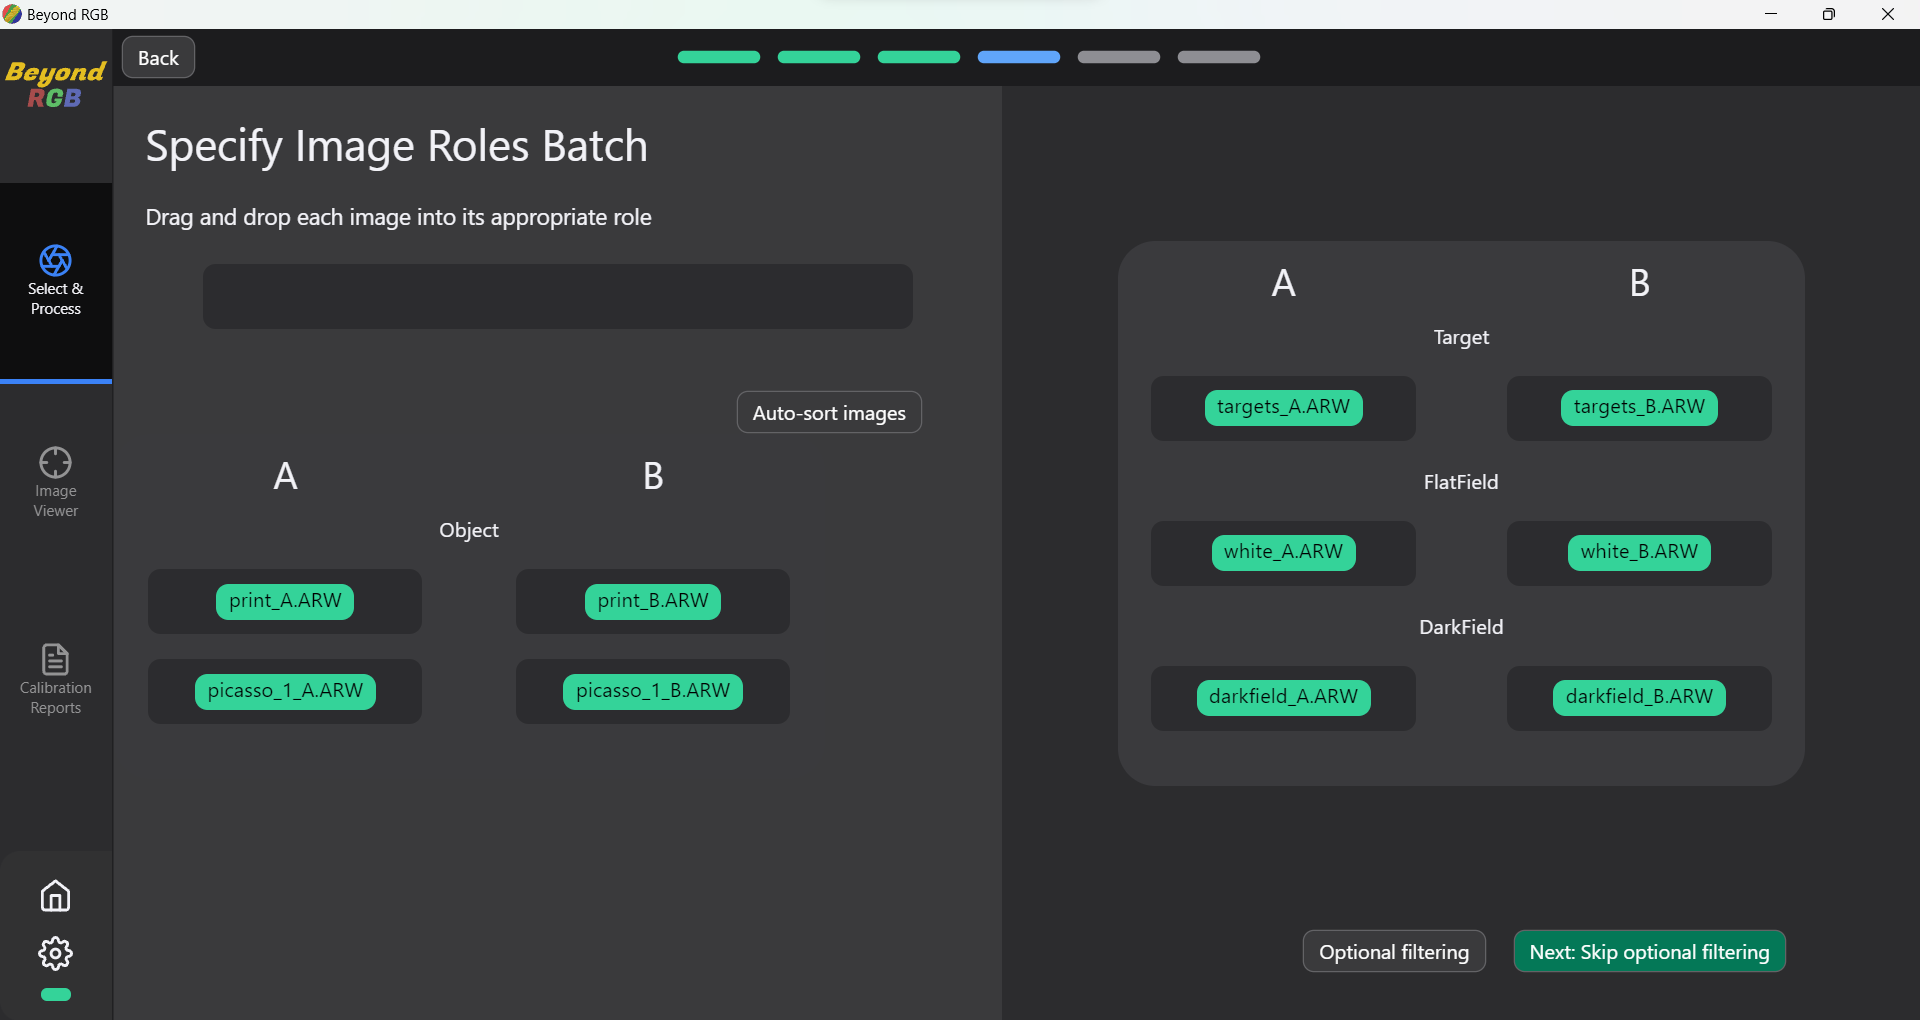
Now we must tell the application which images are which. Drag and drop the images into the boxes with their correct roles or use the auto-sort button which can sort files into their correct roles based on their naming patterns.
Autosort uses a specific naming convention to identify the files. The naming convention is as follows:
anyFilename-typeIndicator_imageID.extension
The first segment of the name can be any identifying name you want to use; the program will not read this part of the name.
The second segment, the type indicator should follow a hyphen and use a keyword that matches the file to one of the categories of images (target, image, flatfield, darkfield). The list of accepted type Indicator keywords is as follows:
Image: "image", "print", "object", "art", "exhibit", "paint", "subject", "item", "obj"
Color Target: "target", "targets", "color", "grid", "map", "passport"
Flatfield: "flatfield", "flat", "white", "ff", "vignetting", "vignette", "light", "correction", "f",
"w"
Darkfield: "darkfield", "d", "darkcurrent", "dc", "black", "dark", "current", "signal", ”internal",
"camera"
The Image ID in a suffix can be anything but the IDs must match each other- ergo, there must only be 2 of them. For example you might have 4 images with the ID “A” and 4 with the ID “B” with one flatfield labeled A and the other labeled B. The ID is used to identify image sets by color- all images under the same lighting must have the same ID to be recognizable to the autosort.

This page differs slightly depending on the processing type that was chosen, but they function identically. Click "next" to choose a sharpening level or skip that step.
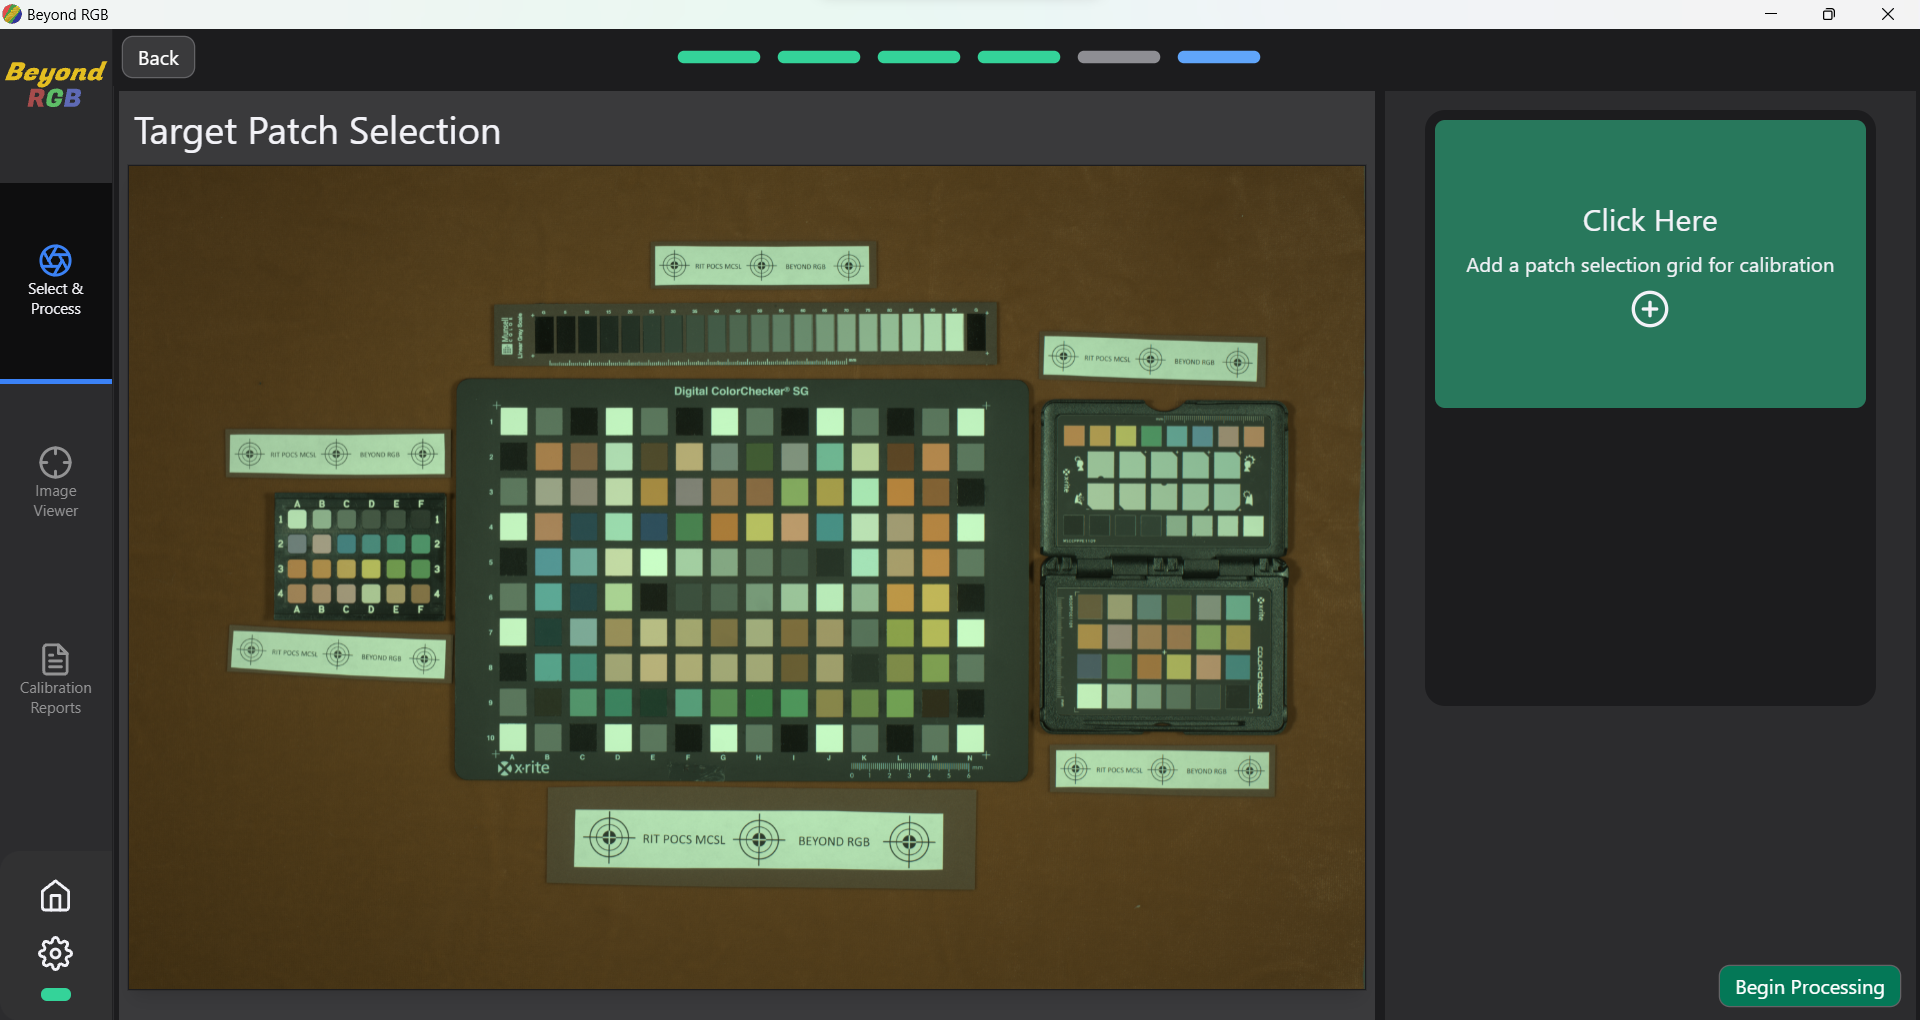
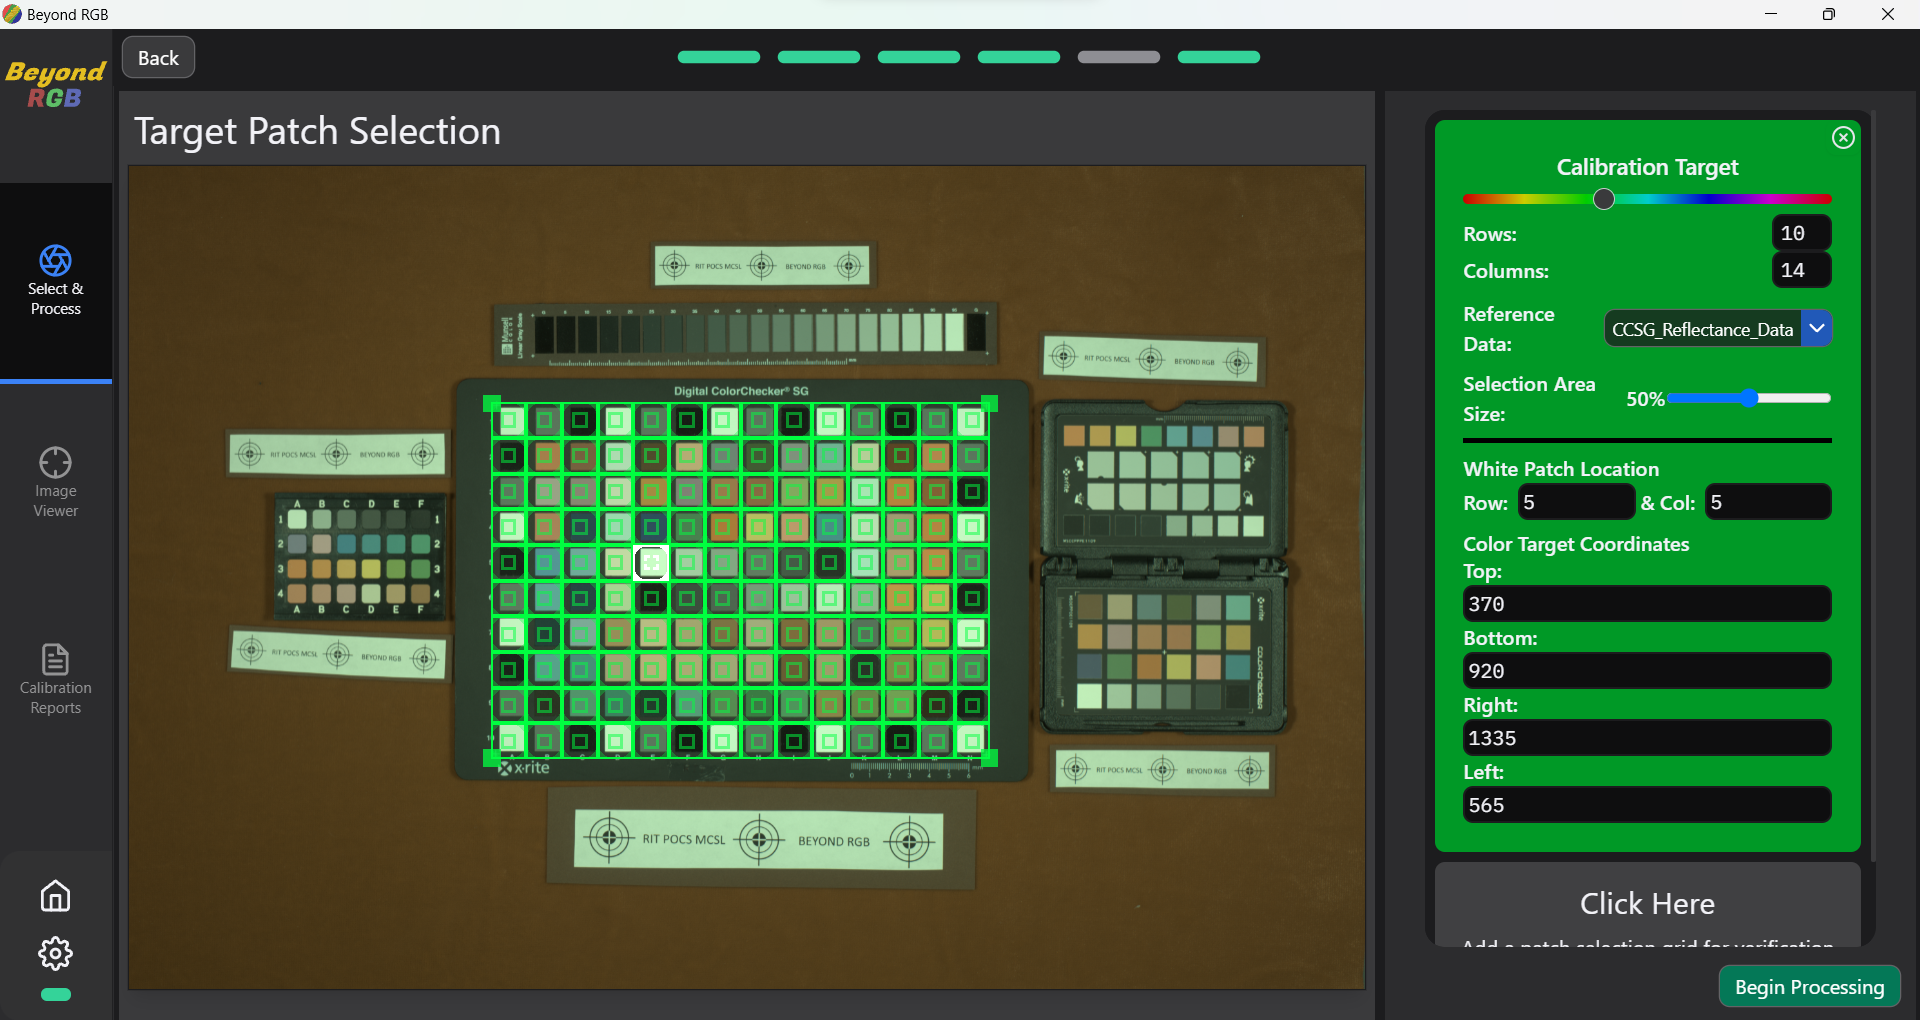
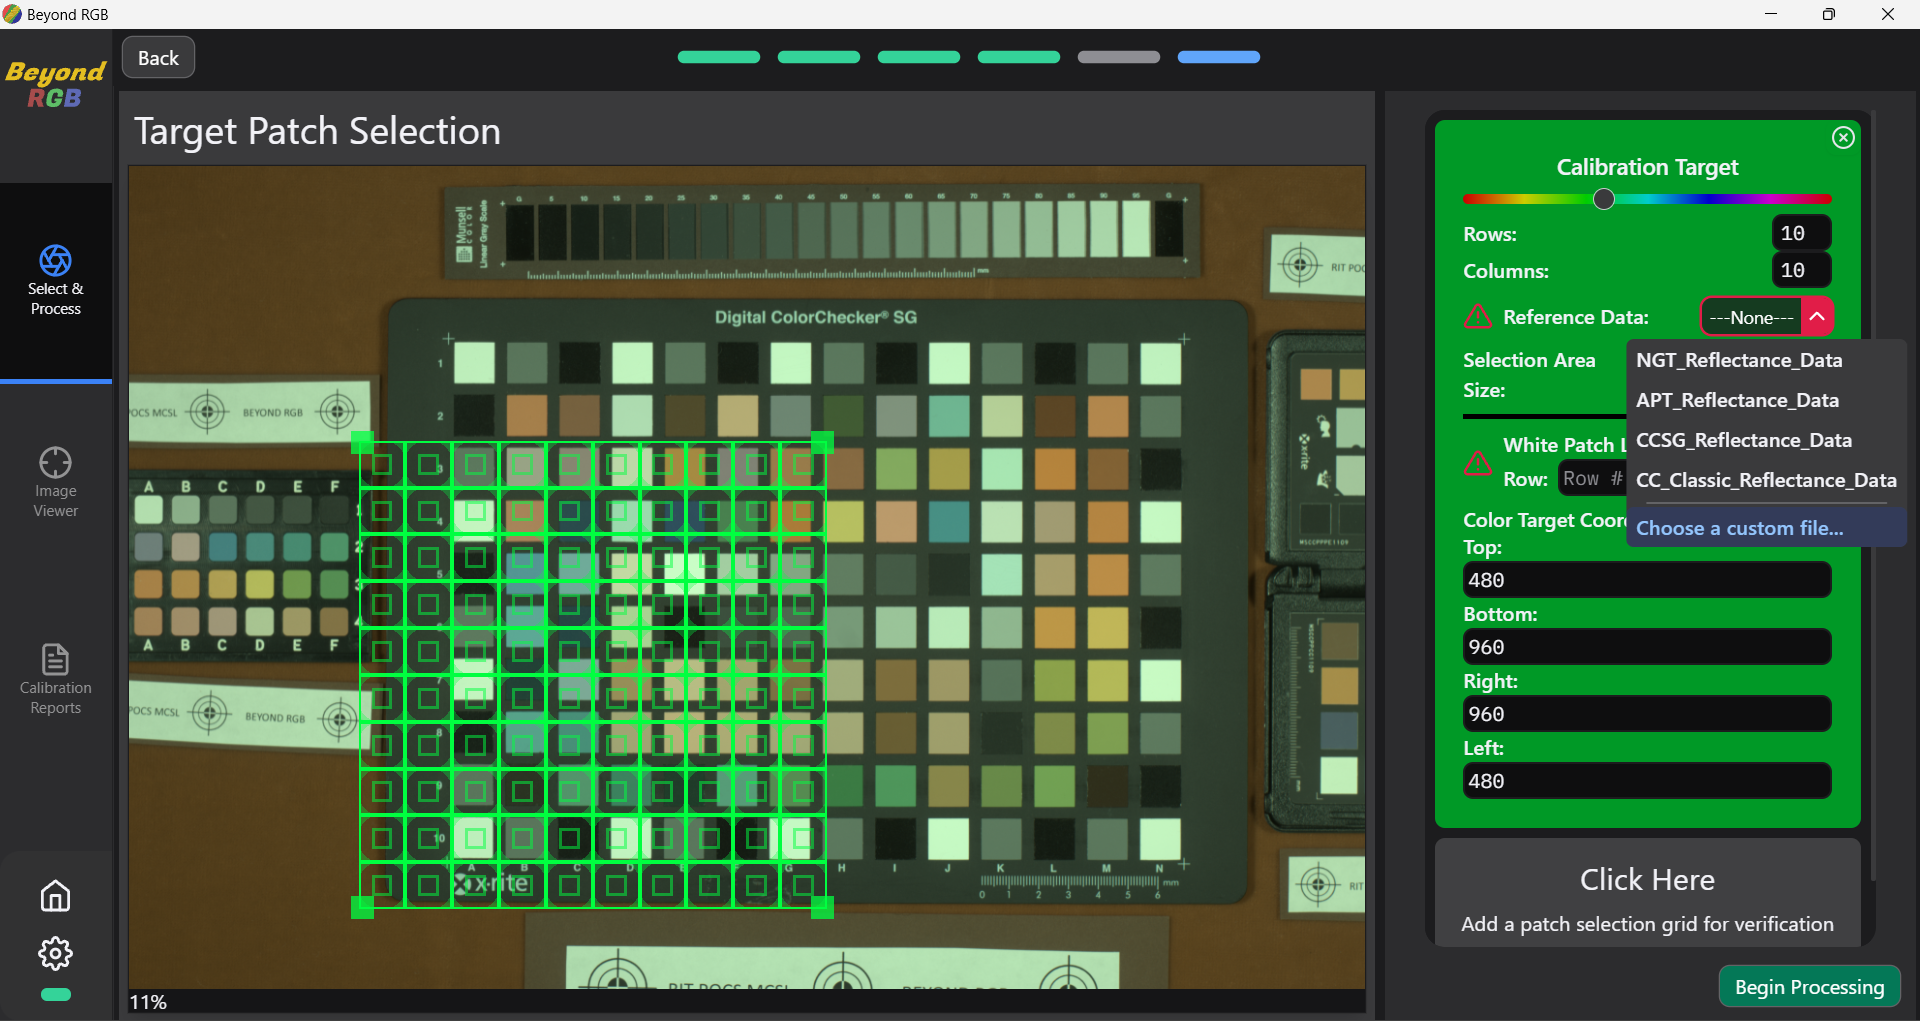
Now we must tell the application where the color target is. Click the '+' to add a selection grid, then choose the corresponding reference data from the dropdown - in our case it is the "CCSG" target. It is also possible to upload custom reference data. When a user adds custom reference data, that custom reference data option will remain in the dropdown menu until the software is closed. After selecting your reference data, drag and reshape the selection grid so it covers the color target in your image.You can also turn the grid by +/- 10 degrees to make small rotational adjustments. If desired, you can manually adjust the location of the selection grid. These coordinates are important for having consistency between runs. They will also be saved in the "GeneralInfo" file after the image finishes processing. Finally, enter the row and column of a white patch in the grid - in our case we are using row 5 and column 5. Note that the white patch is highlighted, so you can be sure that you have selected the correct one. Now you can begin processing!
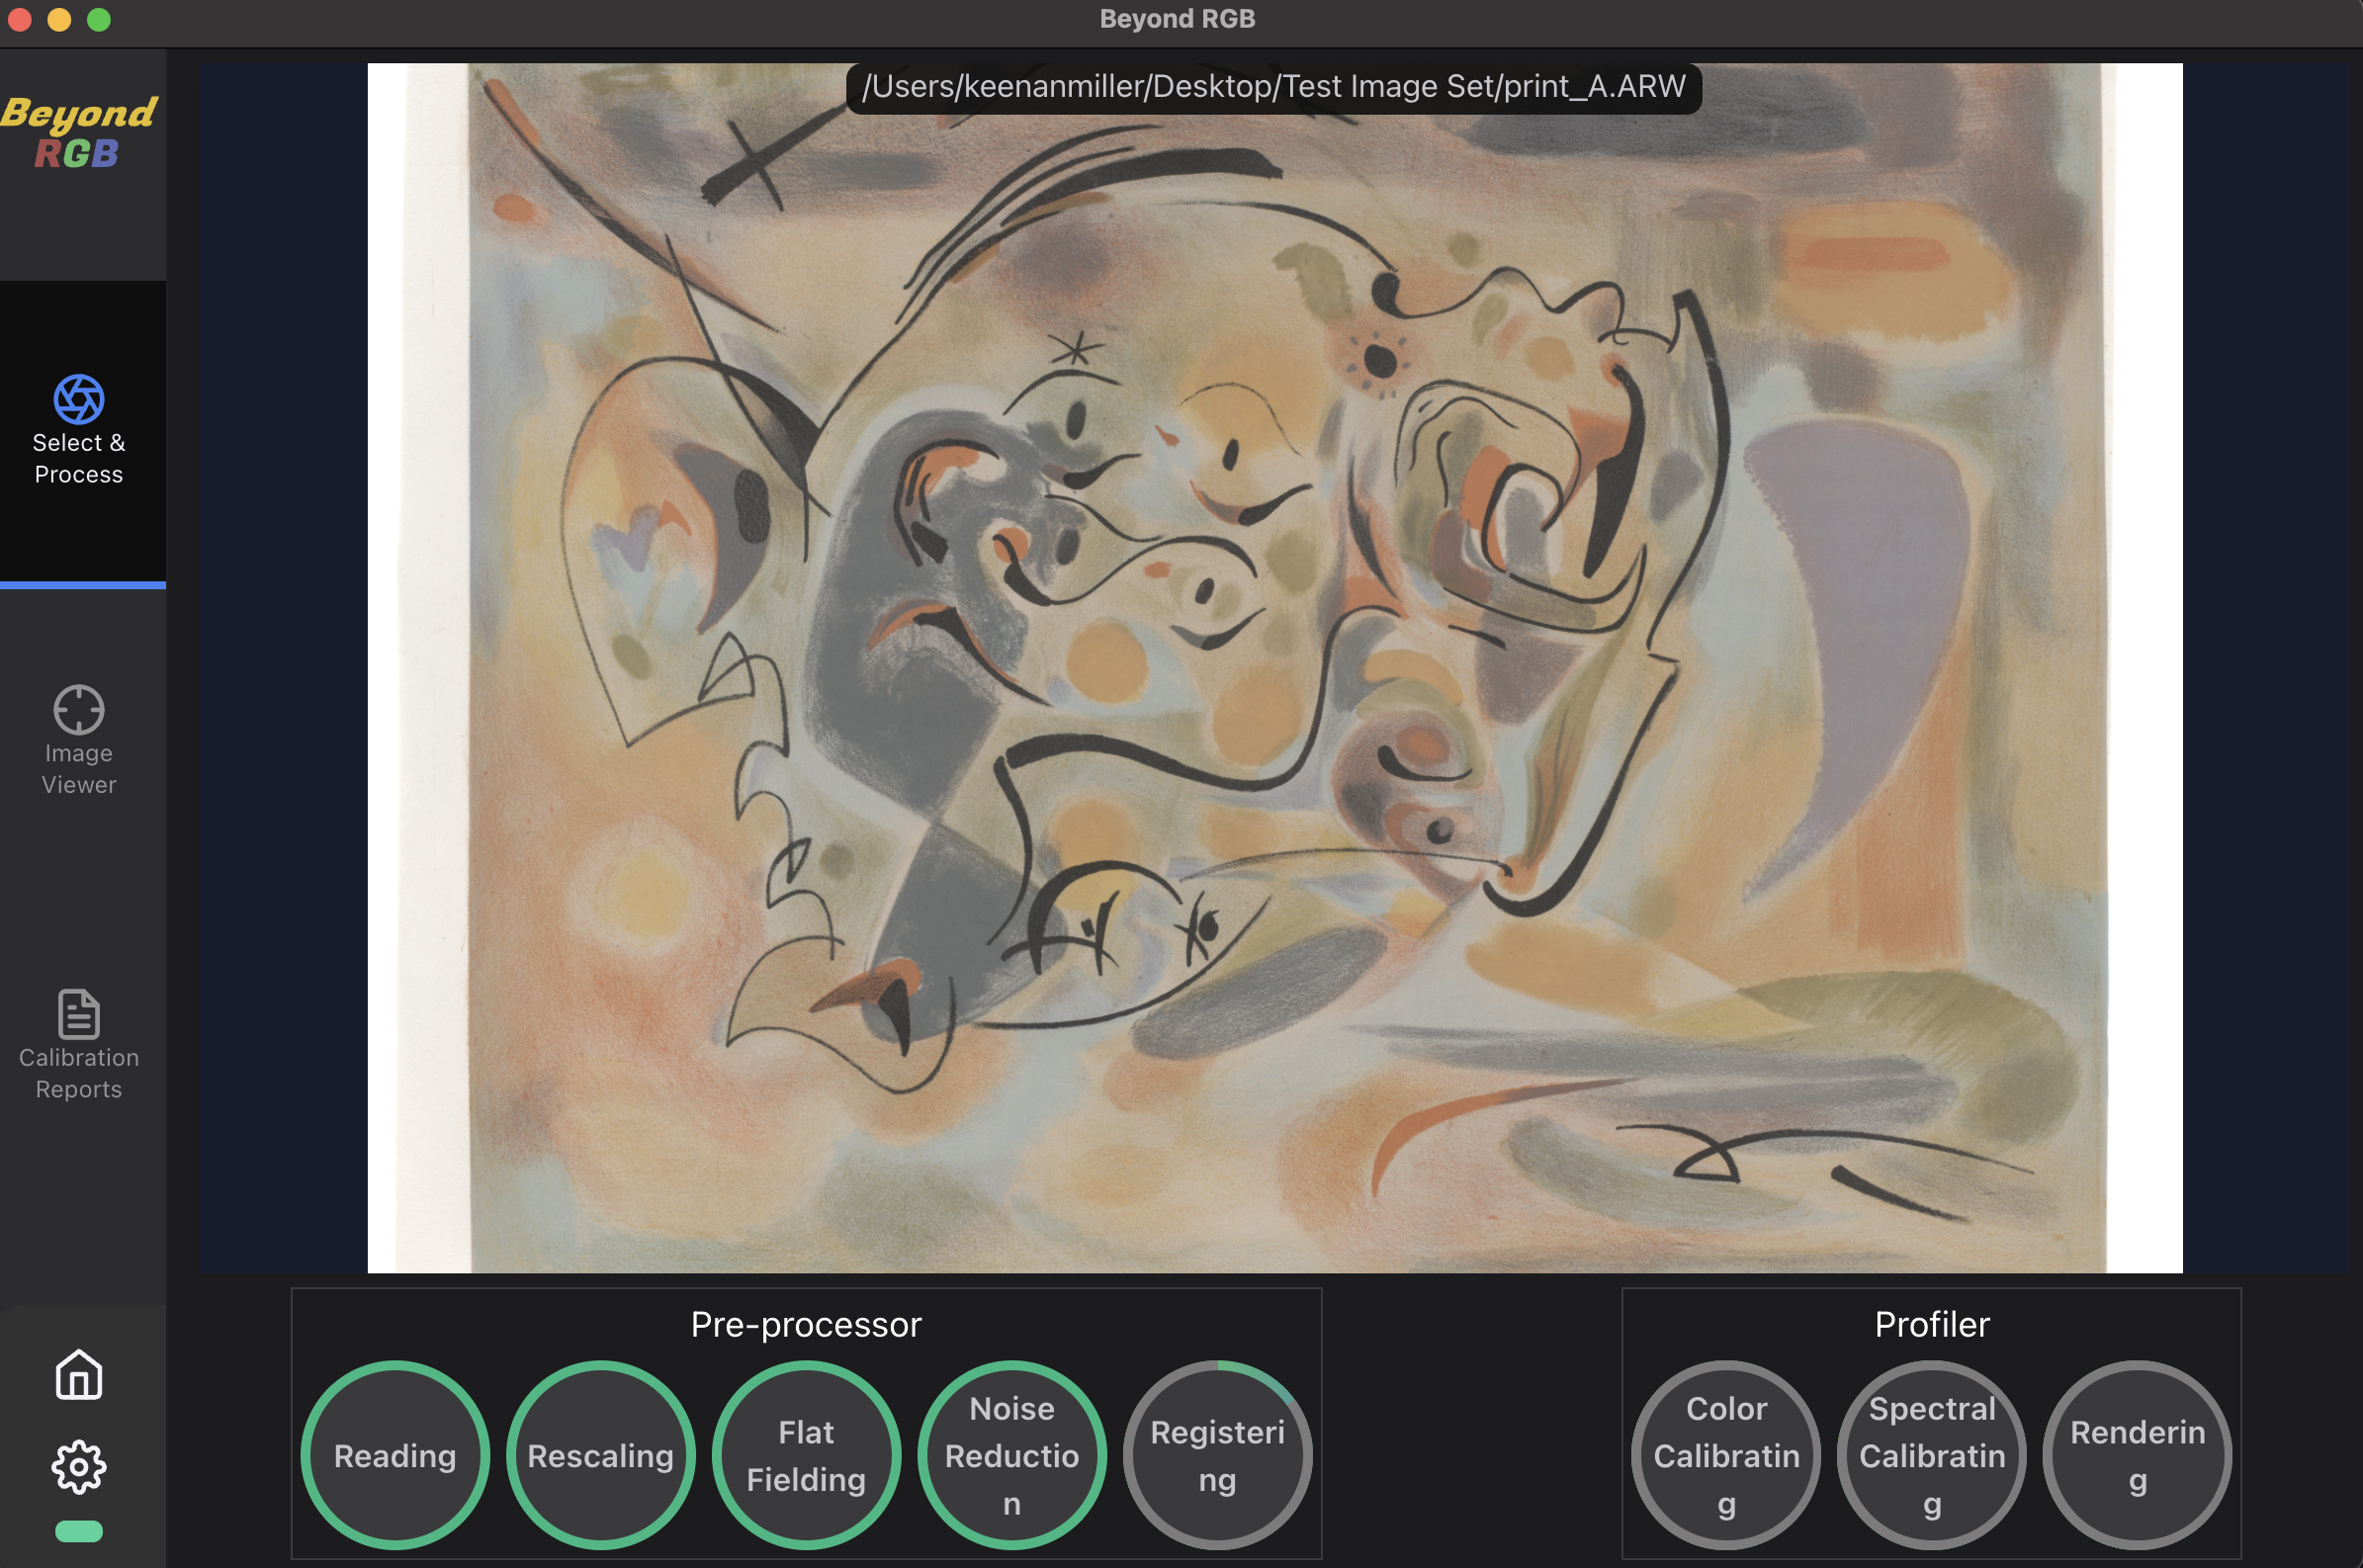
Processing an image can take up to a few minutes, but it will run faster on newer computers. It will run through each step of the process, and it will provide progress data, so you know which step it is currently on. If you are batch processing multiple images, after the first image is complete, the next will automatically begin processing. Remaining art images will begin processing sequentially as they are completed. Once complete, you will have the option to view the image, to view the output files in a file explorer, or process another image. Alternatively, you can also navigate to calibration reports to view calibration data for this run.
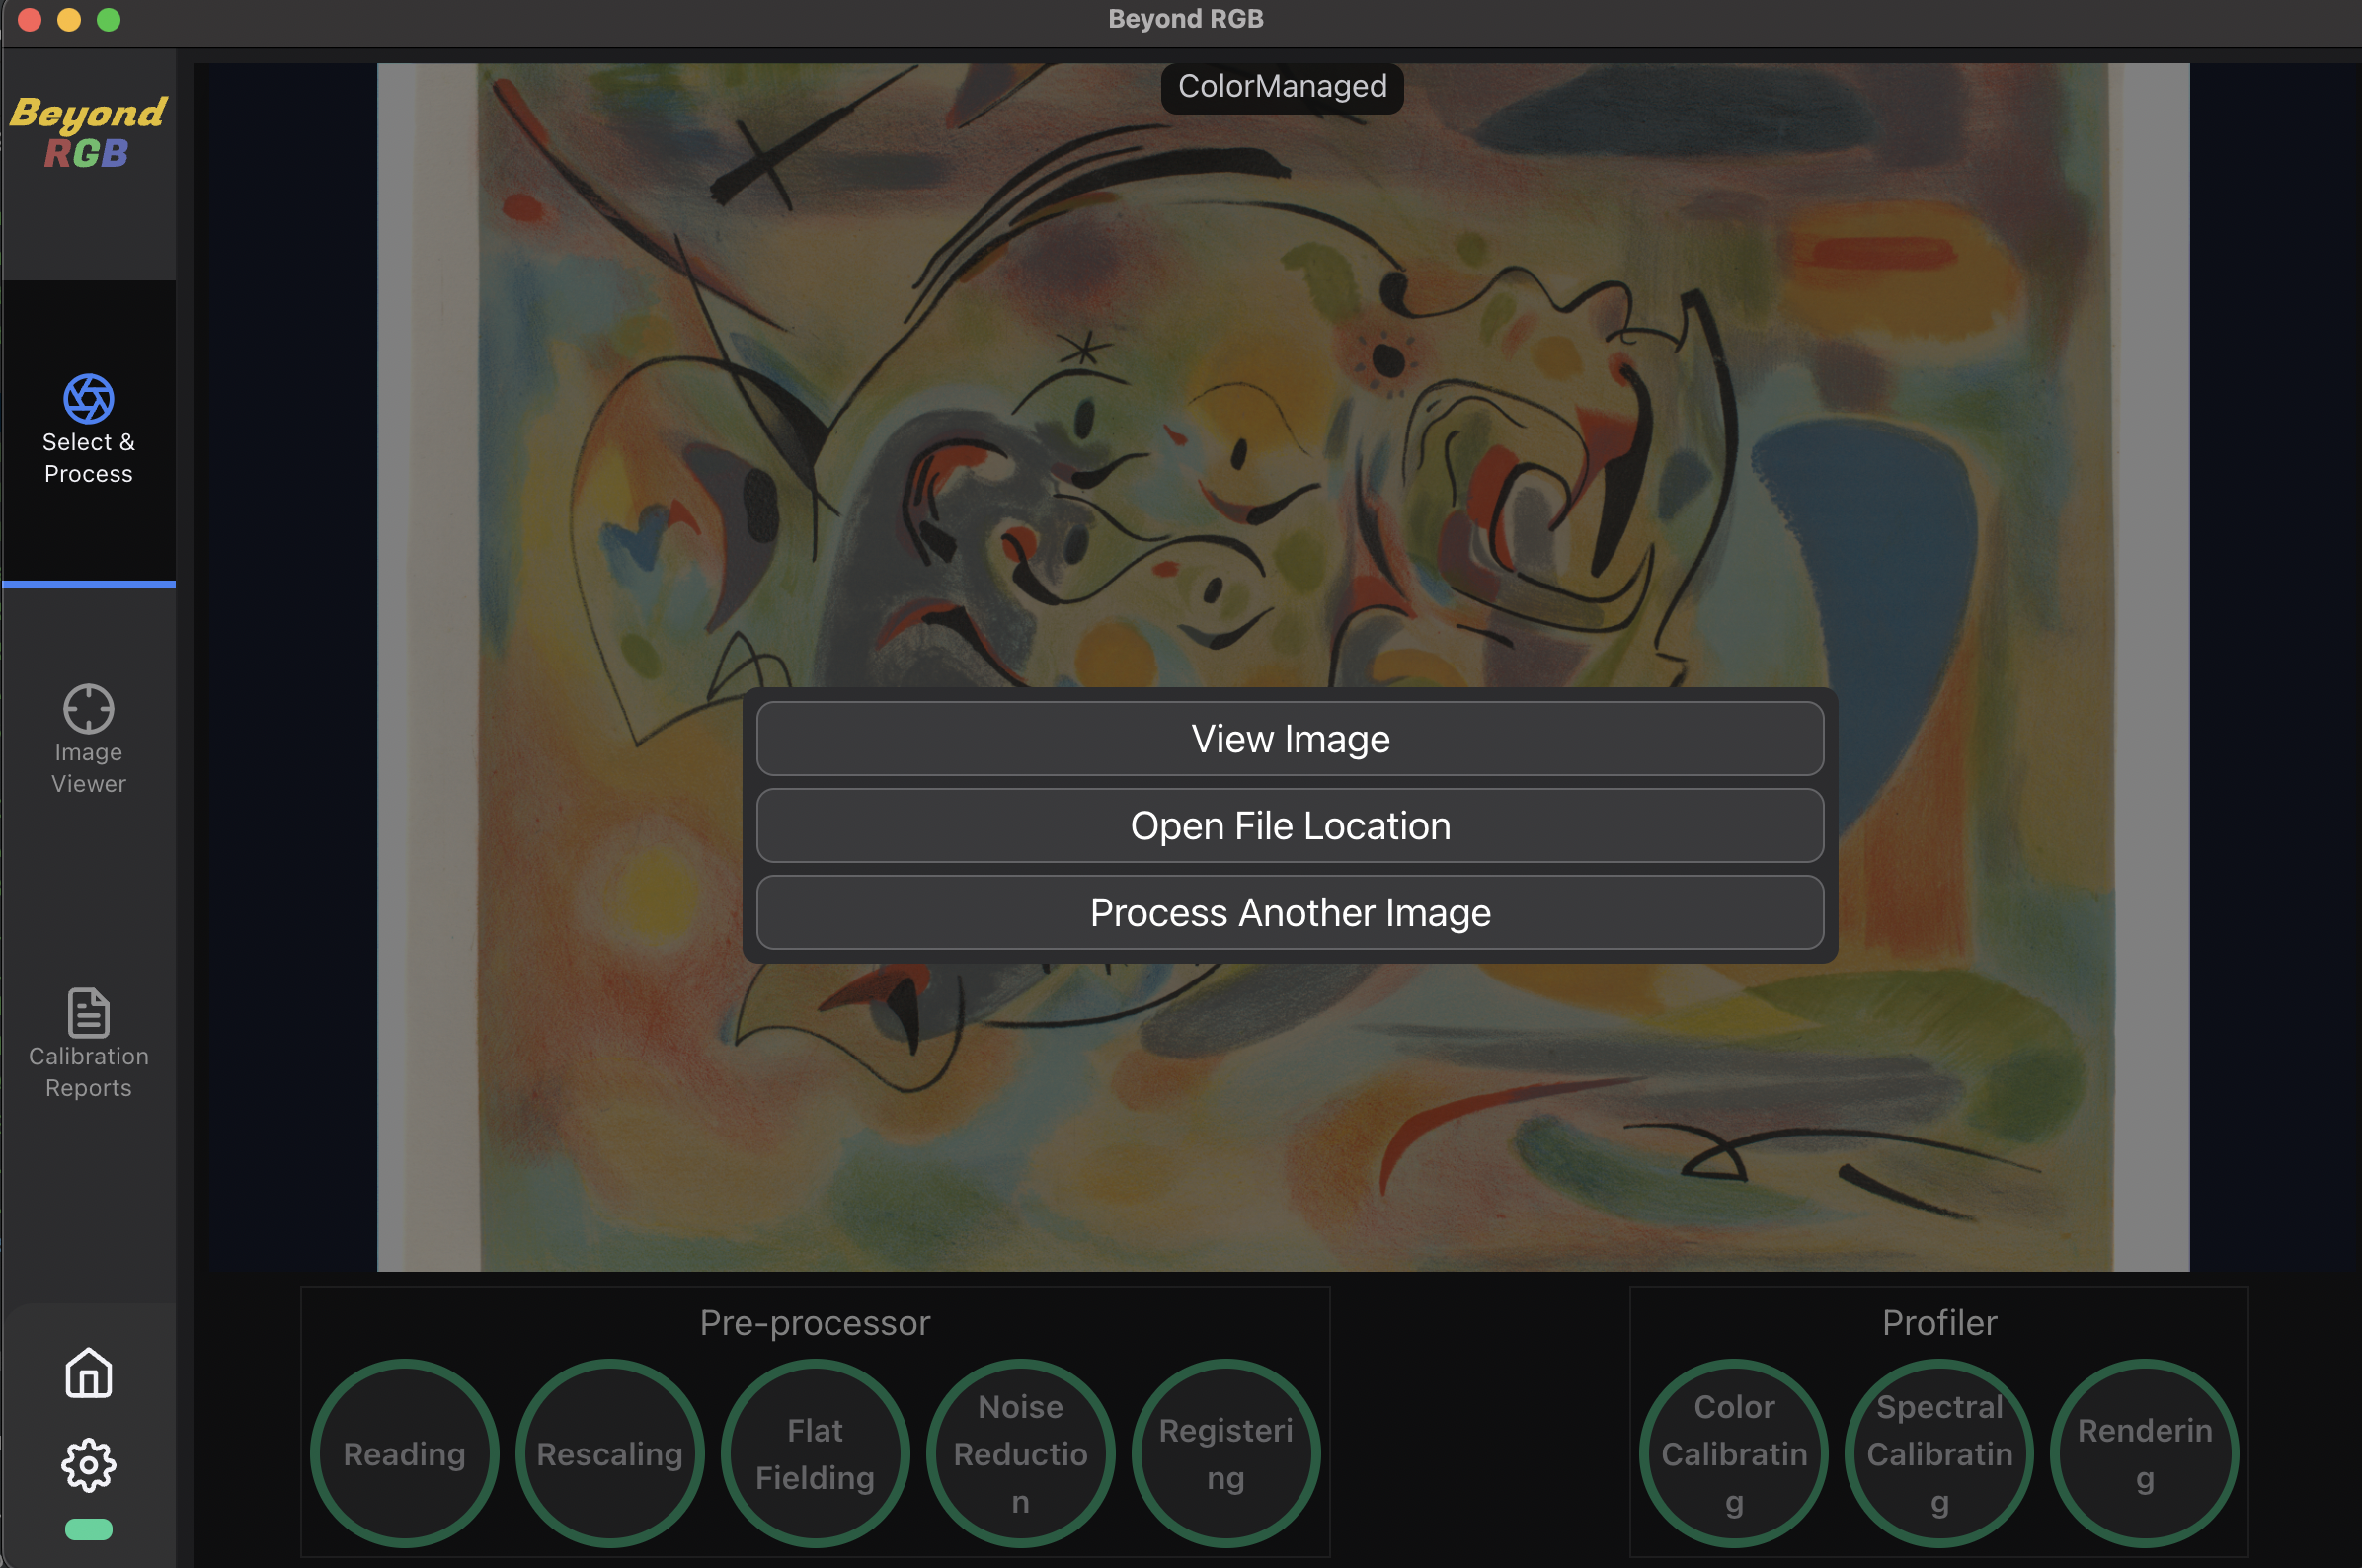
Great job, you've successfully spectrally calibrated your first images with BeyondRGB!
BeyondRGB Demo
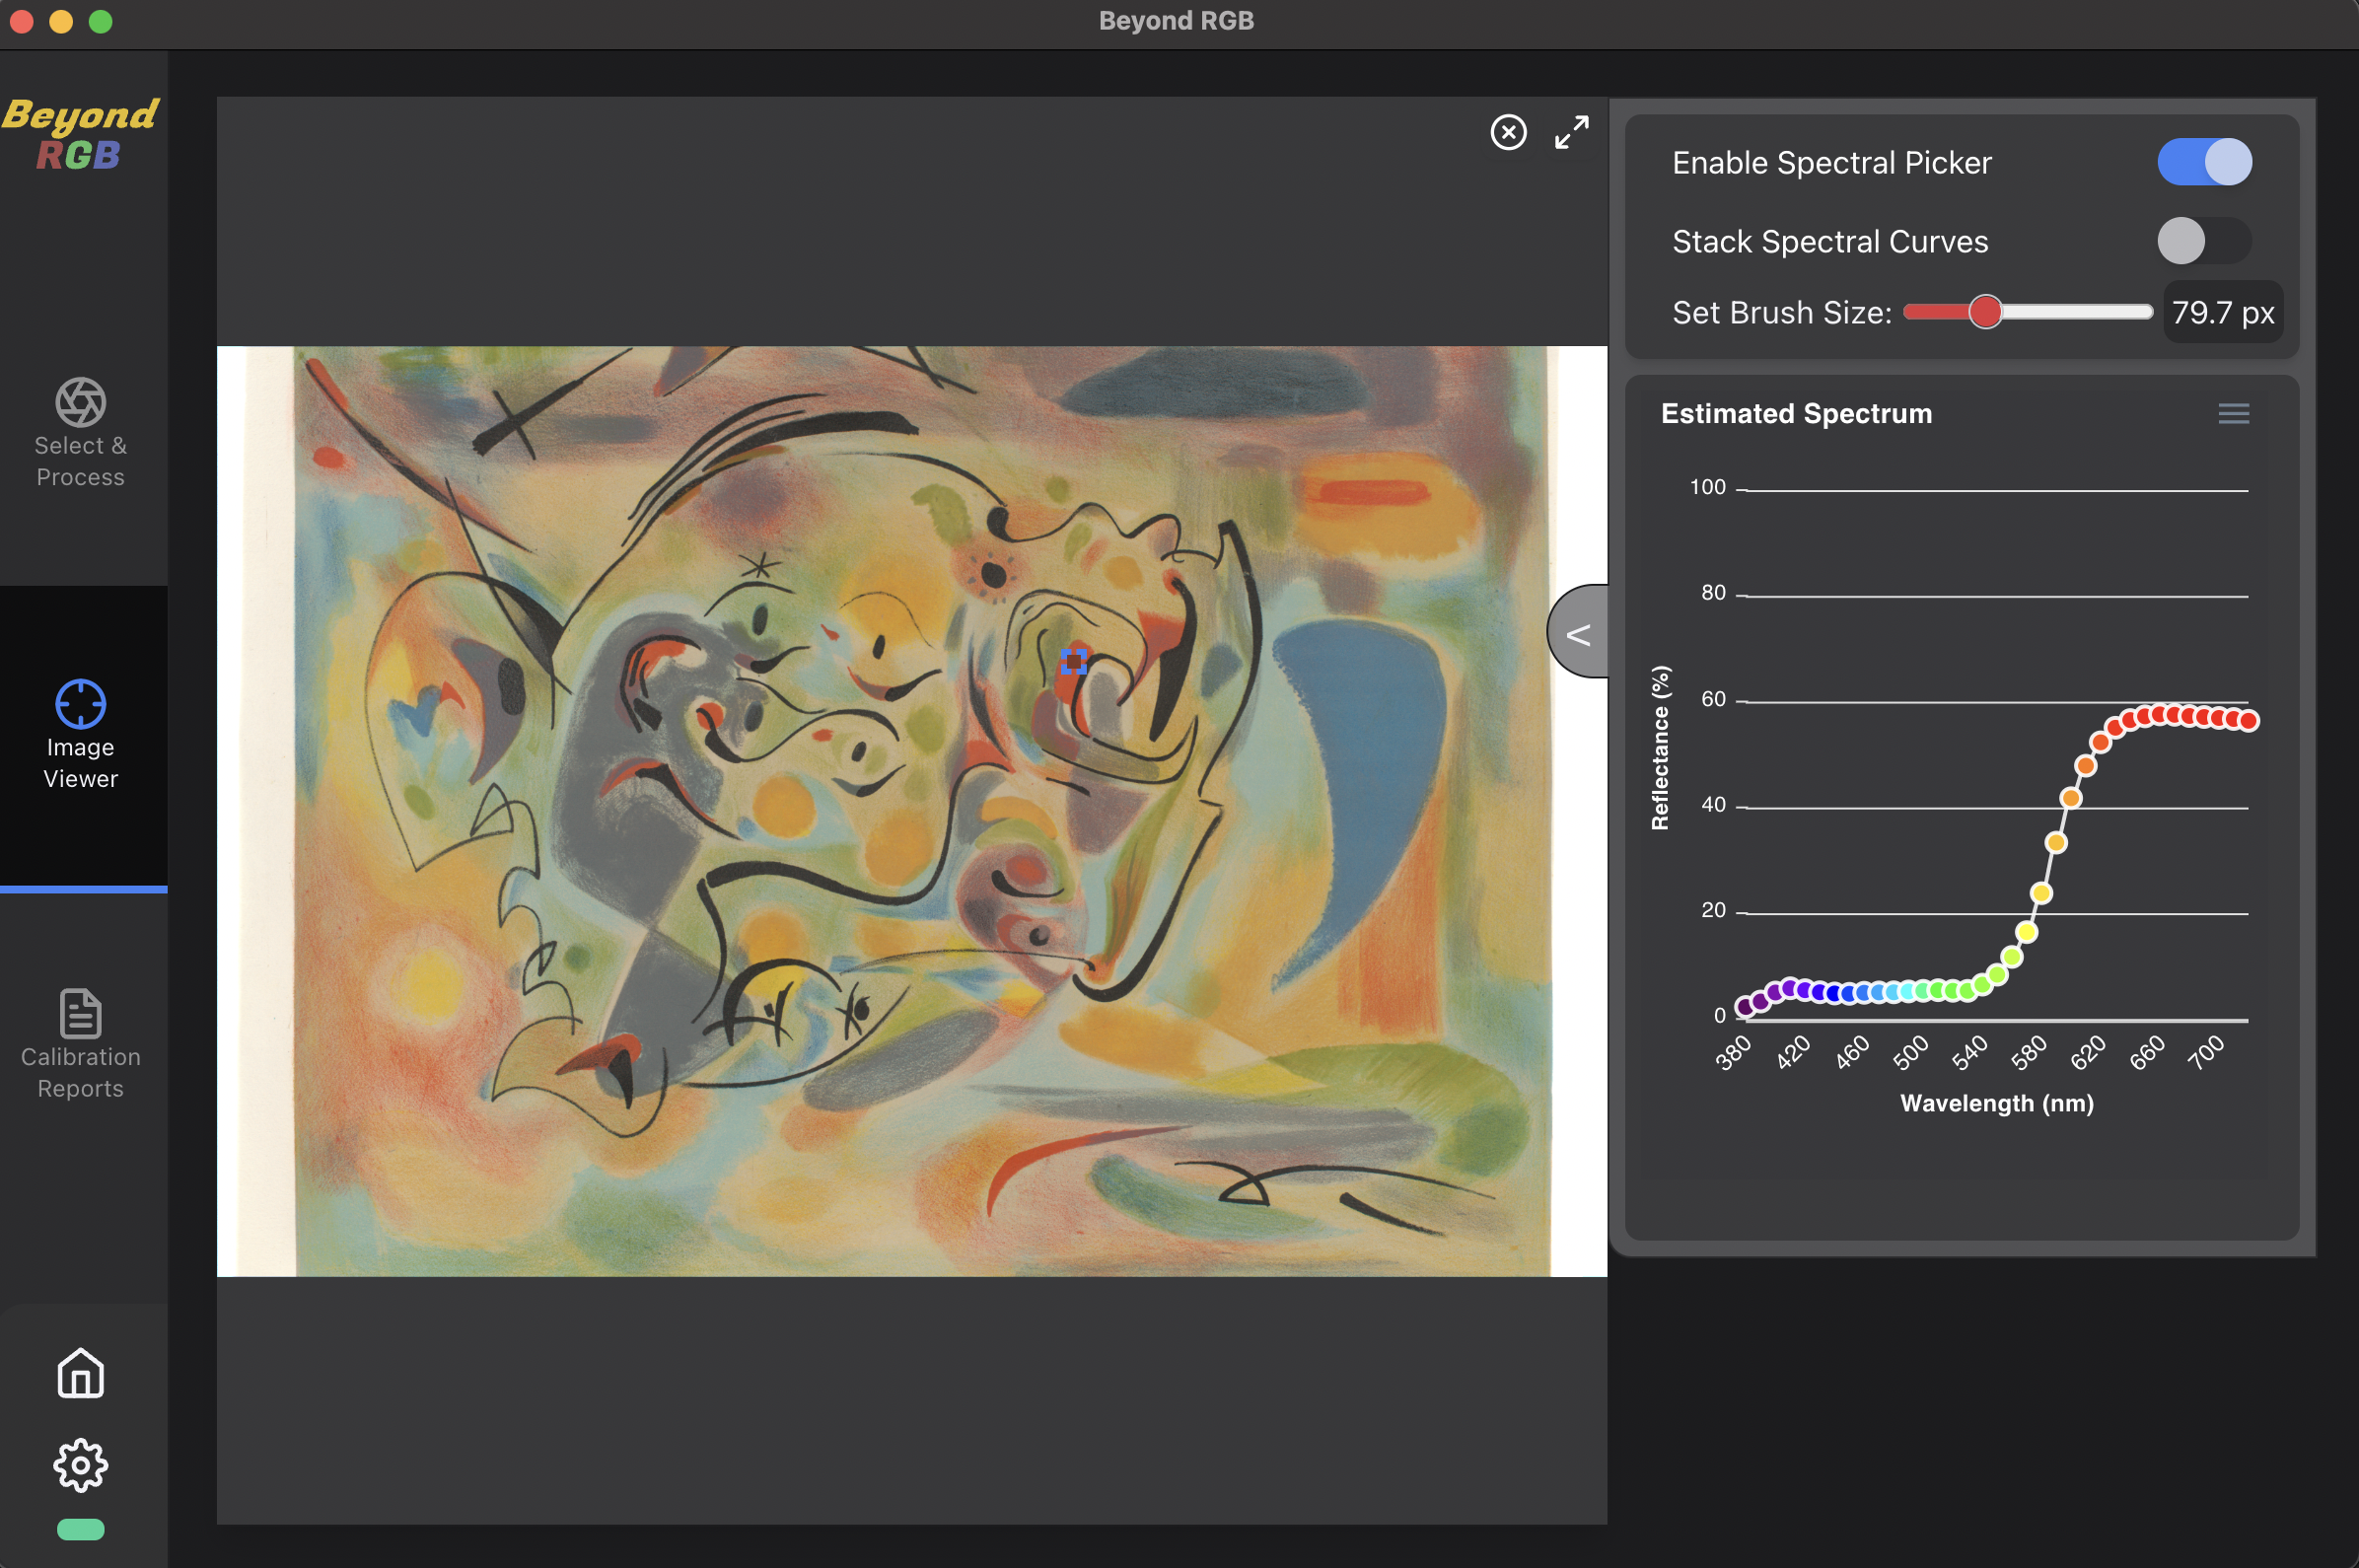
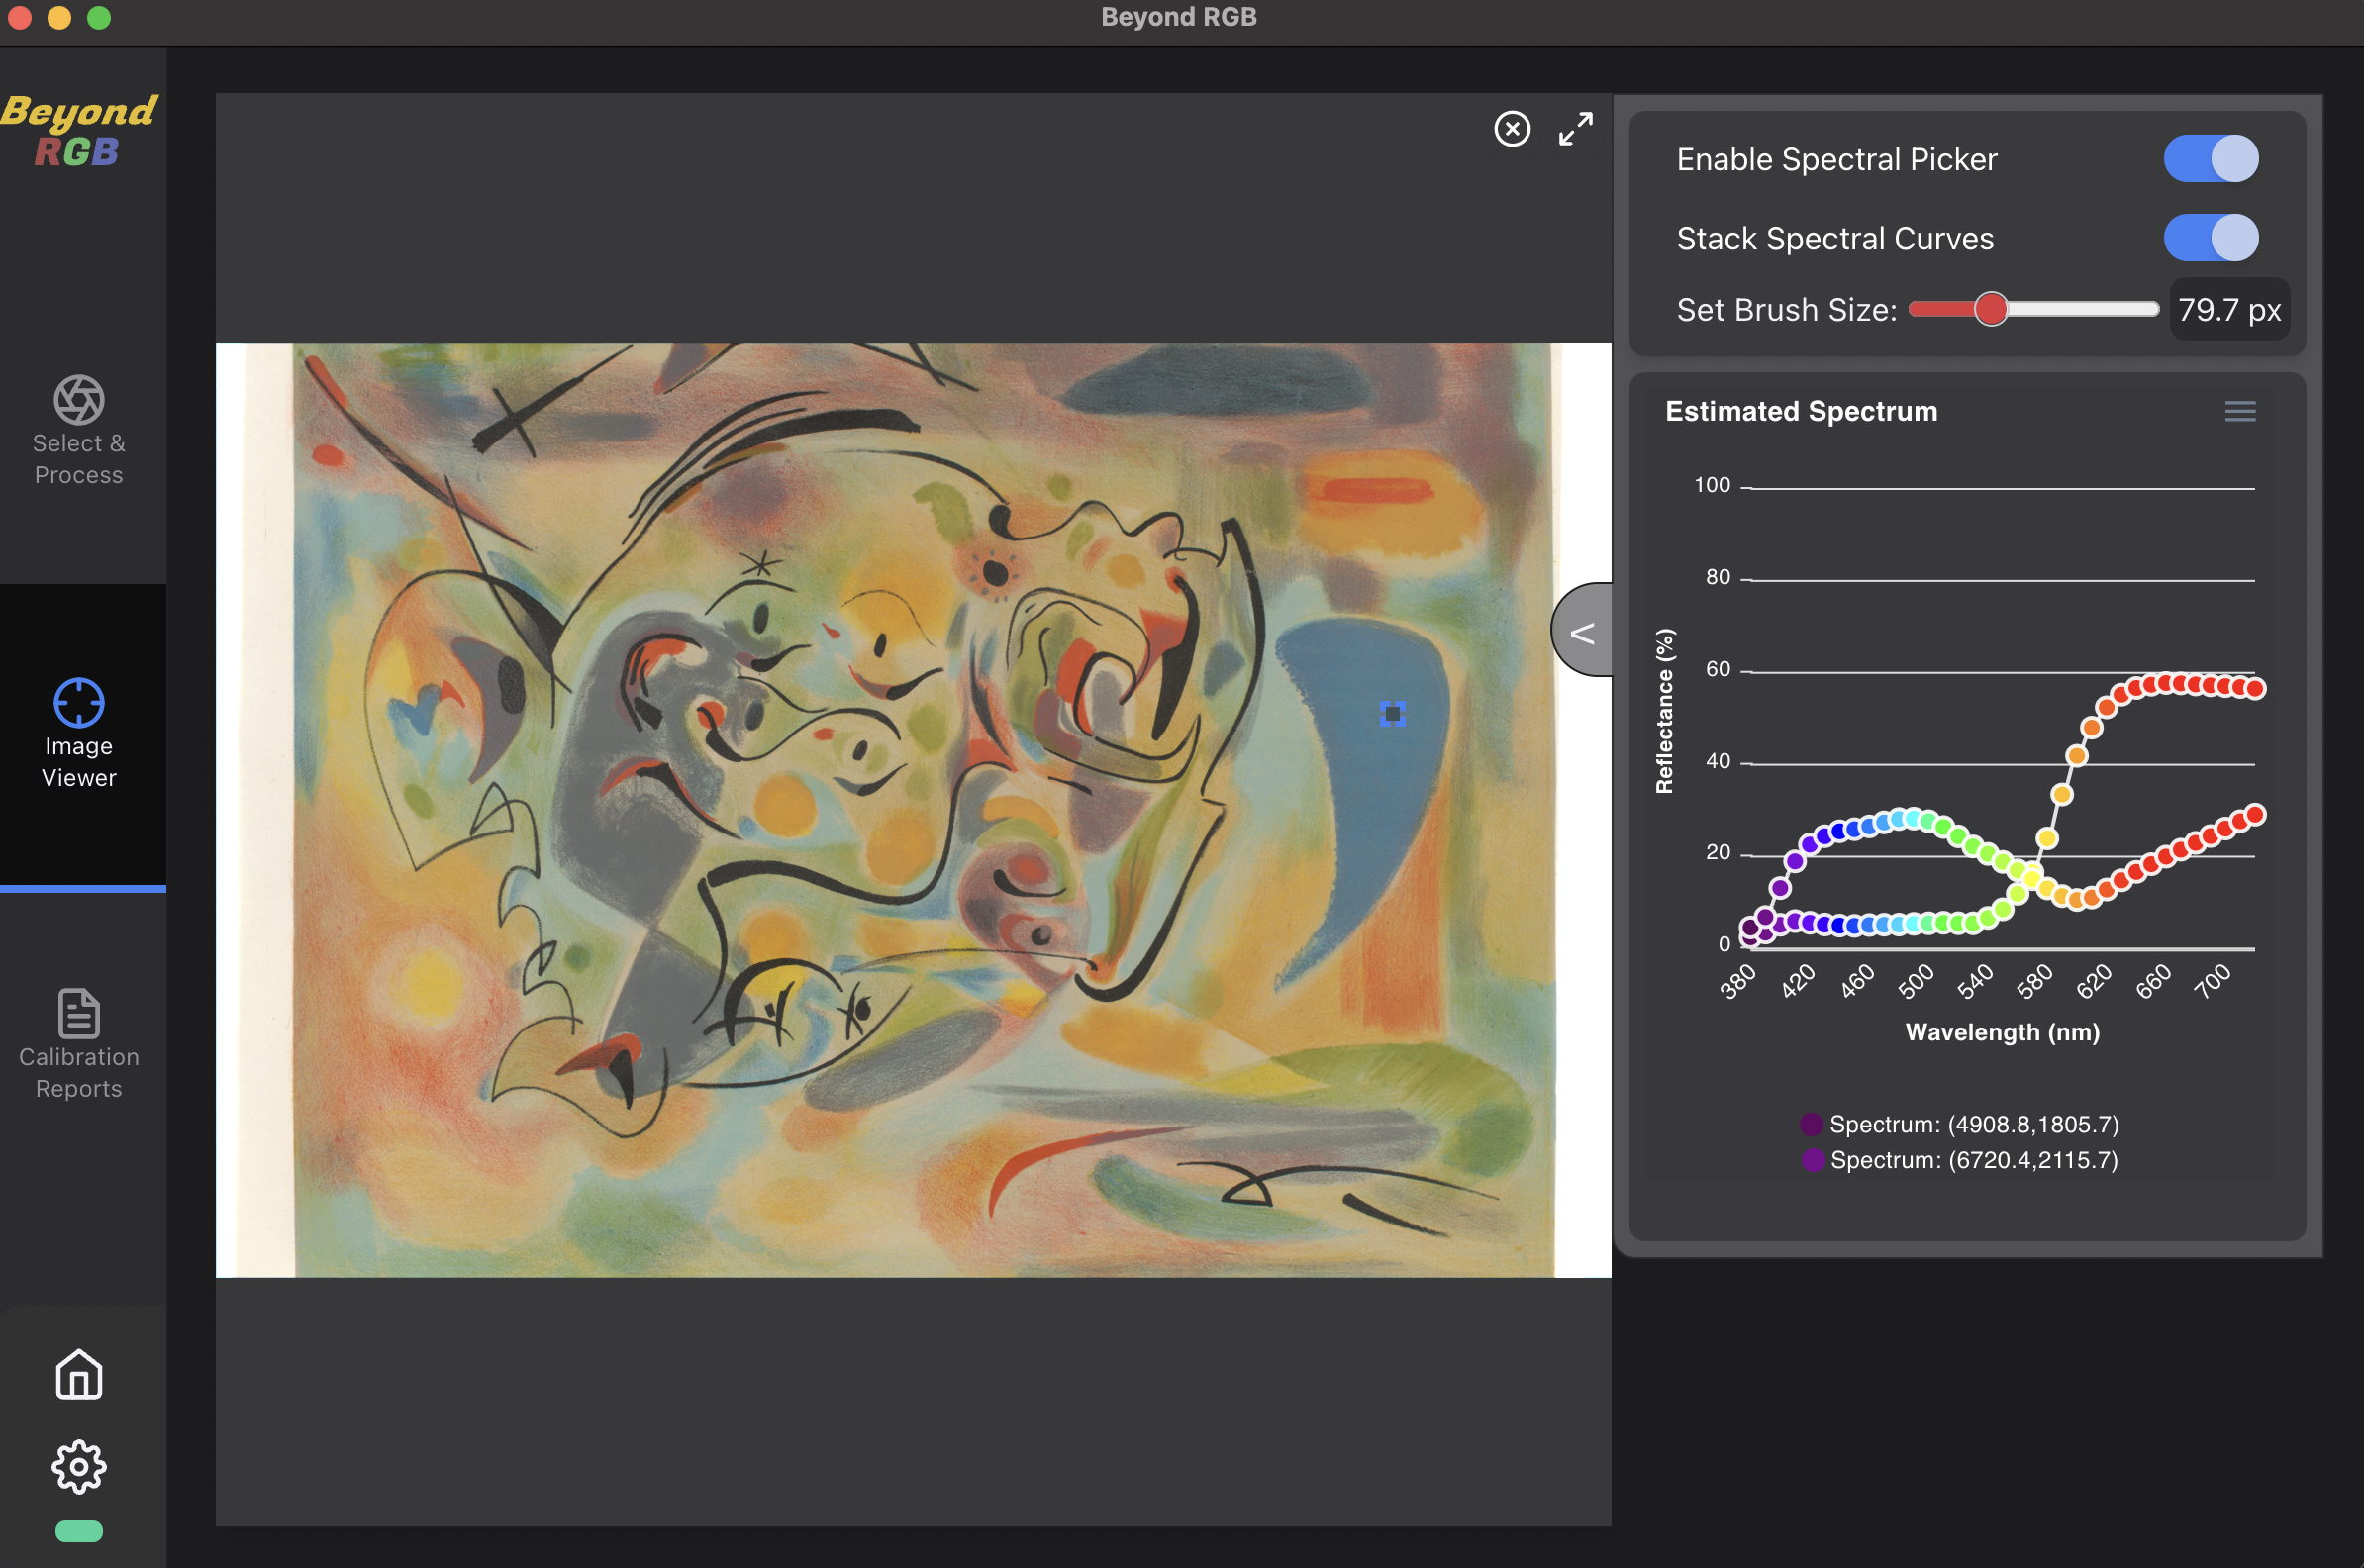
Spectral Picker
So you have already processed an image, and you want to see its spectral reflectance data. The spectral picker allows you to select certain portions of the calibrated image to view its spectral curves. You can resize your brush, and you can view individual curves or stack spectral curves to compare multiple patches of the same image on the same graph. You can also put your cursor on the chart to see the reflectance and wavelength at a given point.
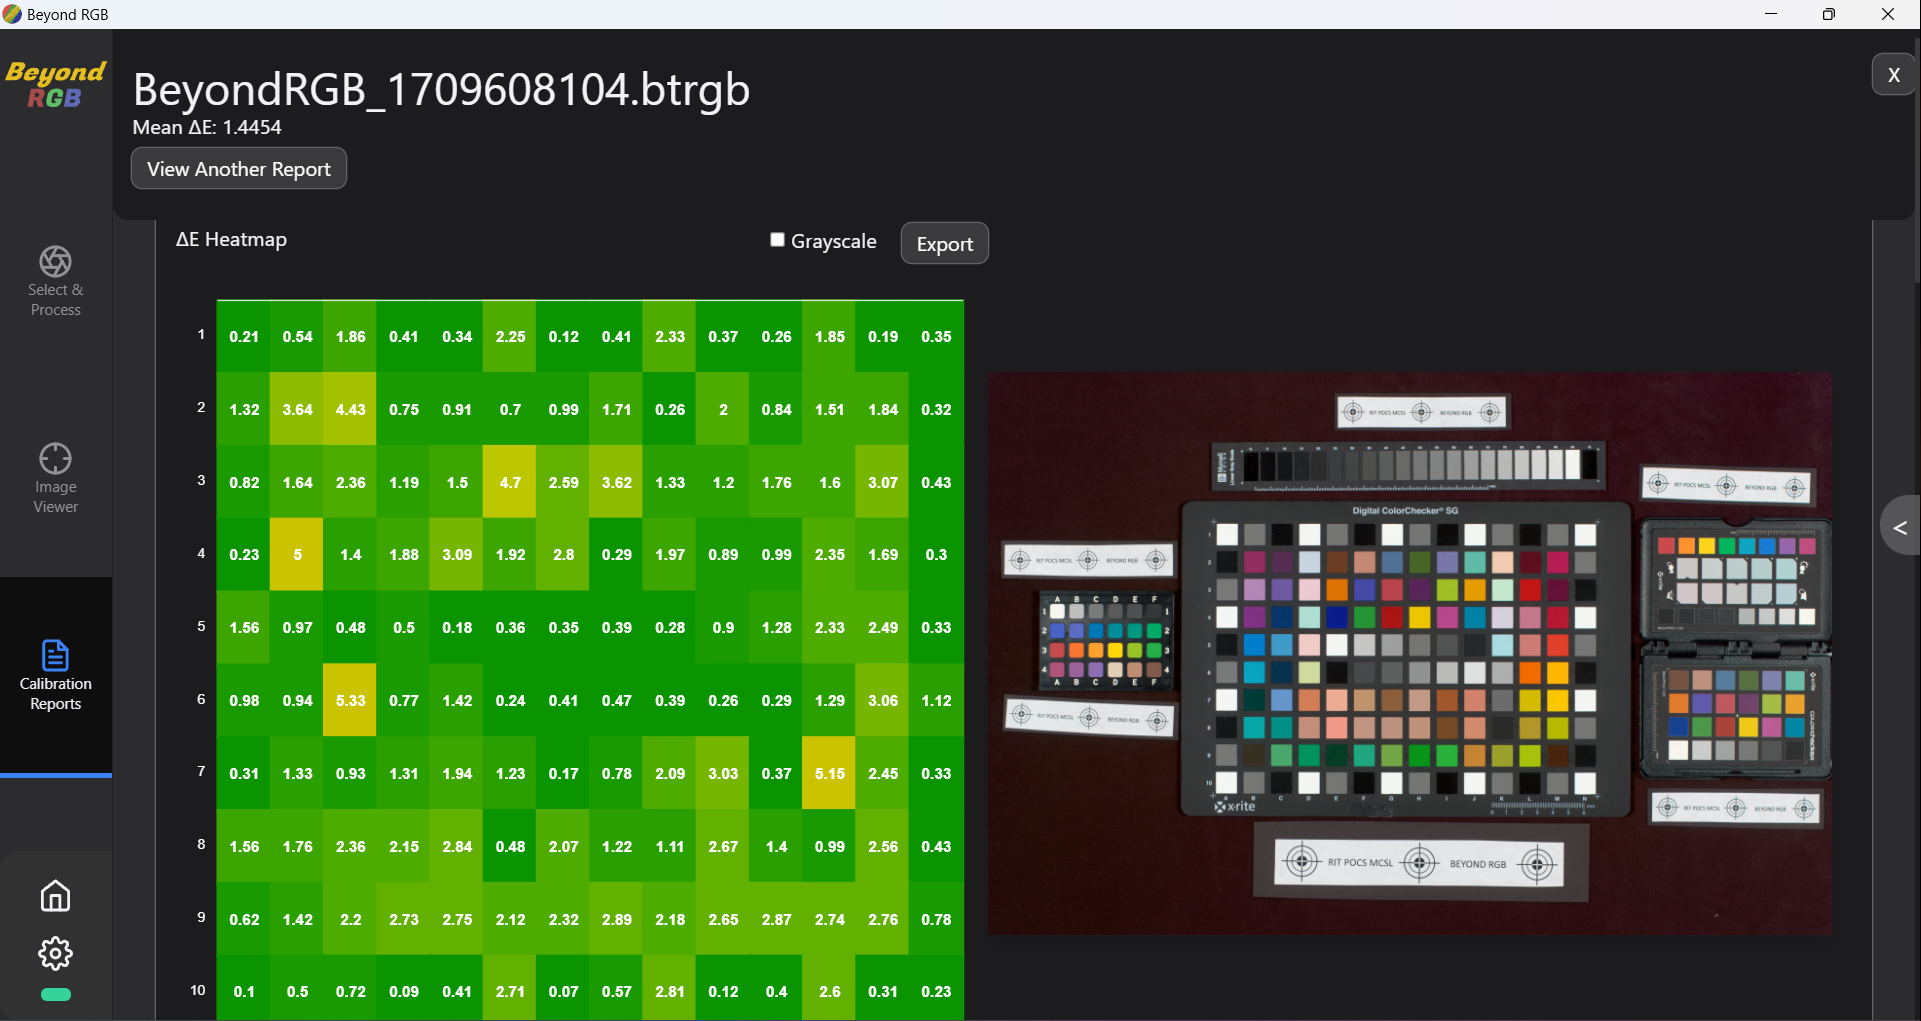
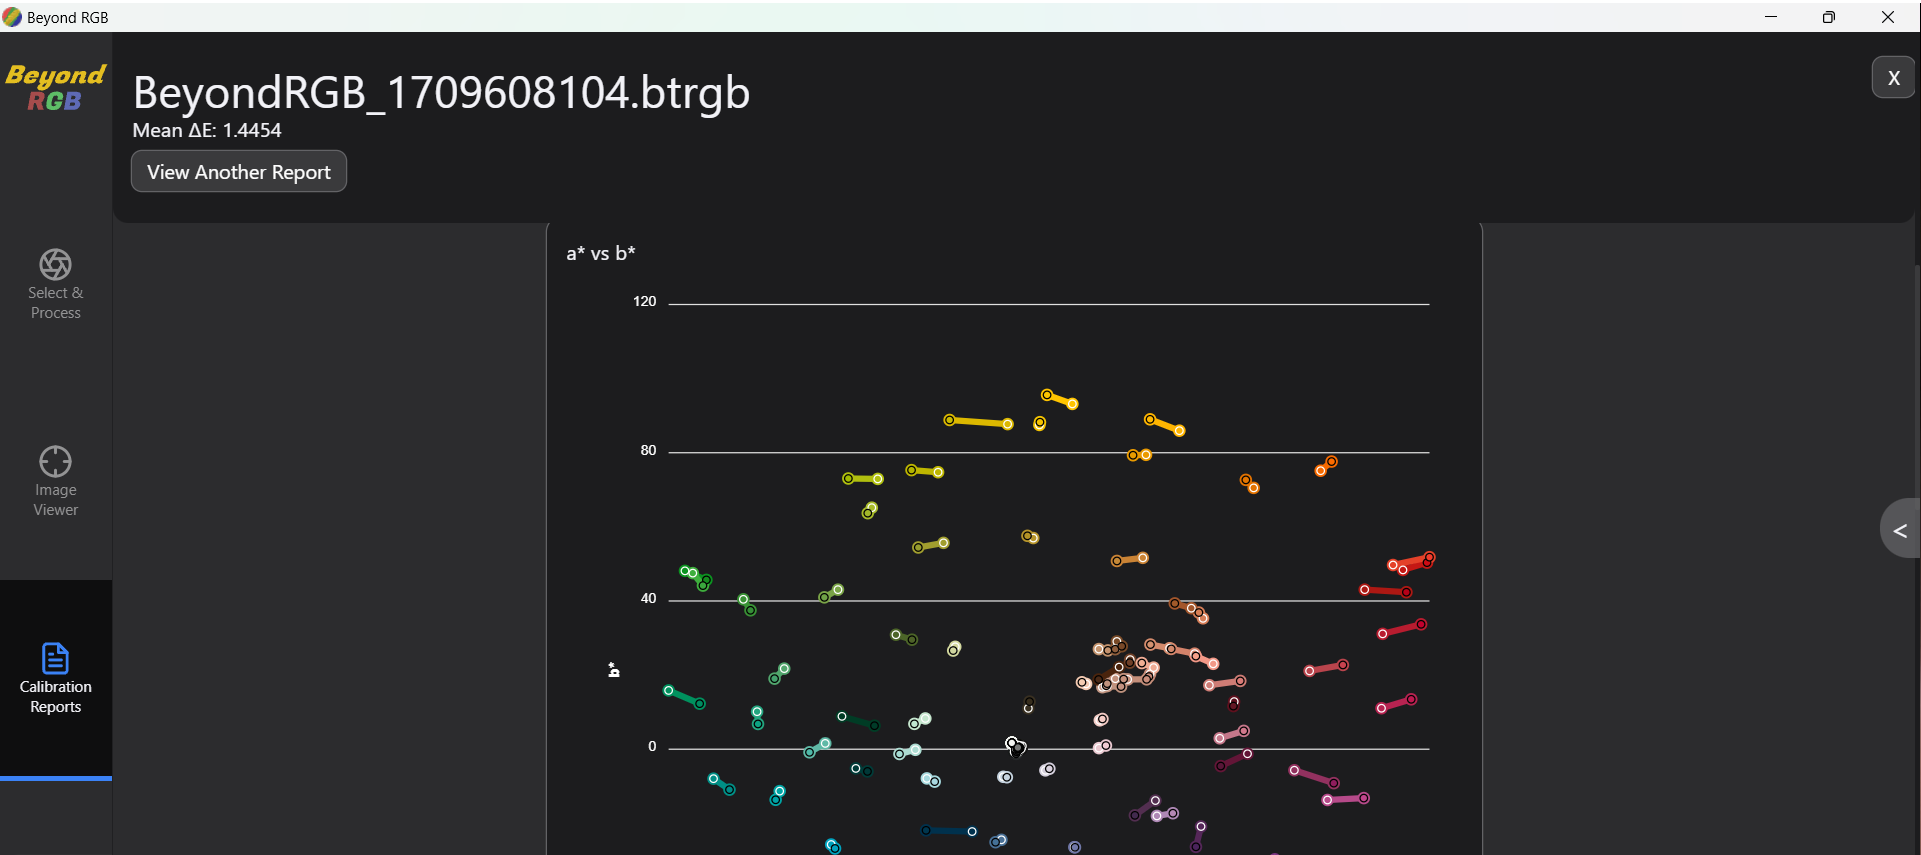
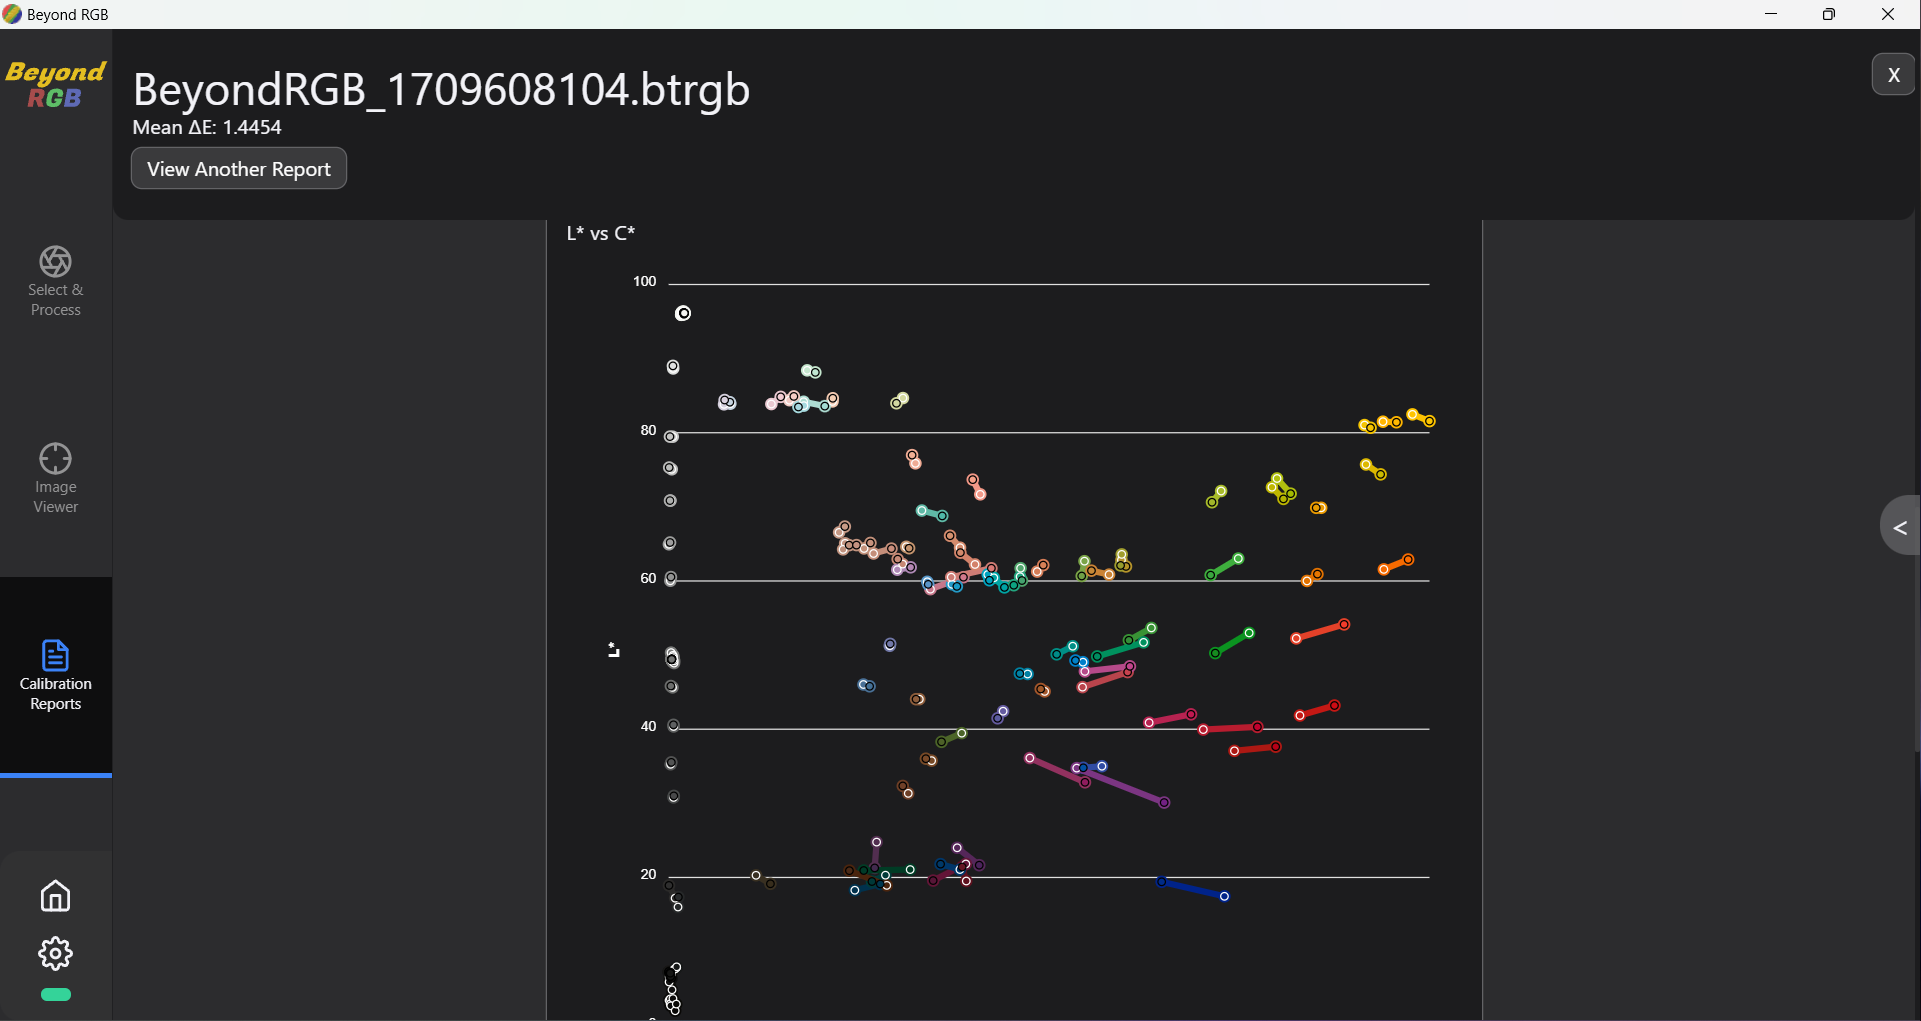
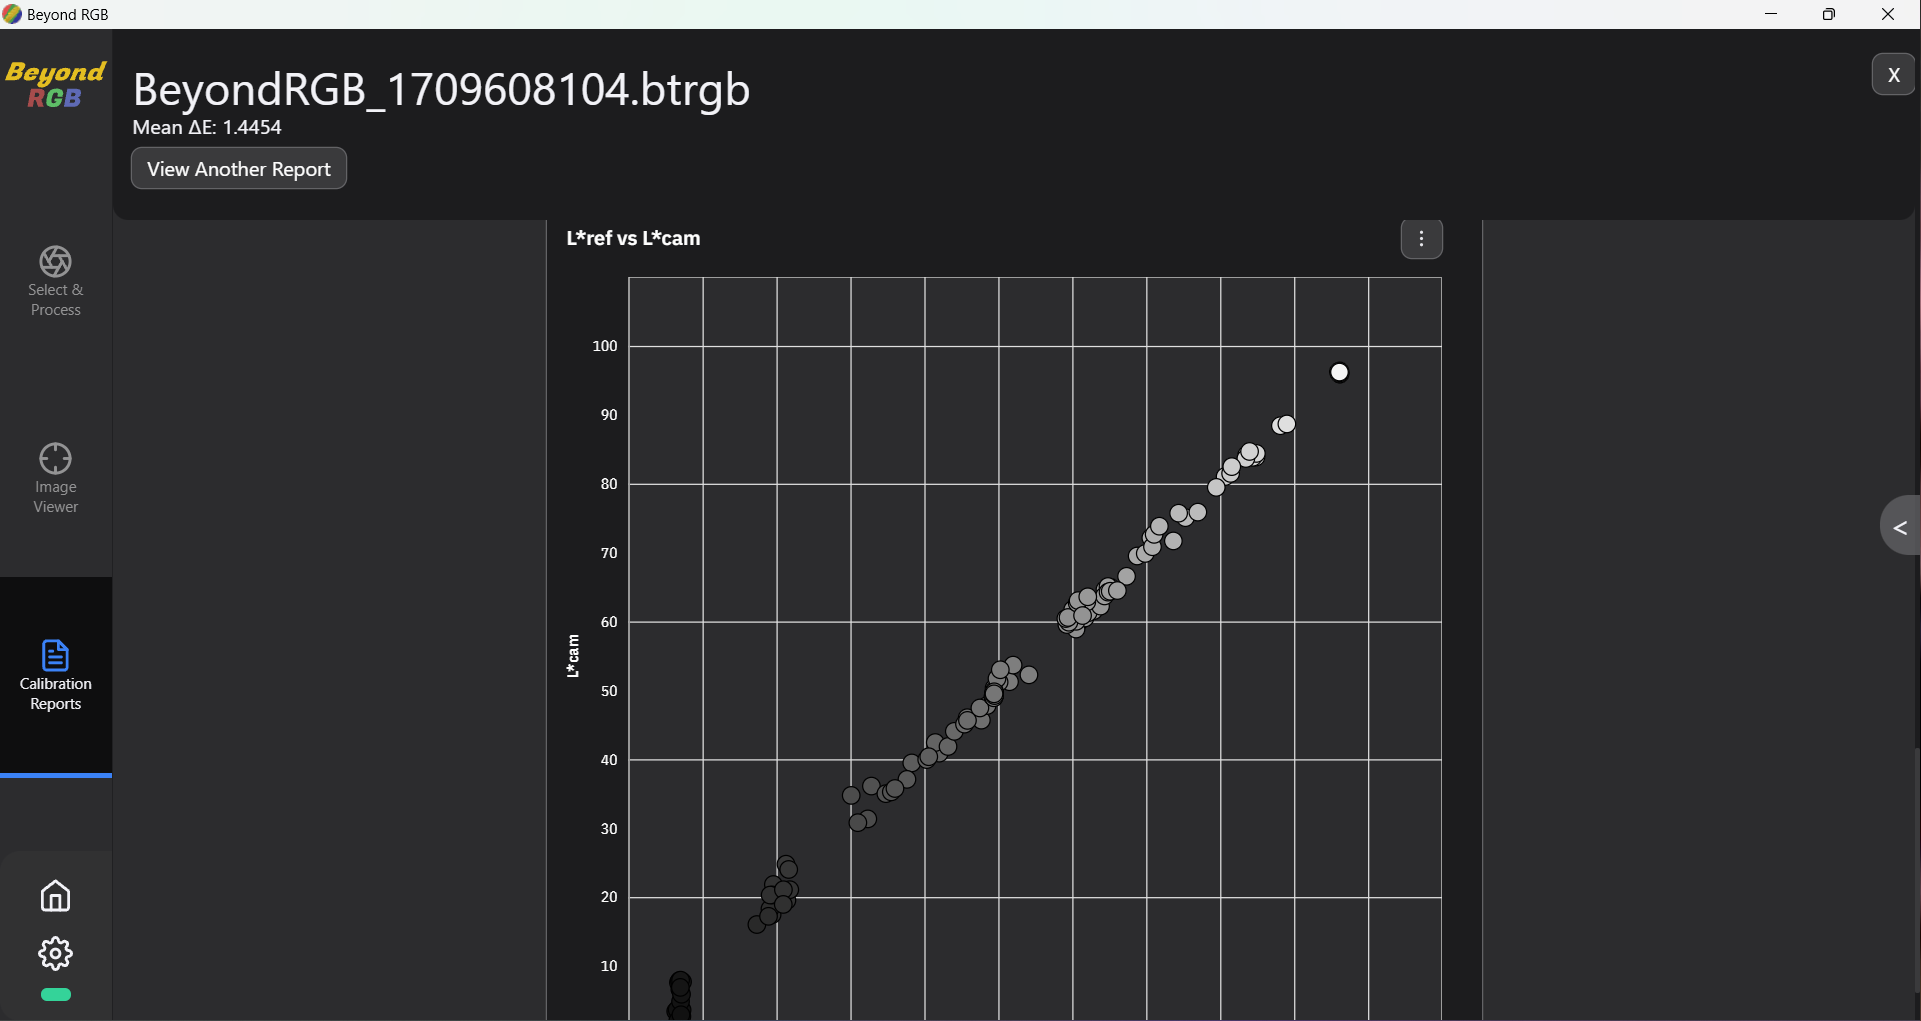
Calibration Charts
So you have already processed an image, and you want to see its calibration data. The calibration page allows you to view data specific to the calibration of a single image processed with BeyondRGB.It also displays the mean and 90th percentile values for ΔE in the upper left hand corner.
Issues Running BeyondRGB
If your computer blocks the application because it is from an "unidentified" developer (mac):
Using your own custom Calibration Target
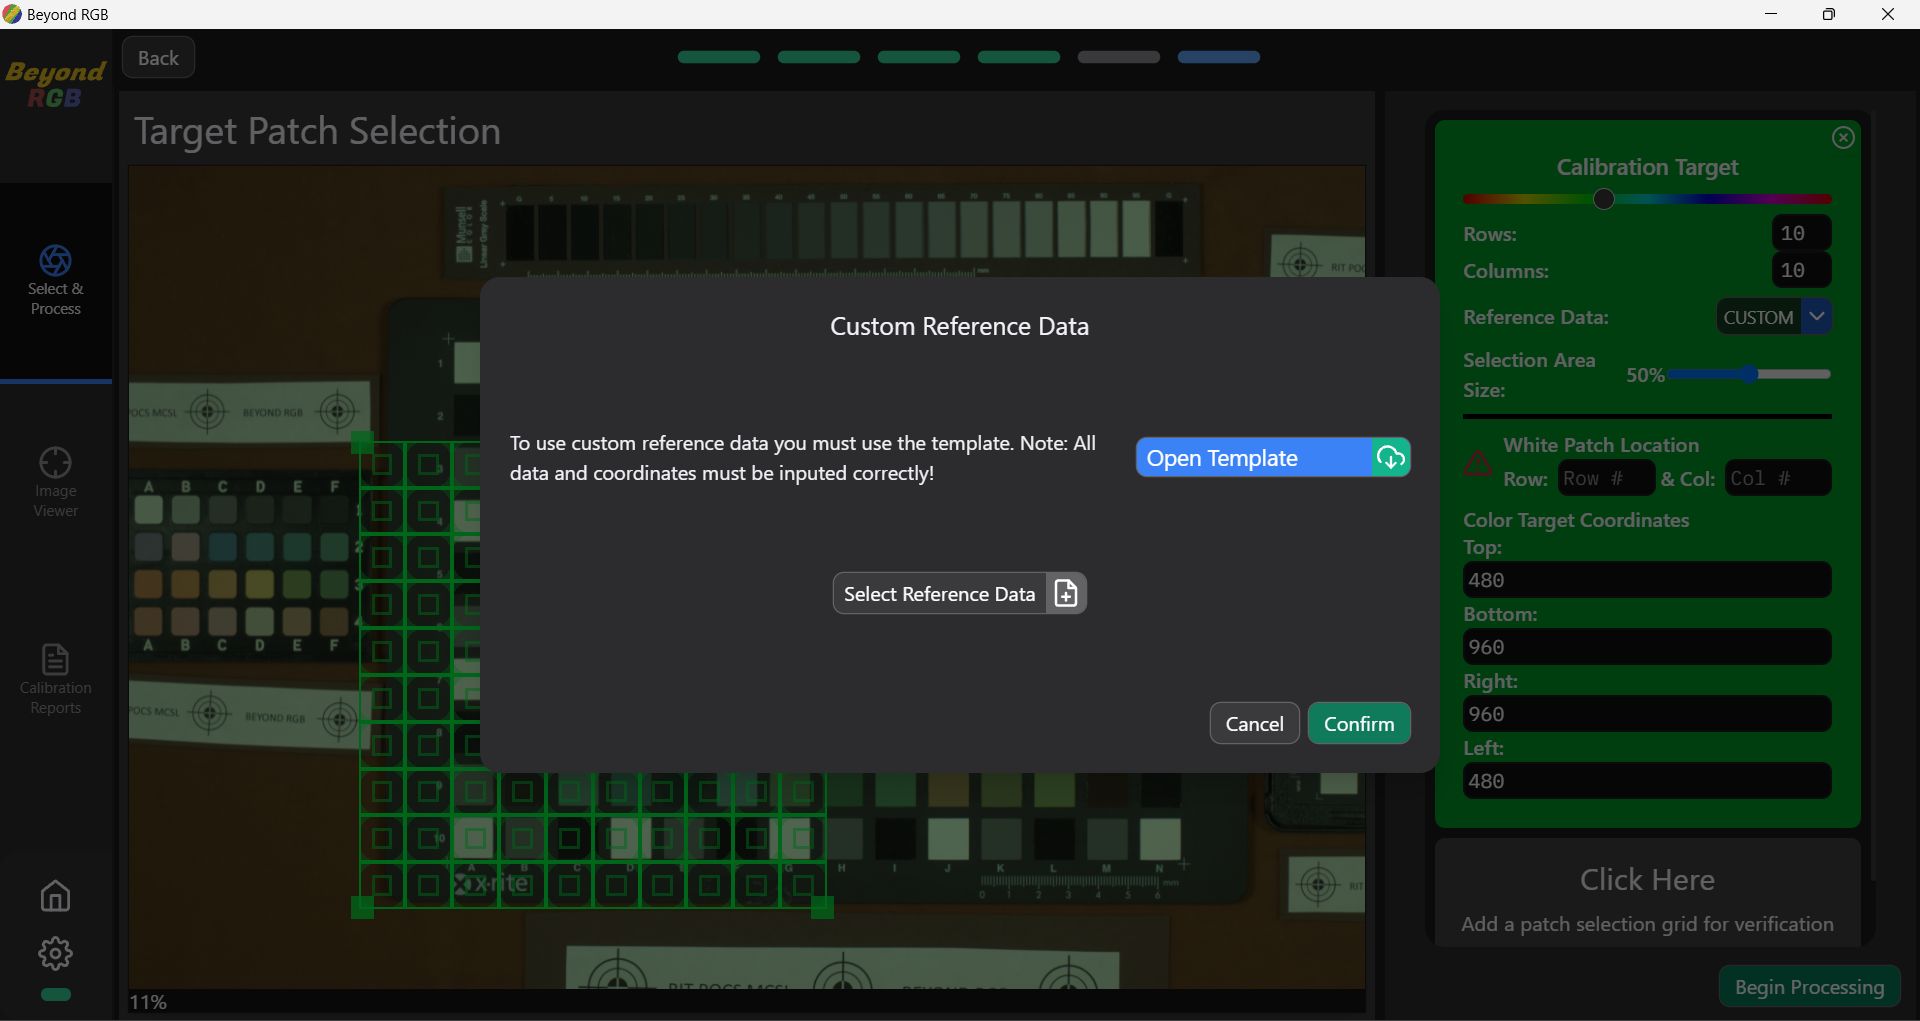
You do not have to use the given example calibration target images/data. This section will show you how to use your own calibration target data. First you will want to follow the image processing setup as normal. When you get to the Target Patch Selection page, click on the "Reference Data" dropdown and select the "Choose a custom file..." option. A popup box will appear. Here you can download the custom reference target template.
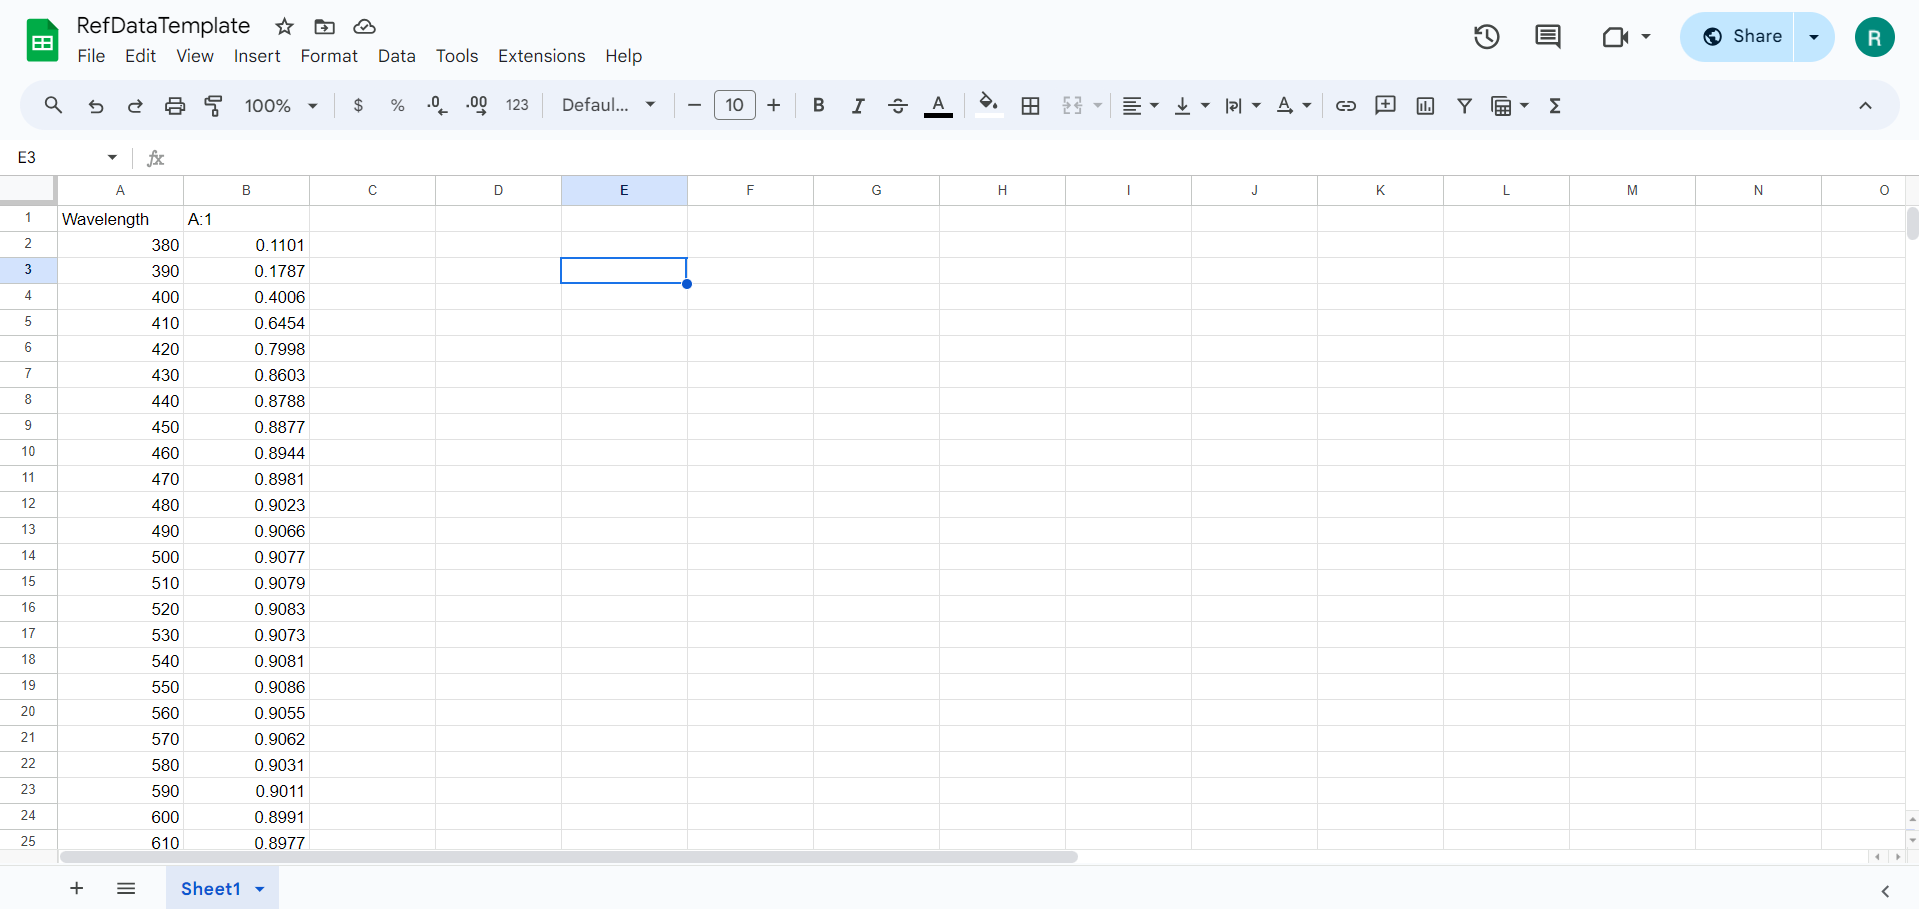
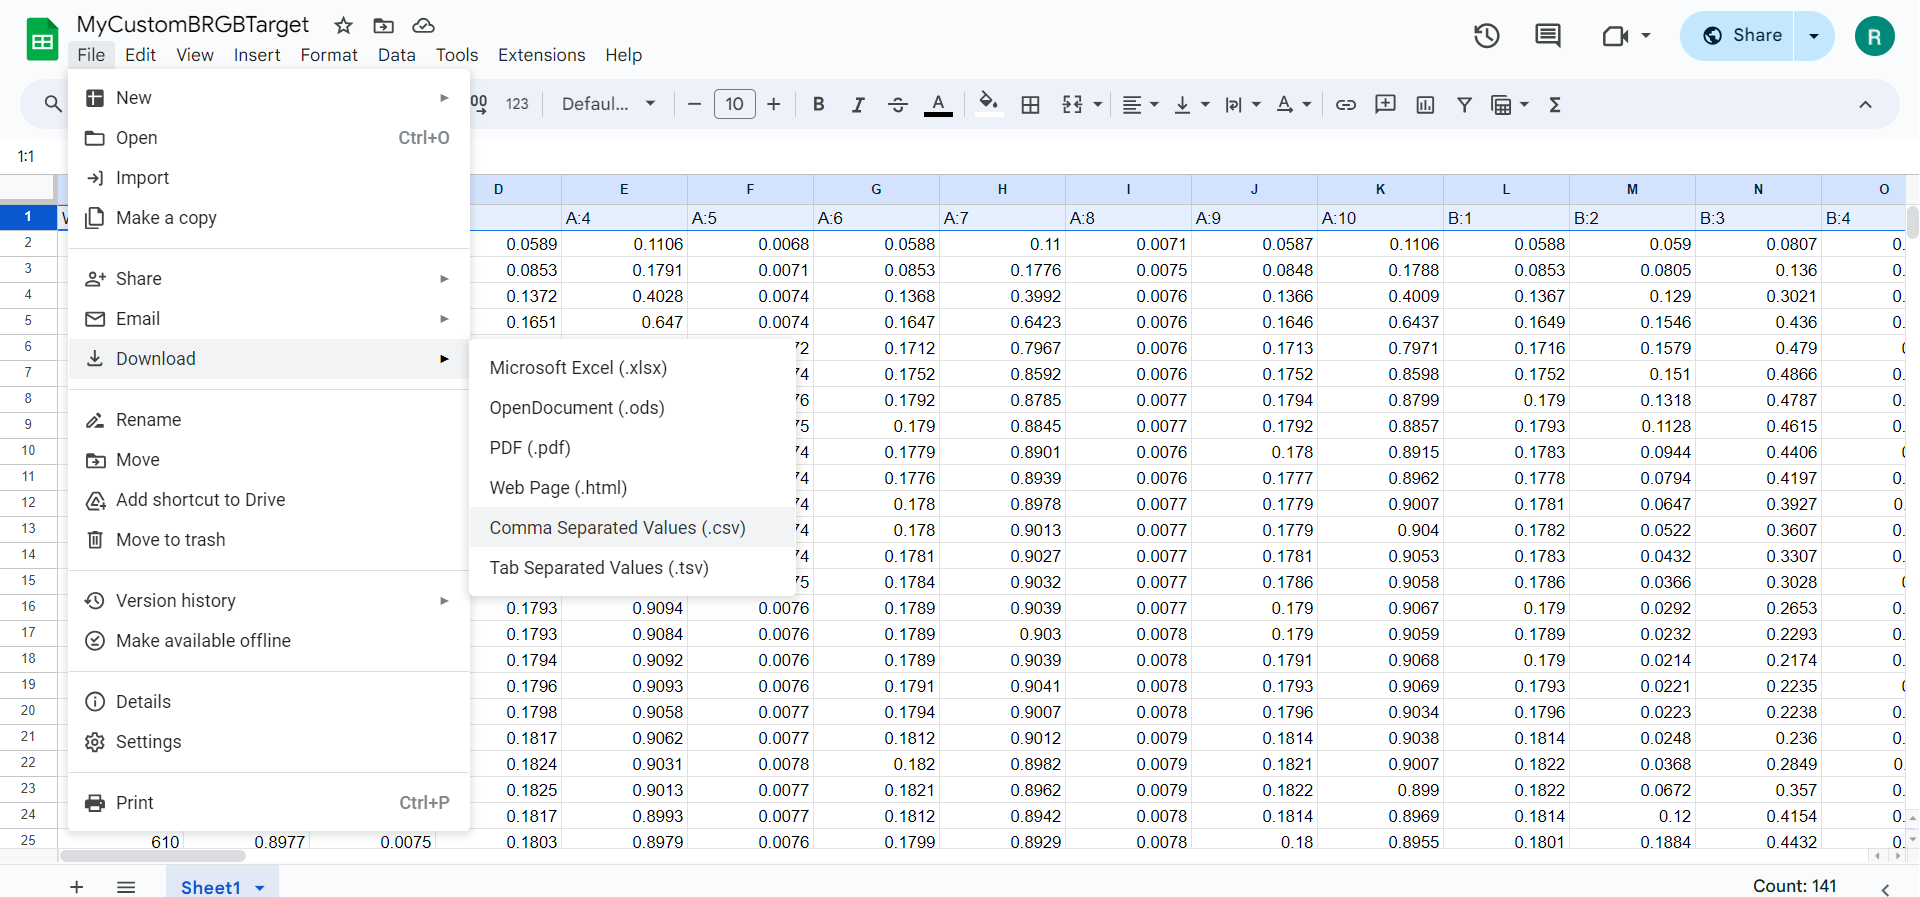
The file template should initially look like the image below. This is a .csv file so it can be edited using Microsoft Excel, but I will be using Google Sheets for this guide.

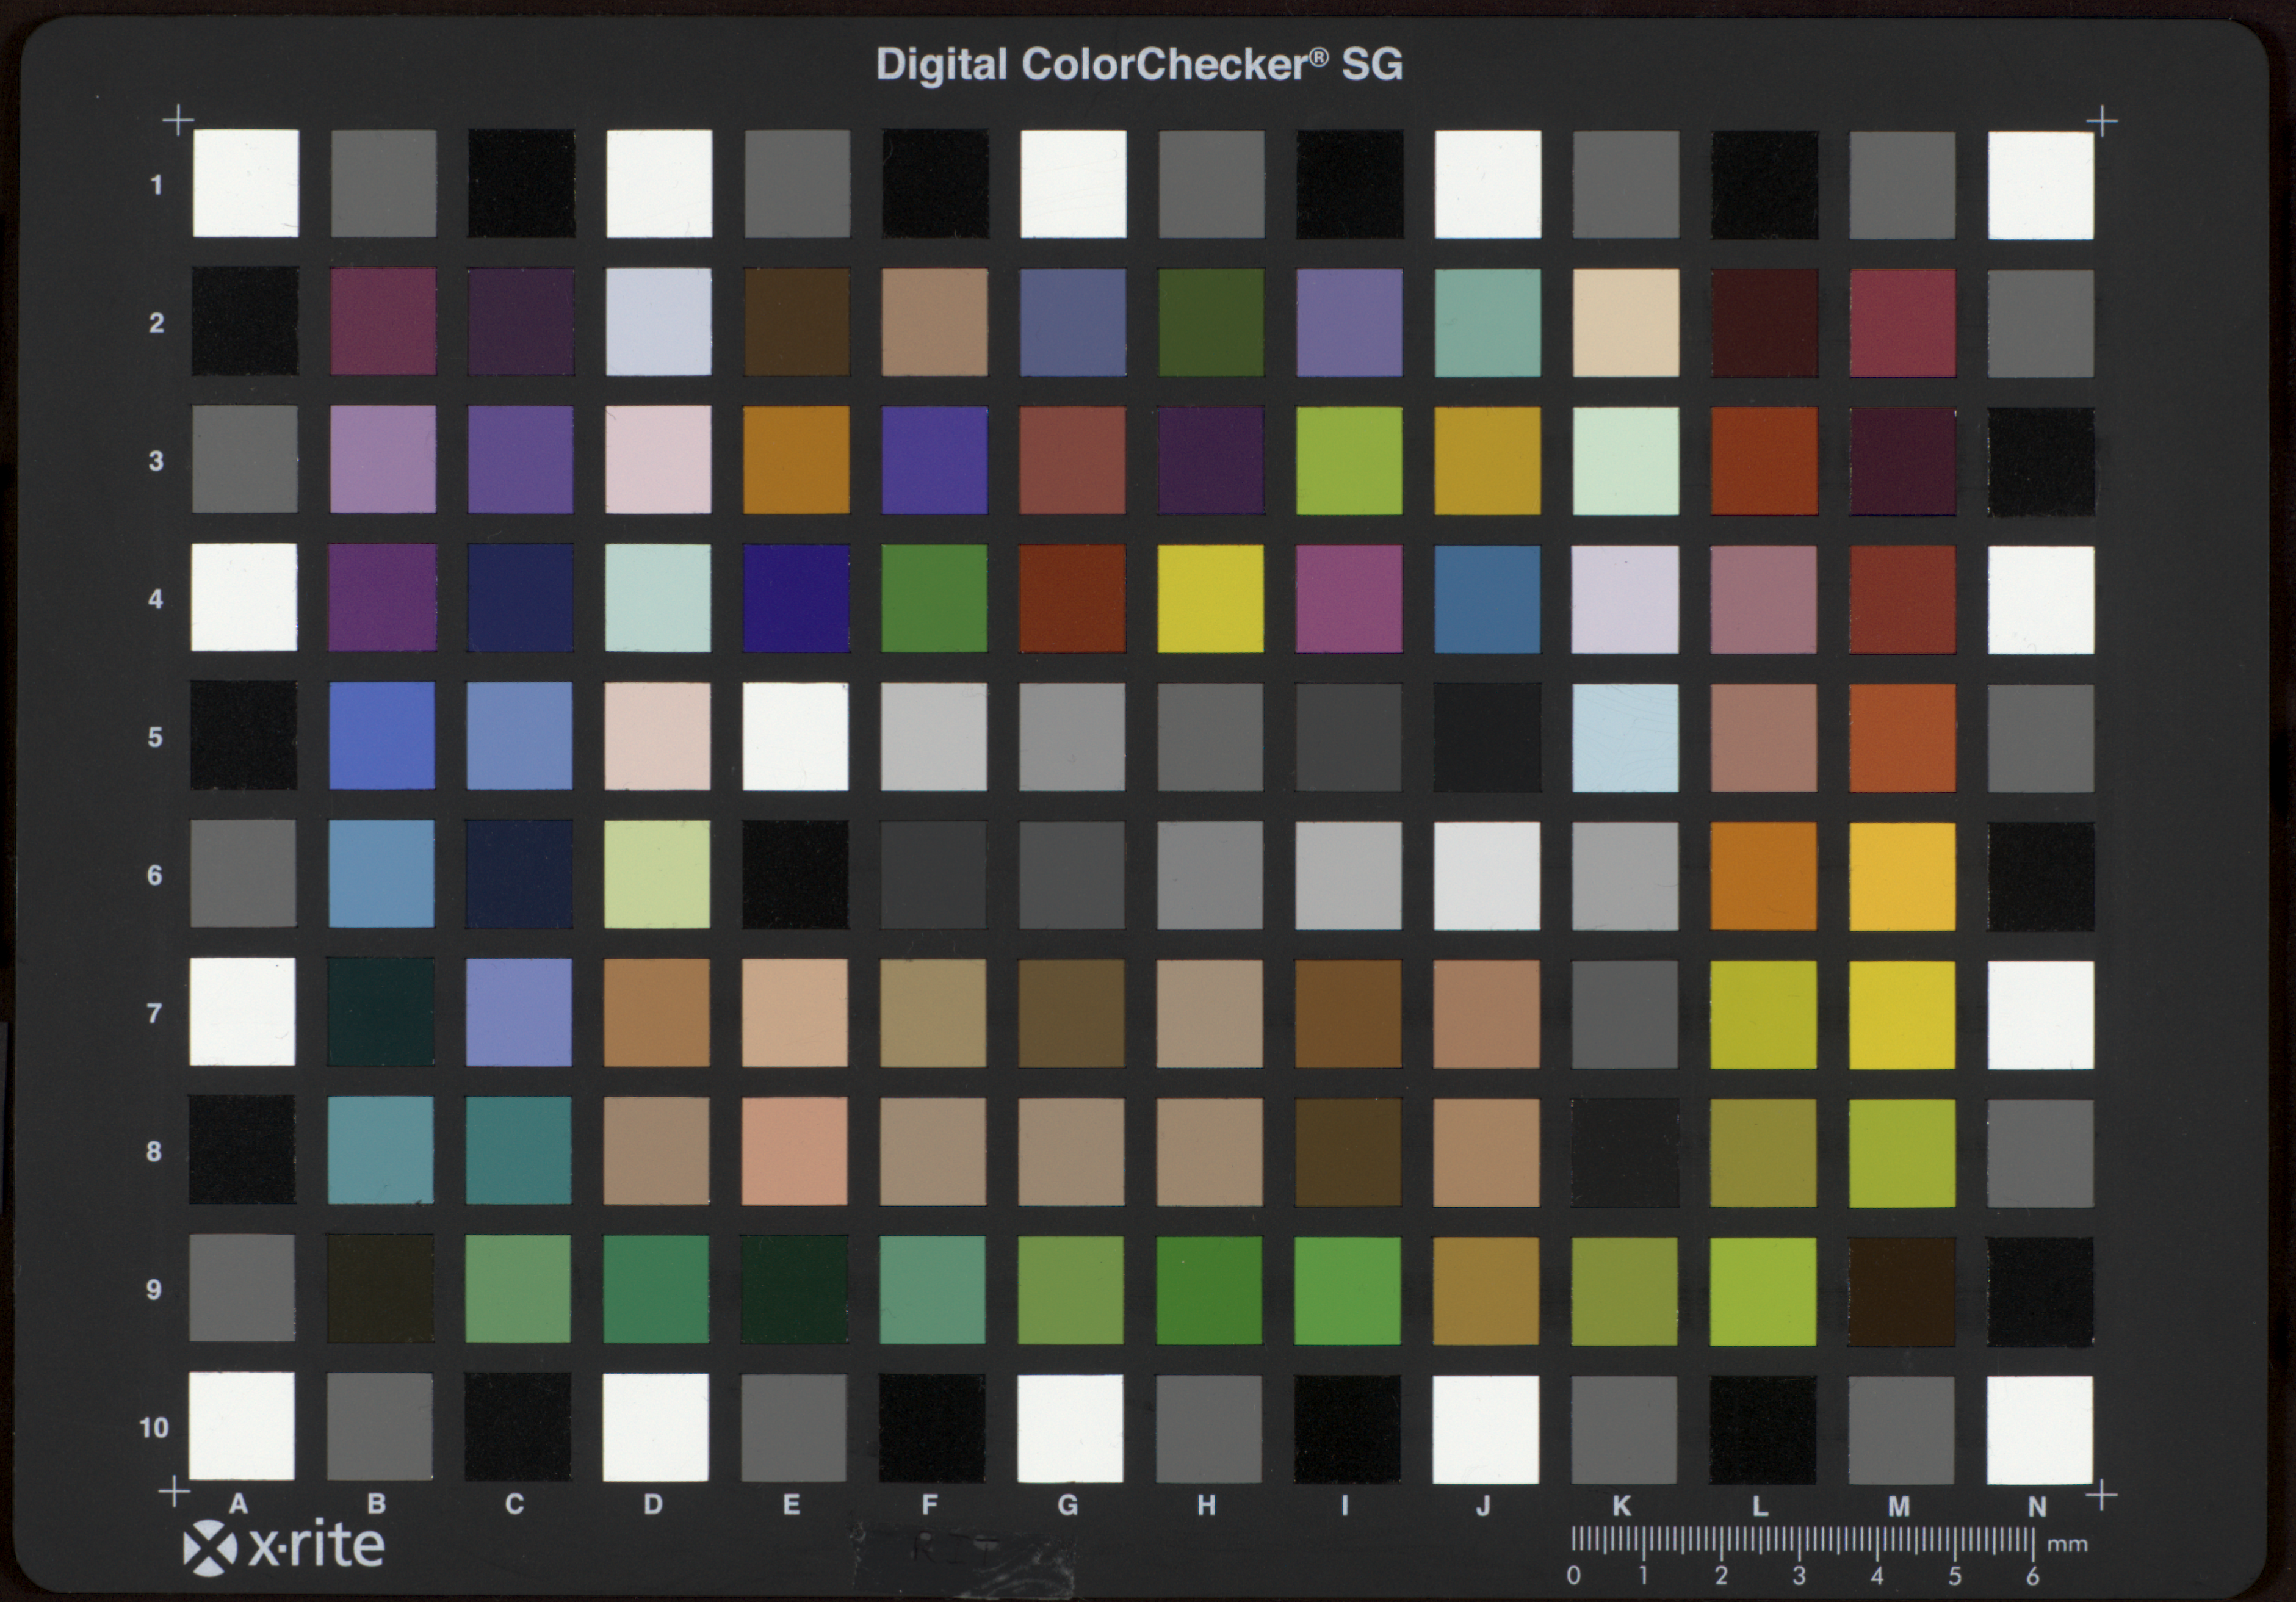
The very first column in the spreadsheet should have the wavelength values, 36 wavelength values plus the 1 header. This column, and thus the number of rows should remain unchanged. Each patch on your color target will must be accounted for in this spreadsheet. I will also be using the example calibration target. Start at the top left patch of your calibration target. The header for this row should be "A:1". The column header for each color patch will follow the format of "letter:number". The letter is the column the patch is in, starting at letter 'A'. The number is the row the patch is in, starting at one. Then you can put in the measured value for each corresponding wavelength below in the same column.
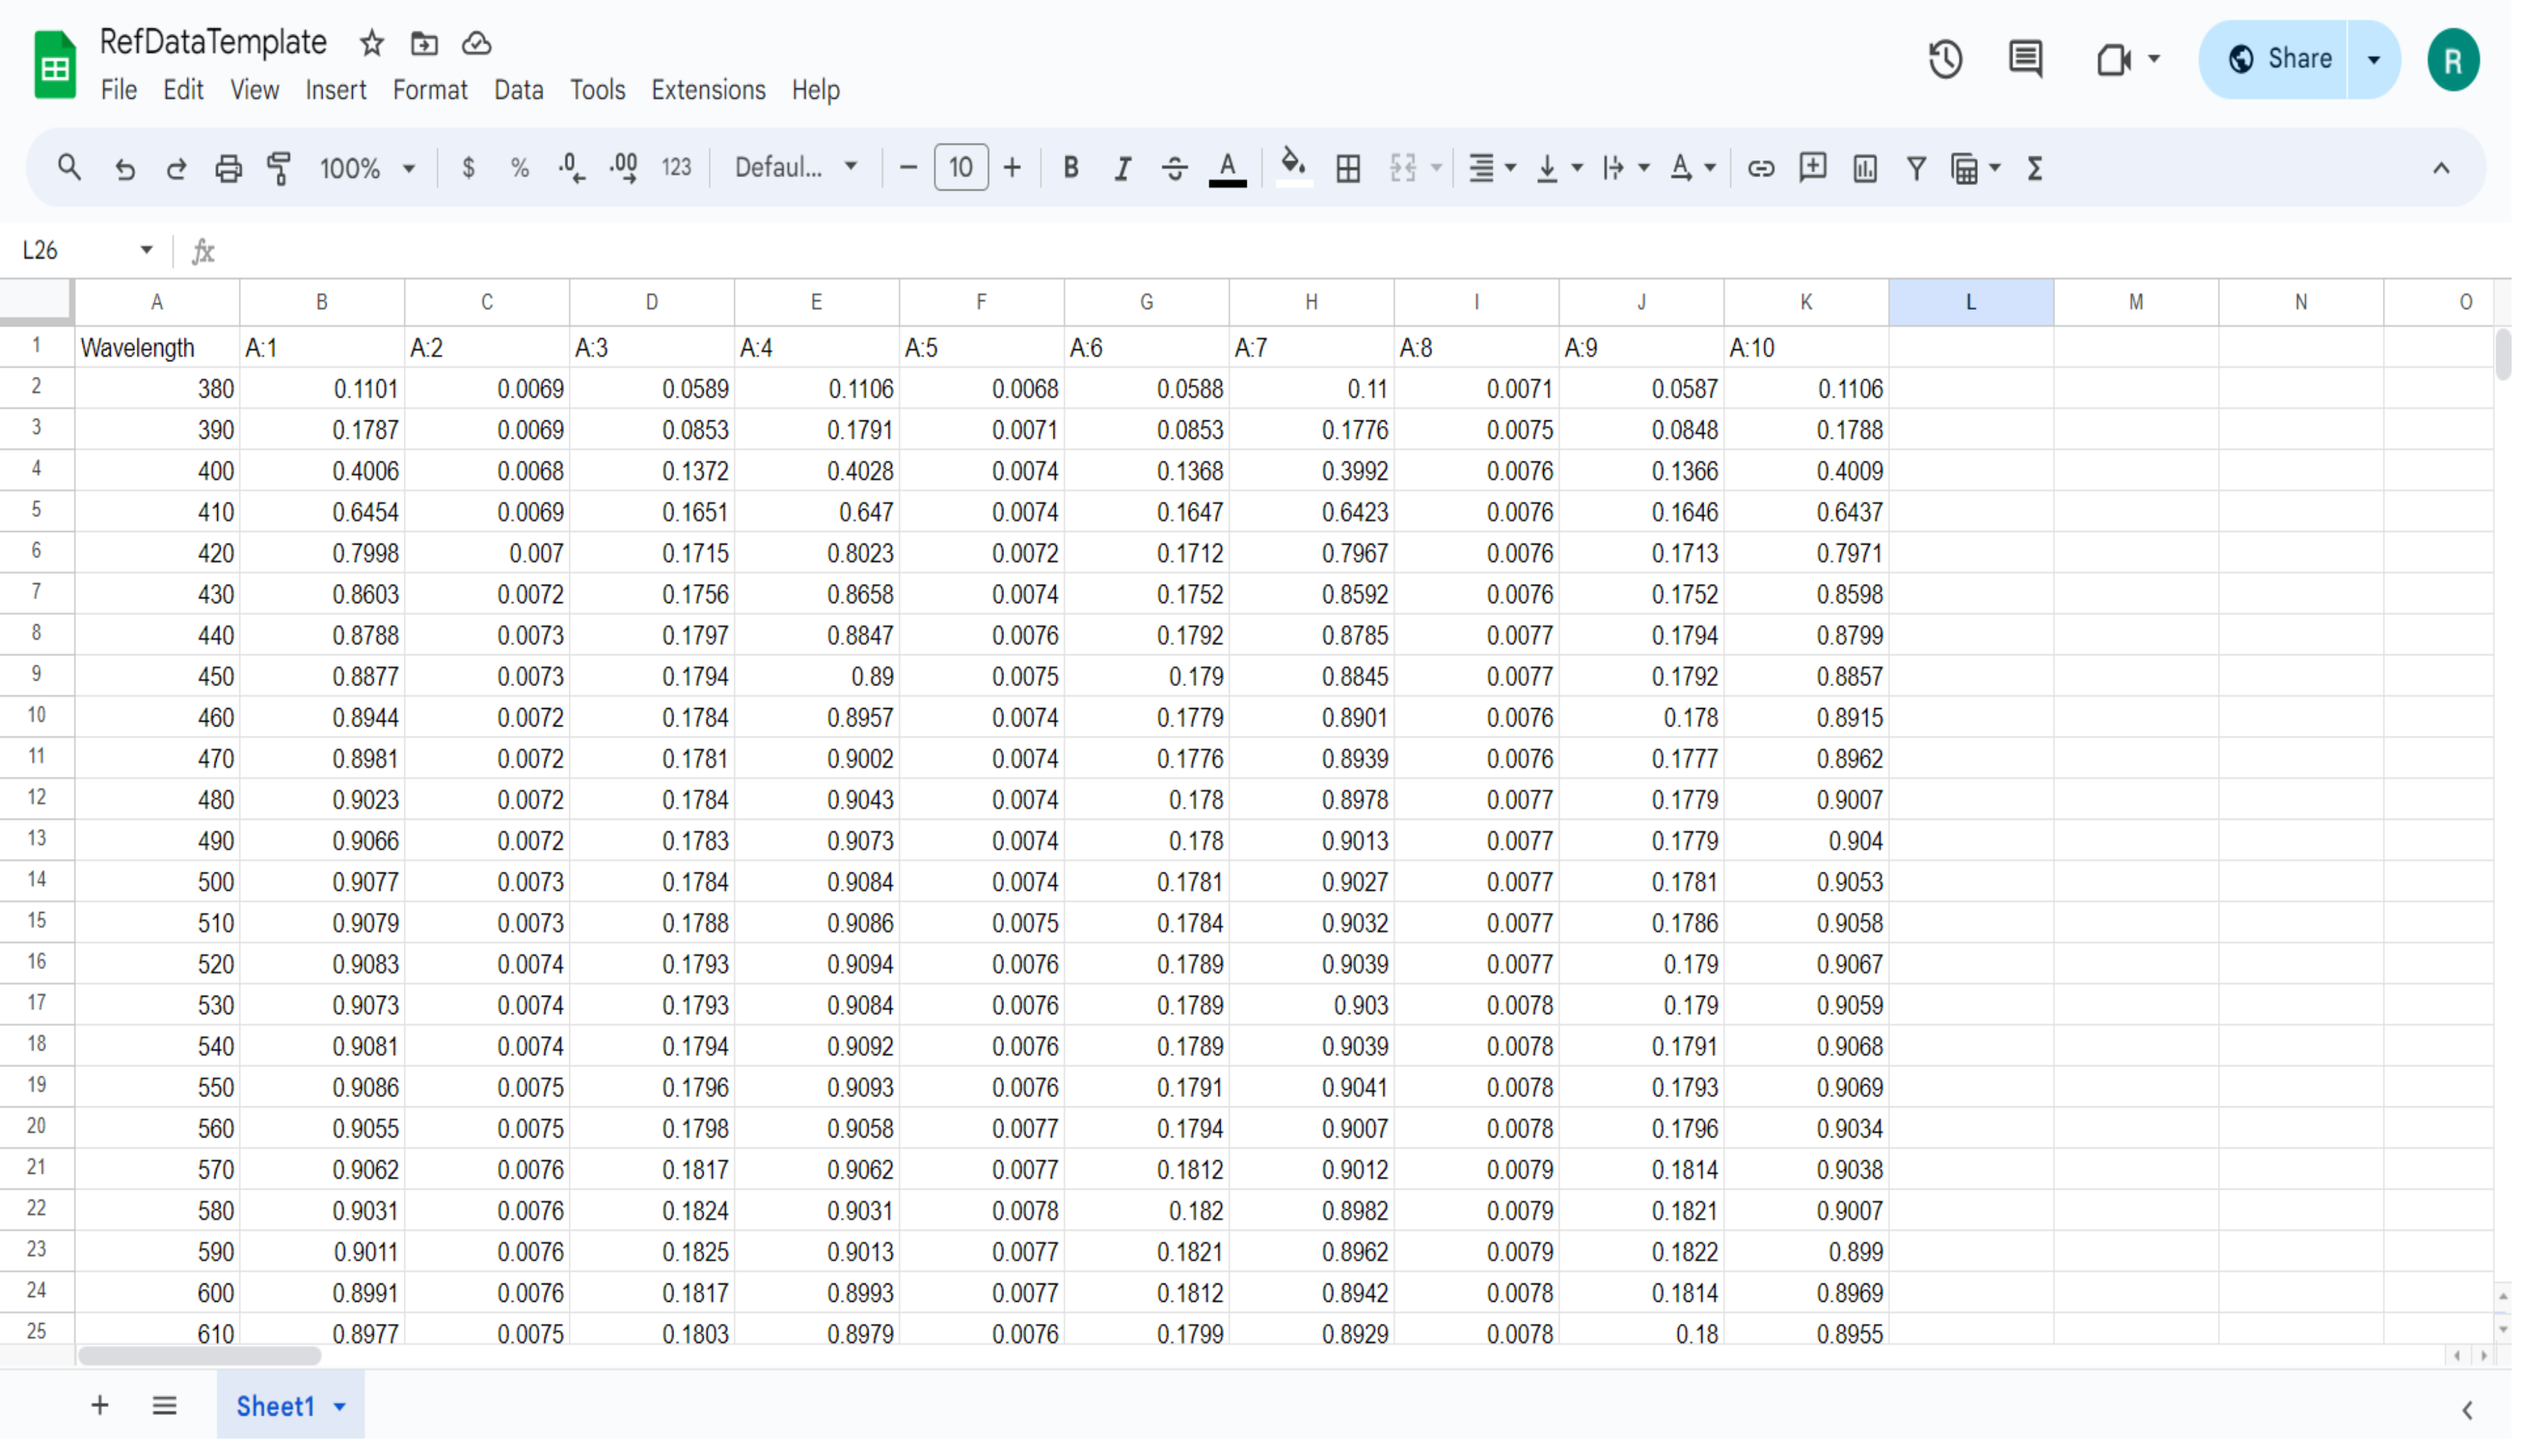
Once finished, the next column in the spreadsheet, A:2, will be the the color patch below A:1. Continue to add in data row-by-row for each color patch in the leftmost column, adding a new column for each patch in the RefDataTemplate. This example has ten rows, so the color patch in the bottom-left corner is denoted by A:10.
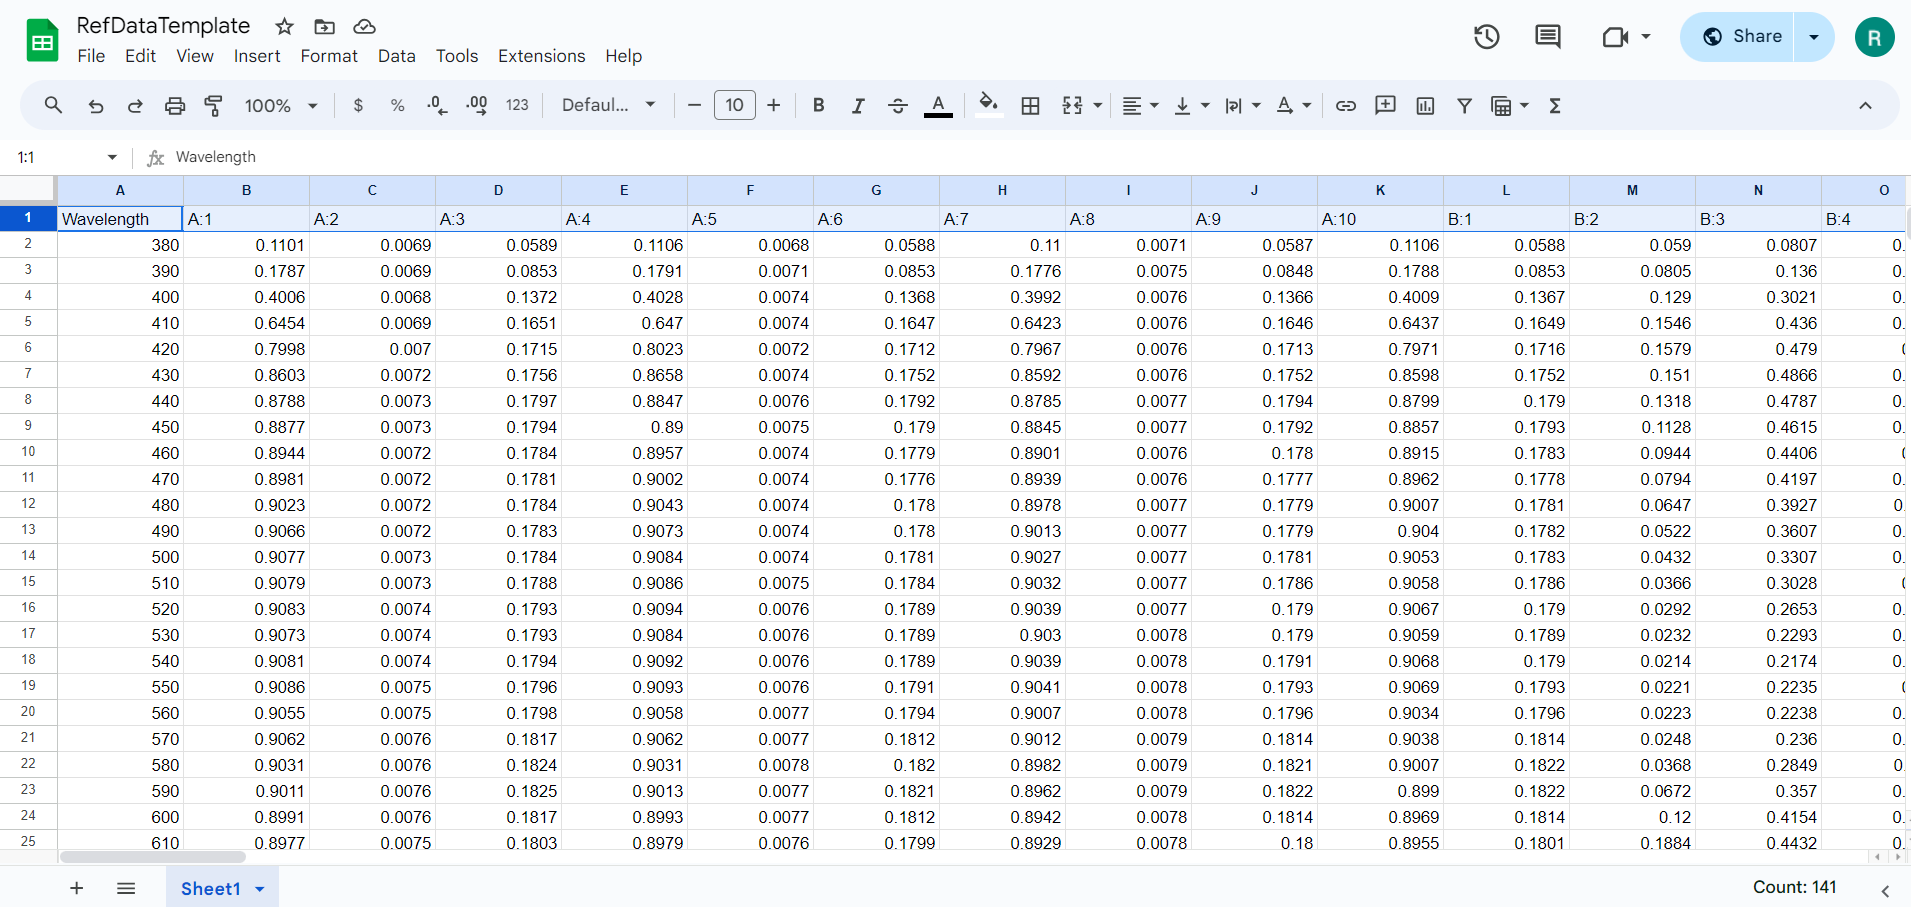
Now that the first column is finished, repeat the process for the next column to the right. Denote the new column by the next letter. So the patch directly to the right of the patch in the top-left corner is B:1. Continue to add in data row-by-row for each color patch in this column, in this example it would be to B:10. Repeat this whole process for the entirety of the calibration target. The data for this example goes to N:10, since it is a 14 by 10 grid.
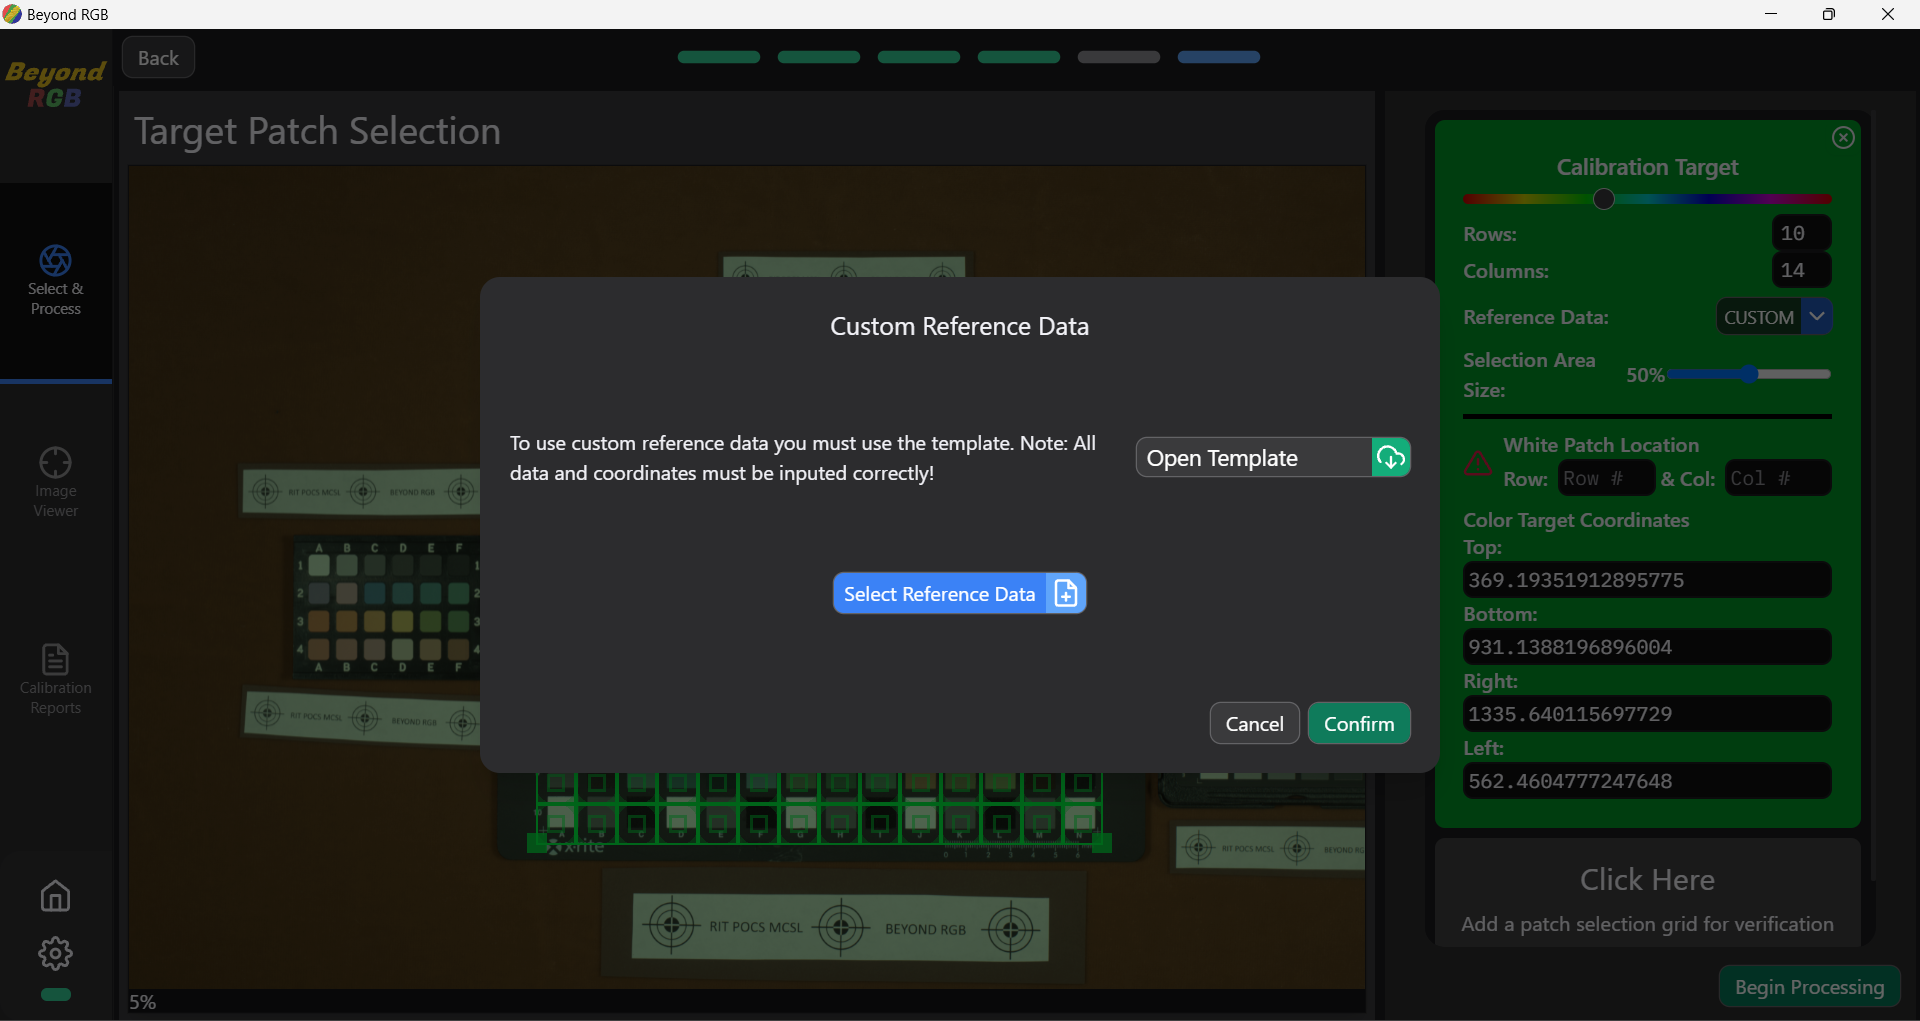
Now that the all of your calibration target data is in the spreadsheet, save it to your computer. You can name it whatever you like, but make sure that it is saved as a .csv file. Back in the BeyondRGB application, click on the "Reference Data" dropdown and select the "Choose a custom file..." option. In the popup click the "Select Reference Data" button, and select the spreadsheet you just saved. Click the "Confirm" button.
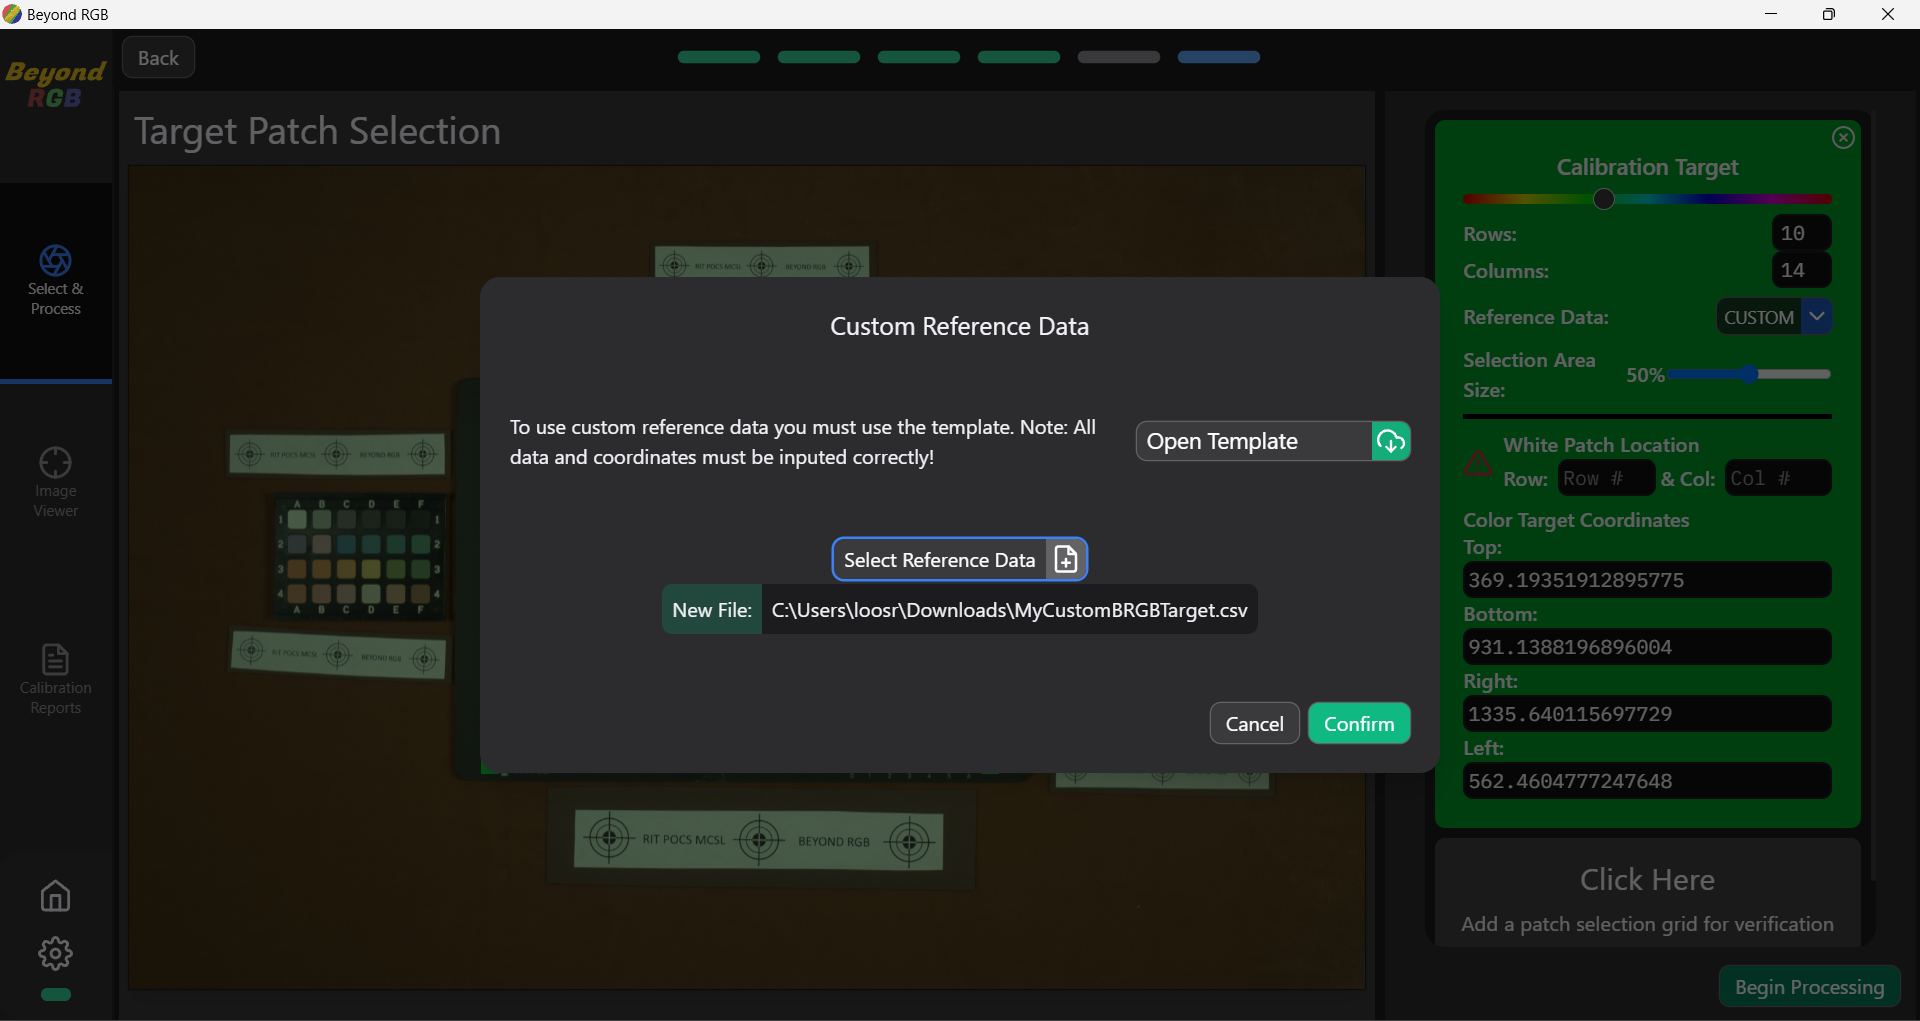
Finally, make sure the grid overlay is properly aligned on the calibration target, with the proper number of rows, columns, and the coordinates of the white patch. While BeyondRGB remains open, your custom target will remain in the dropdown for future runs. Now you can begin processing your artwork with your custom calibration target!